Connect Trend Micro Vision One to Anzenna
Connect your Trend Micro Vision One tenant to Anzenna to monitor Workbench alerts and endpoint inventory. The integration uses an API key issued from the Vision One console — no OAuth redirect.
Prerequisites
Trend Micro Vision One administrator access
Permission to create custom roles and API keys in Vision One
Your Vision One regional API URL (for example,
https://api.xdr.trendmicro.com,https://api.eu.xdr.trendmicro.com, orhttps://api.au.xdr.trendmicro.com)- Access to the Anzenna platform
Step-by-Step Instructions
Part 1: Create a Custom Role for Anzenna
Trend Micro requires API keys to be assigned a role. We'll create a dedicated Anzenna role with the minimum permissions Anzenna needs, then assign it to the API key in Part 2.
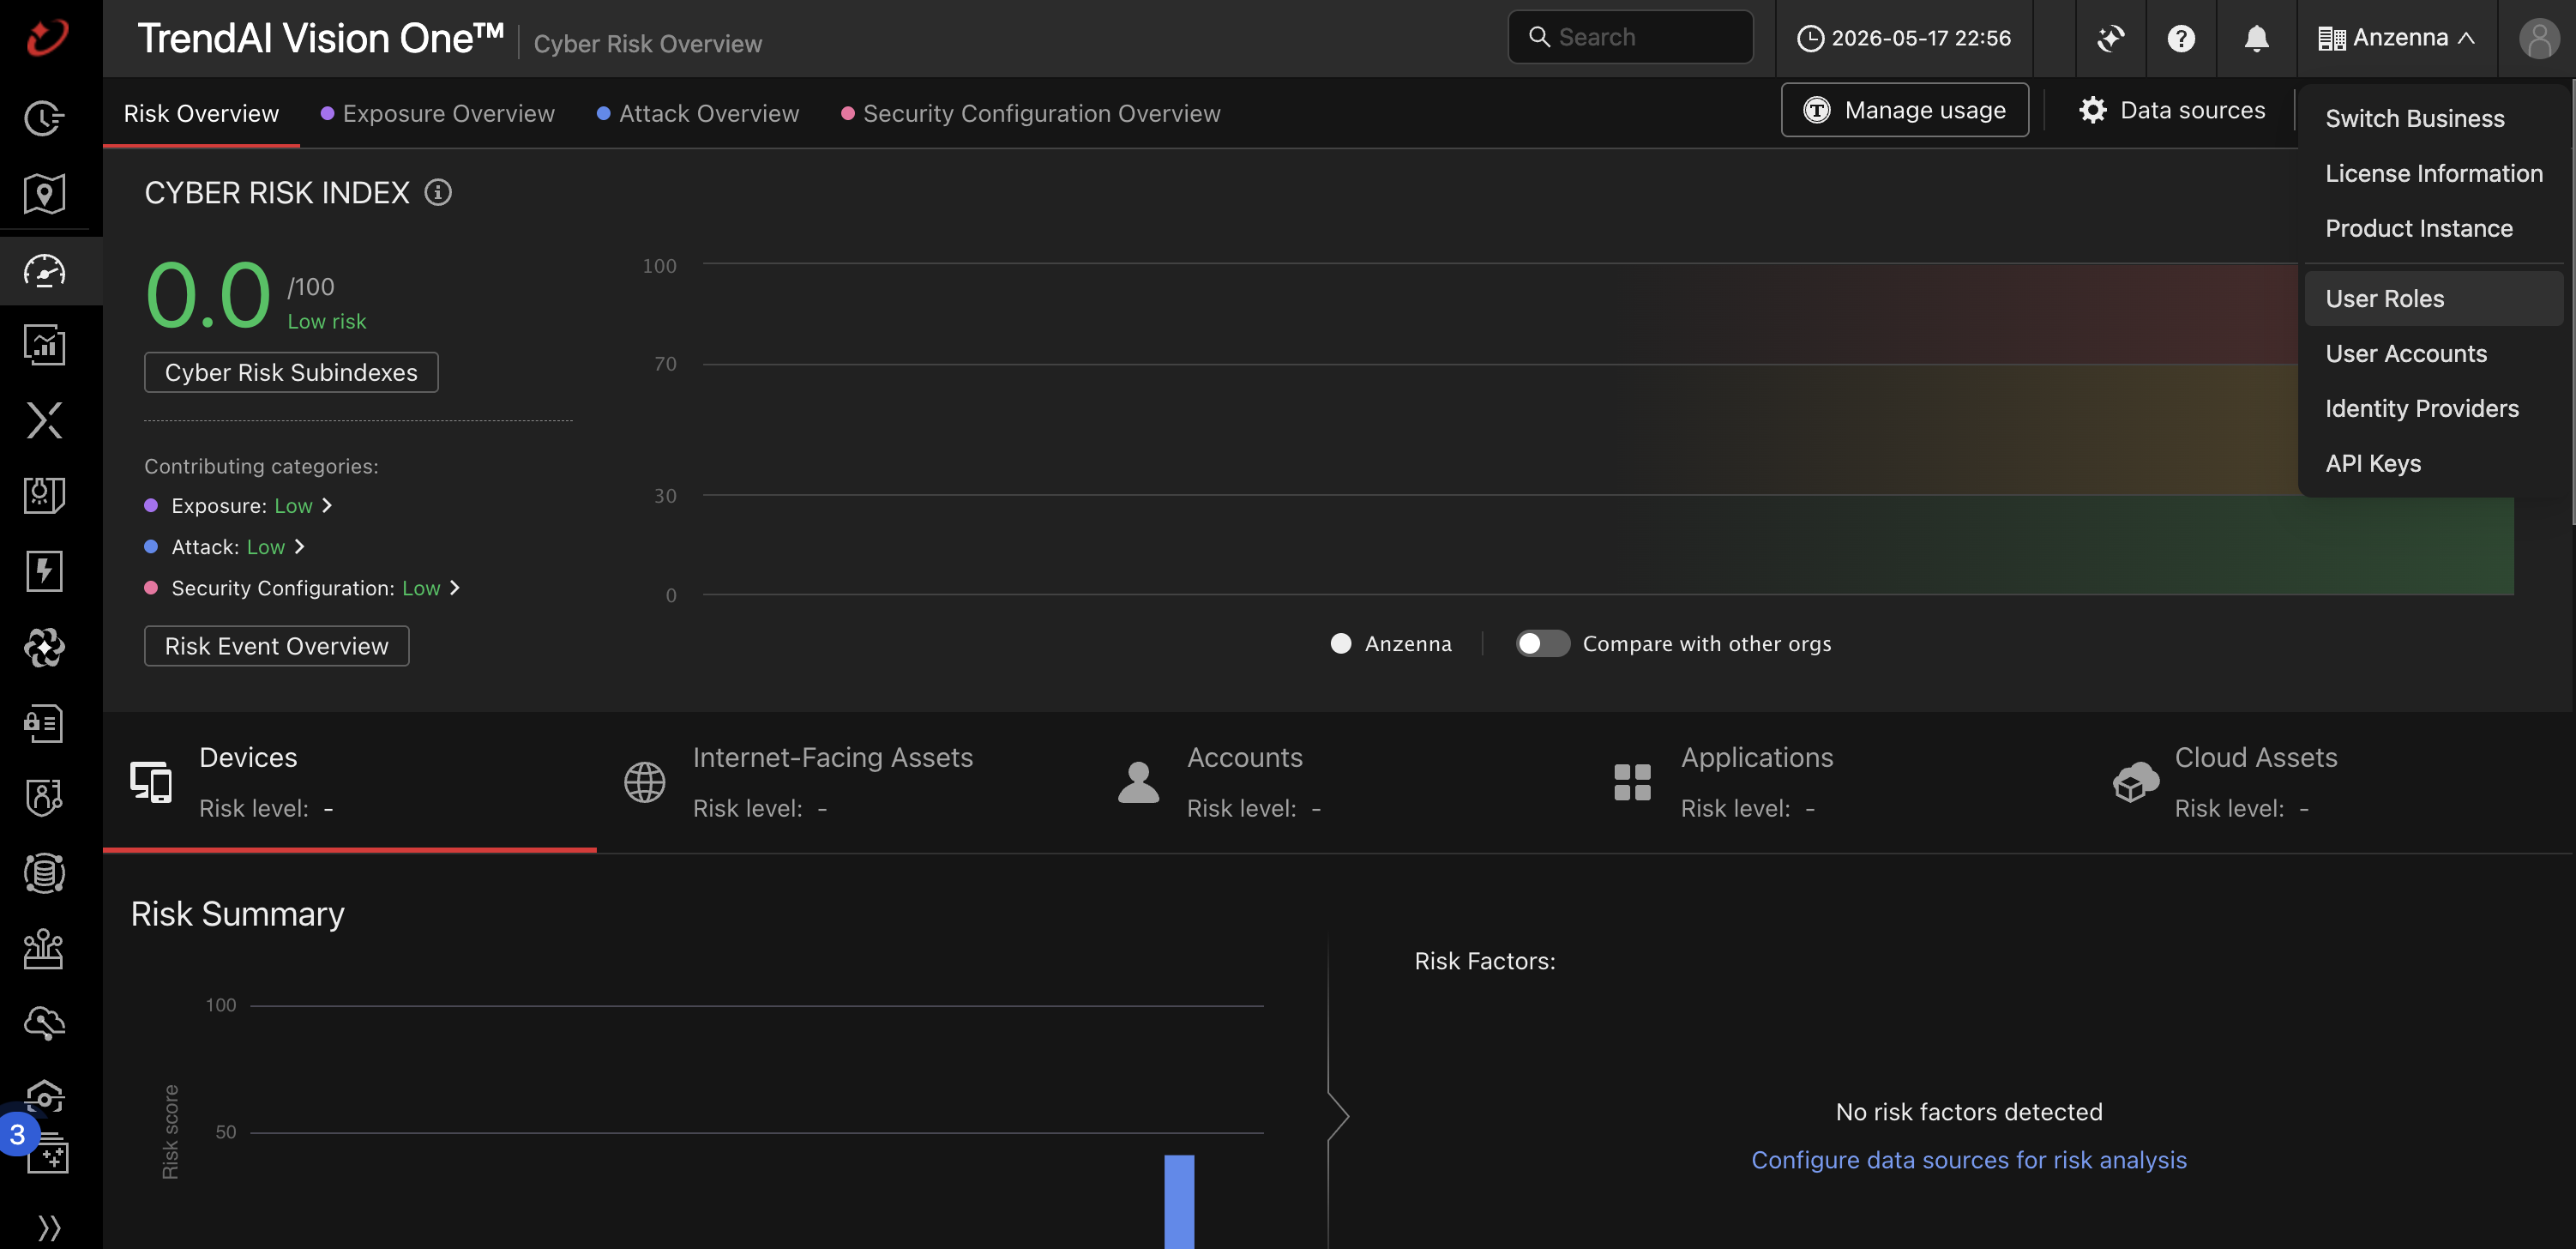
Sign in to the Trend Micro Vision One console as an administrator.
Click your account menu in the top-right corner and select User Roles.
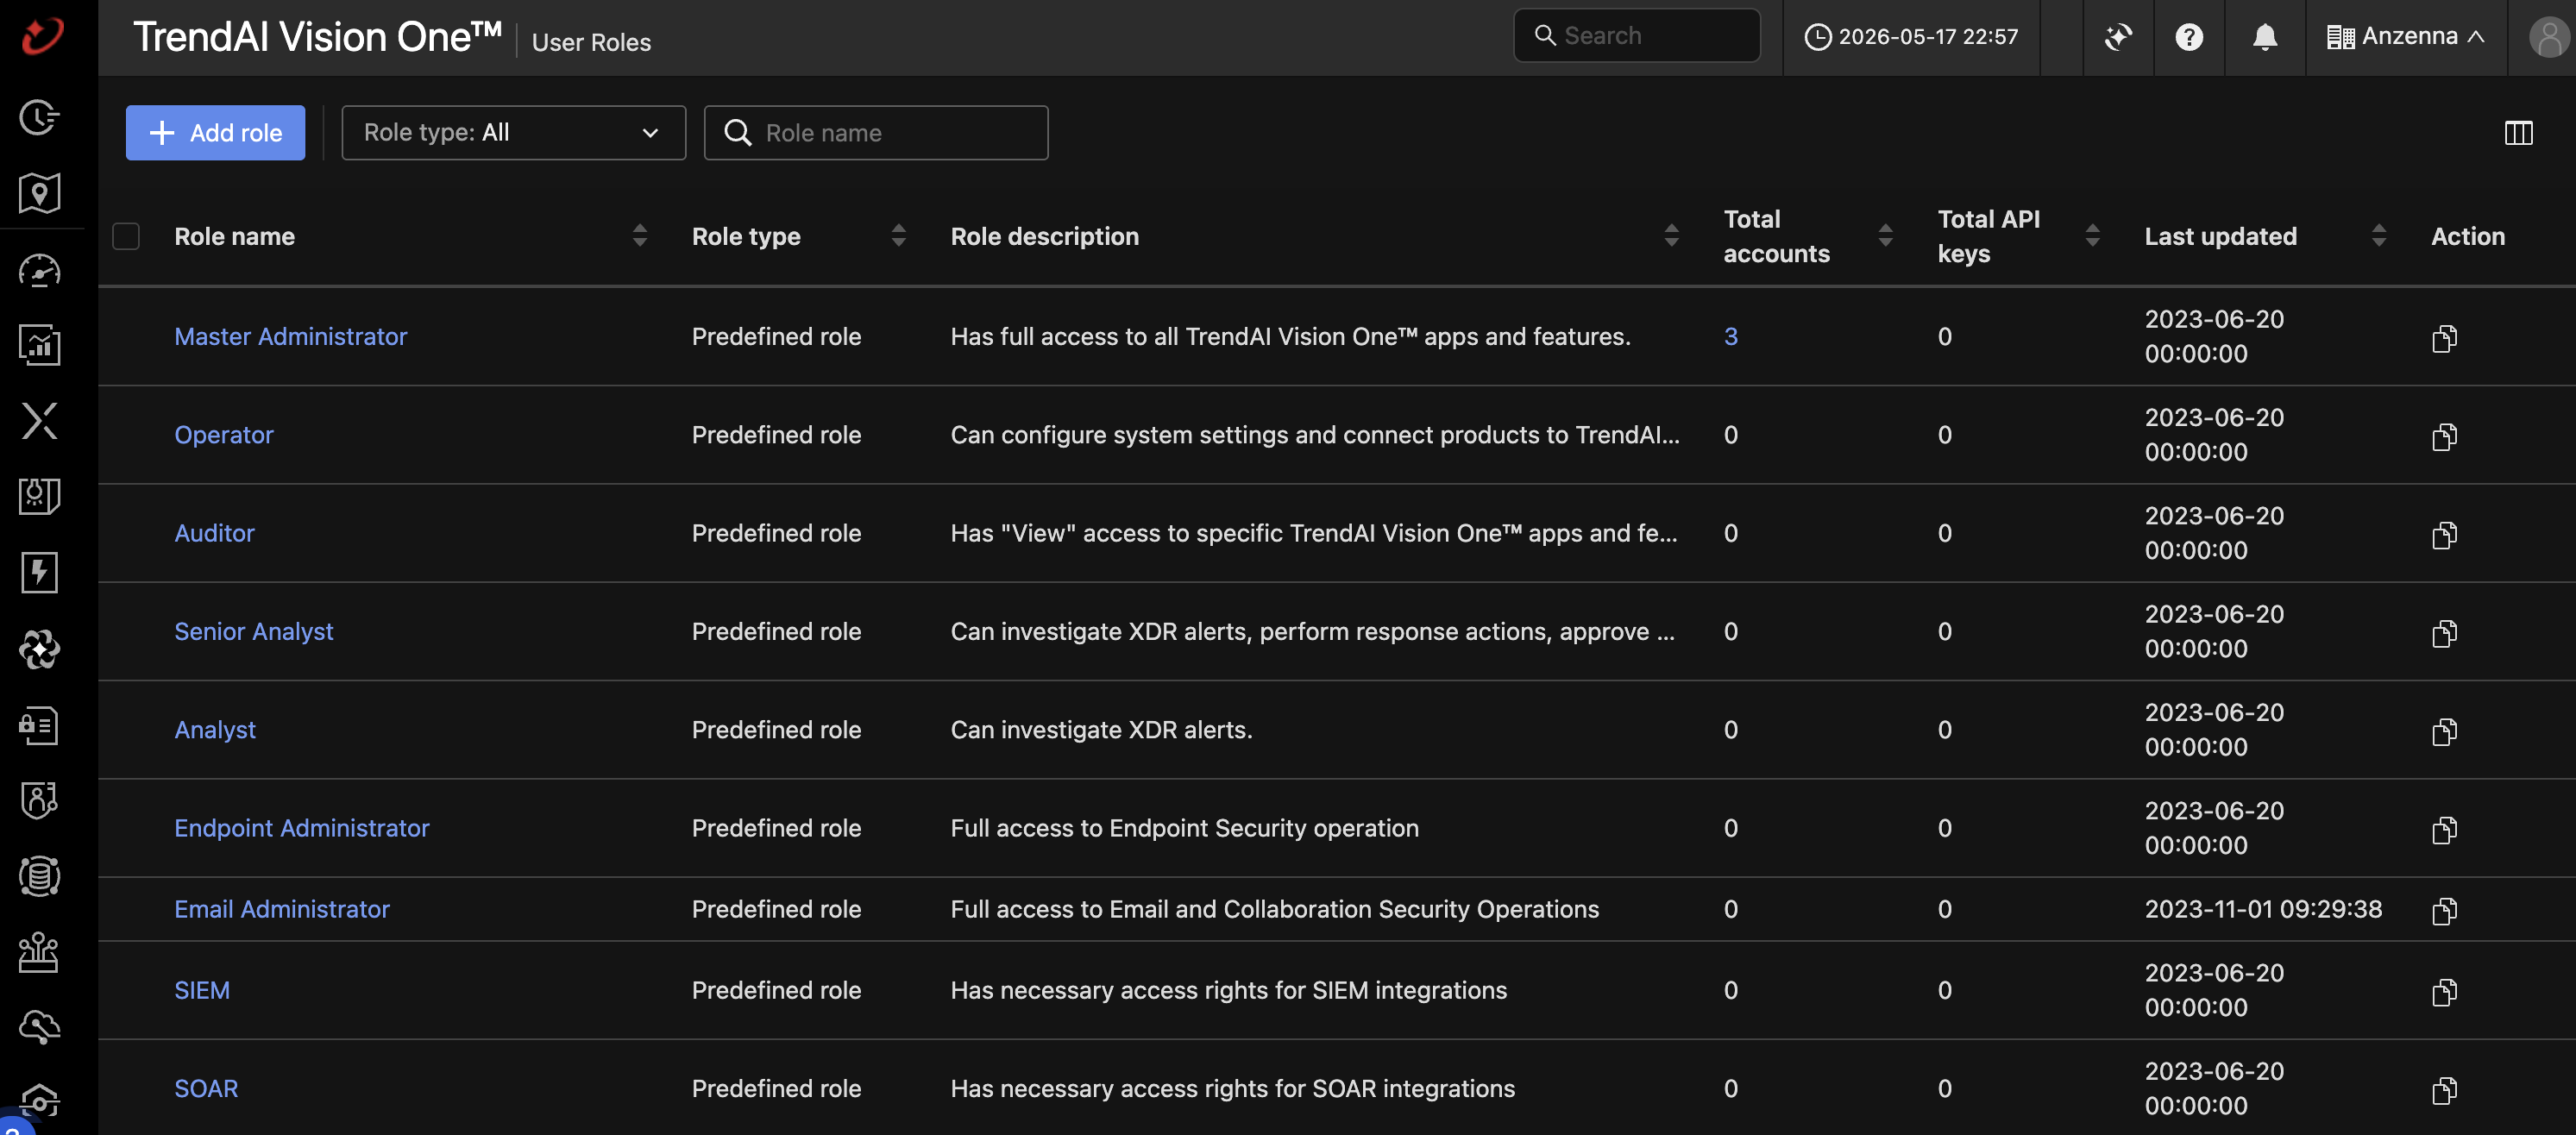
On the User Roles page, click Add role.
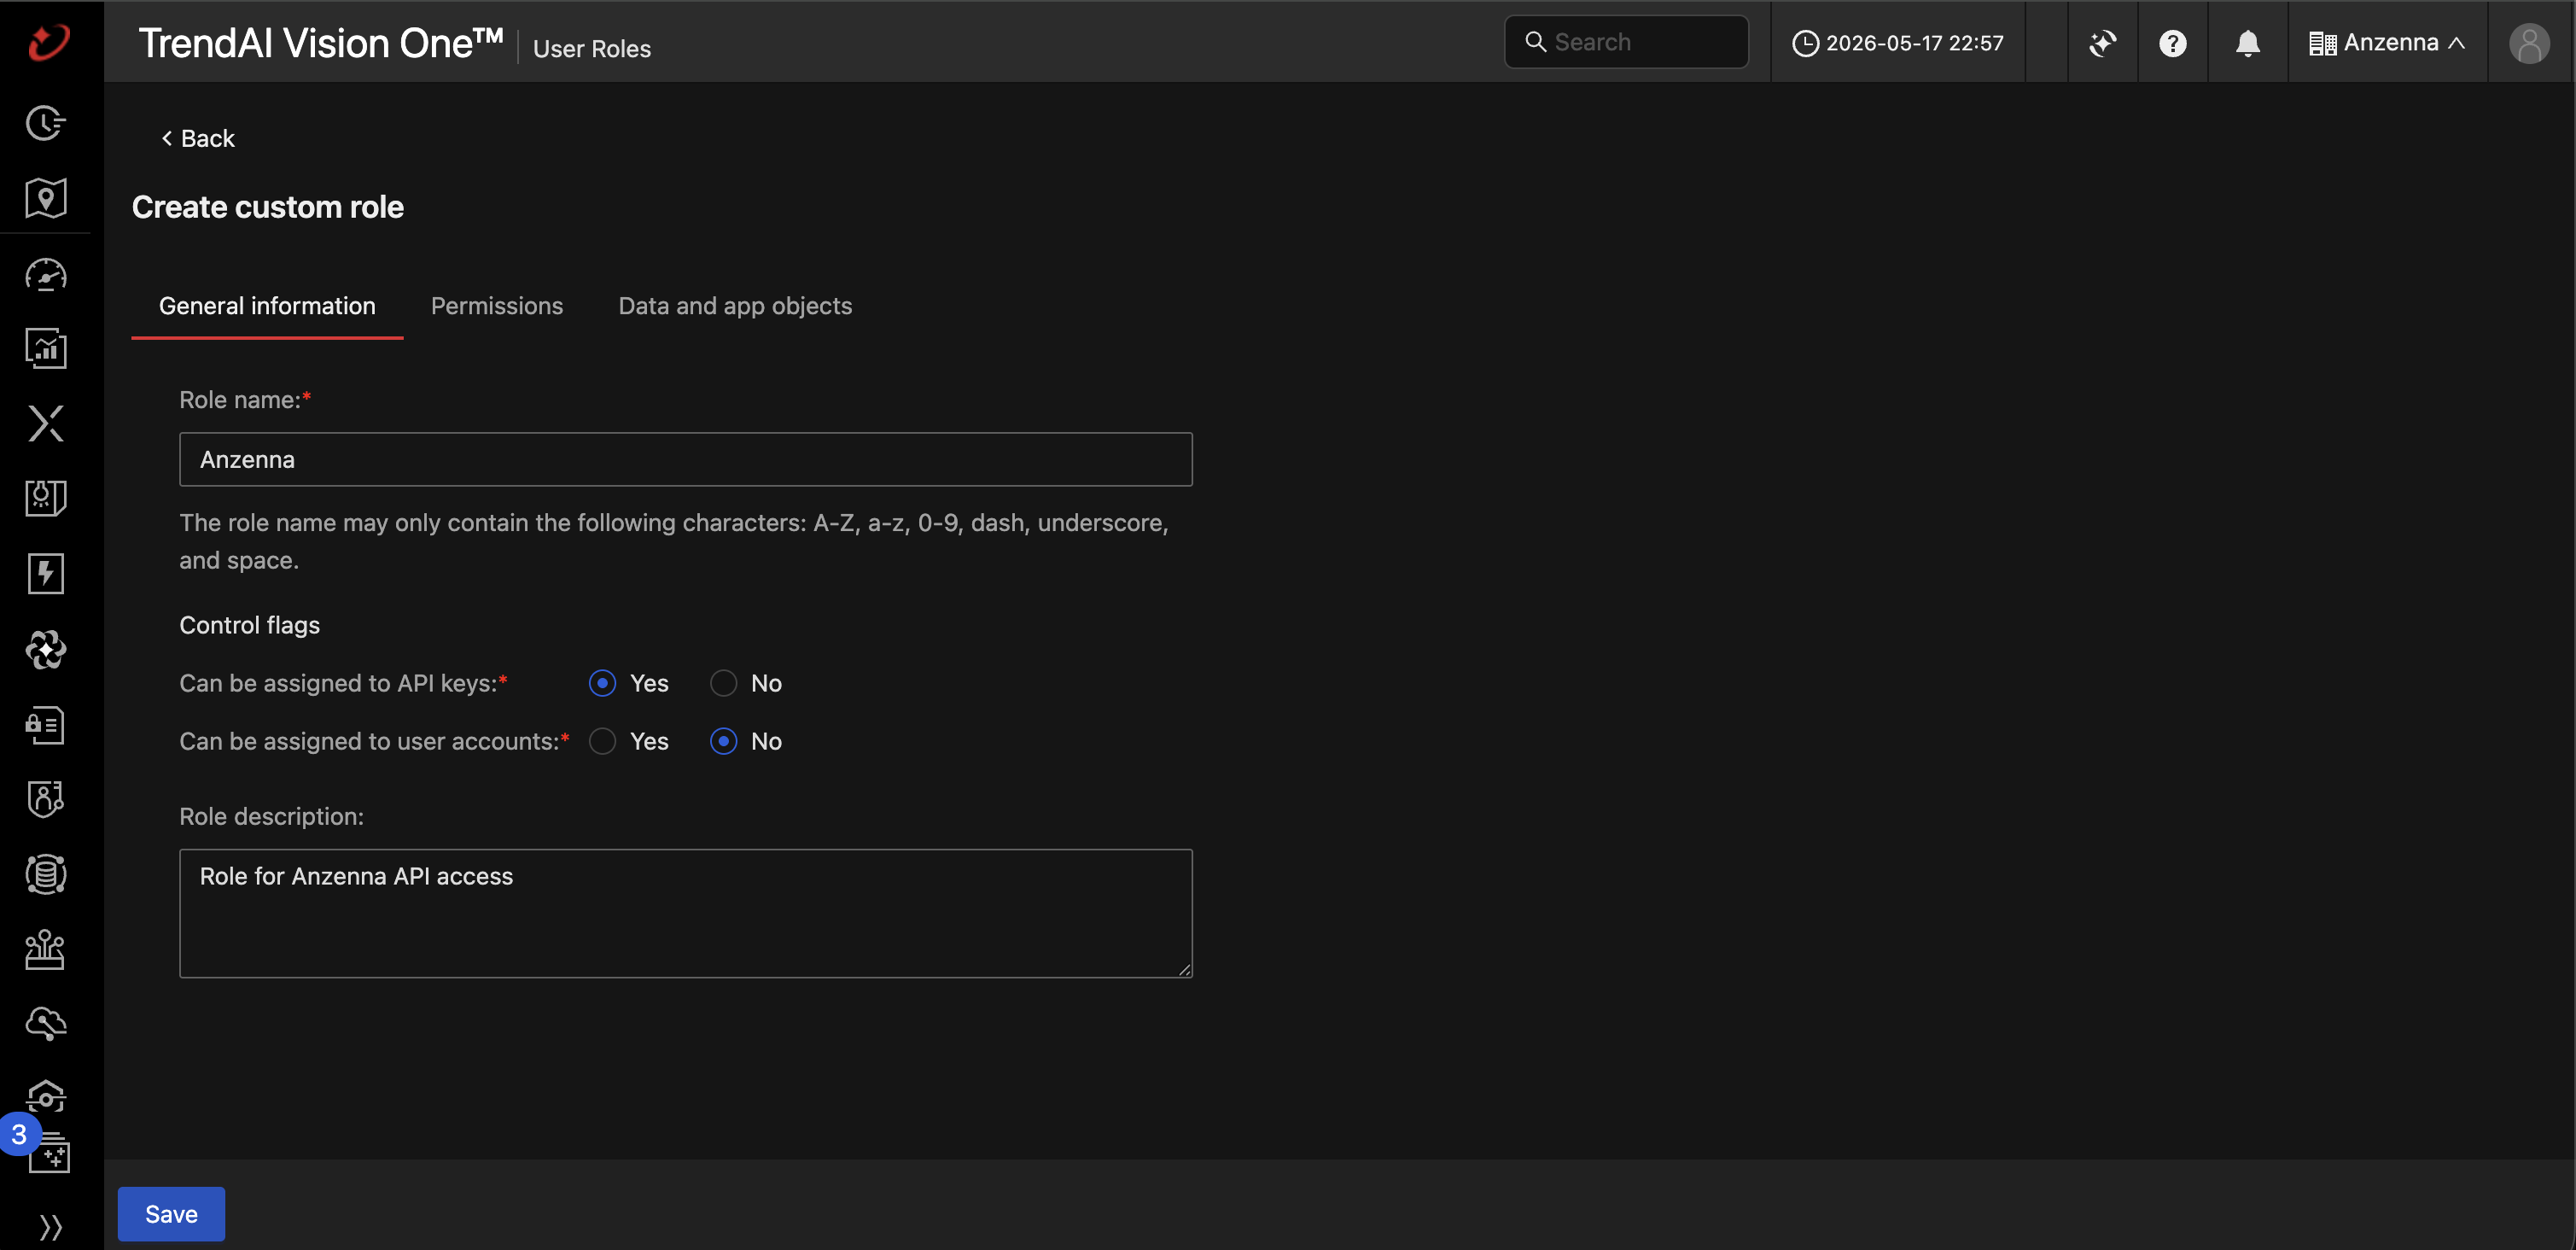
On the General information tab, set the Role name to
Anzenna.Under Control flags, set Can be assigned to API keys to Yes. Leave Can be assigned to user accounts set to No.
Optionally enter a Role description such as
Role for Anzenna API access.
Switch to the Permissions tab. Under Platform Capabilities, leave Companion, Cyber Risk Exposure Management, Dashboards & Reports, and Threat Intelligence at No access, then expand Workflow and Automation and grant the permissions Anzenna needs for Case Management, Security Playbooks, and Response Management.
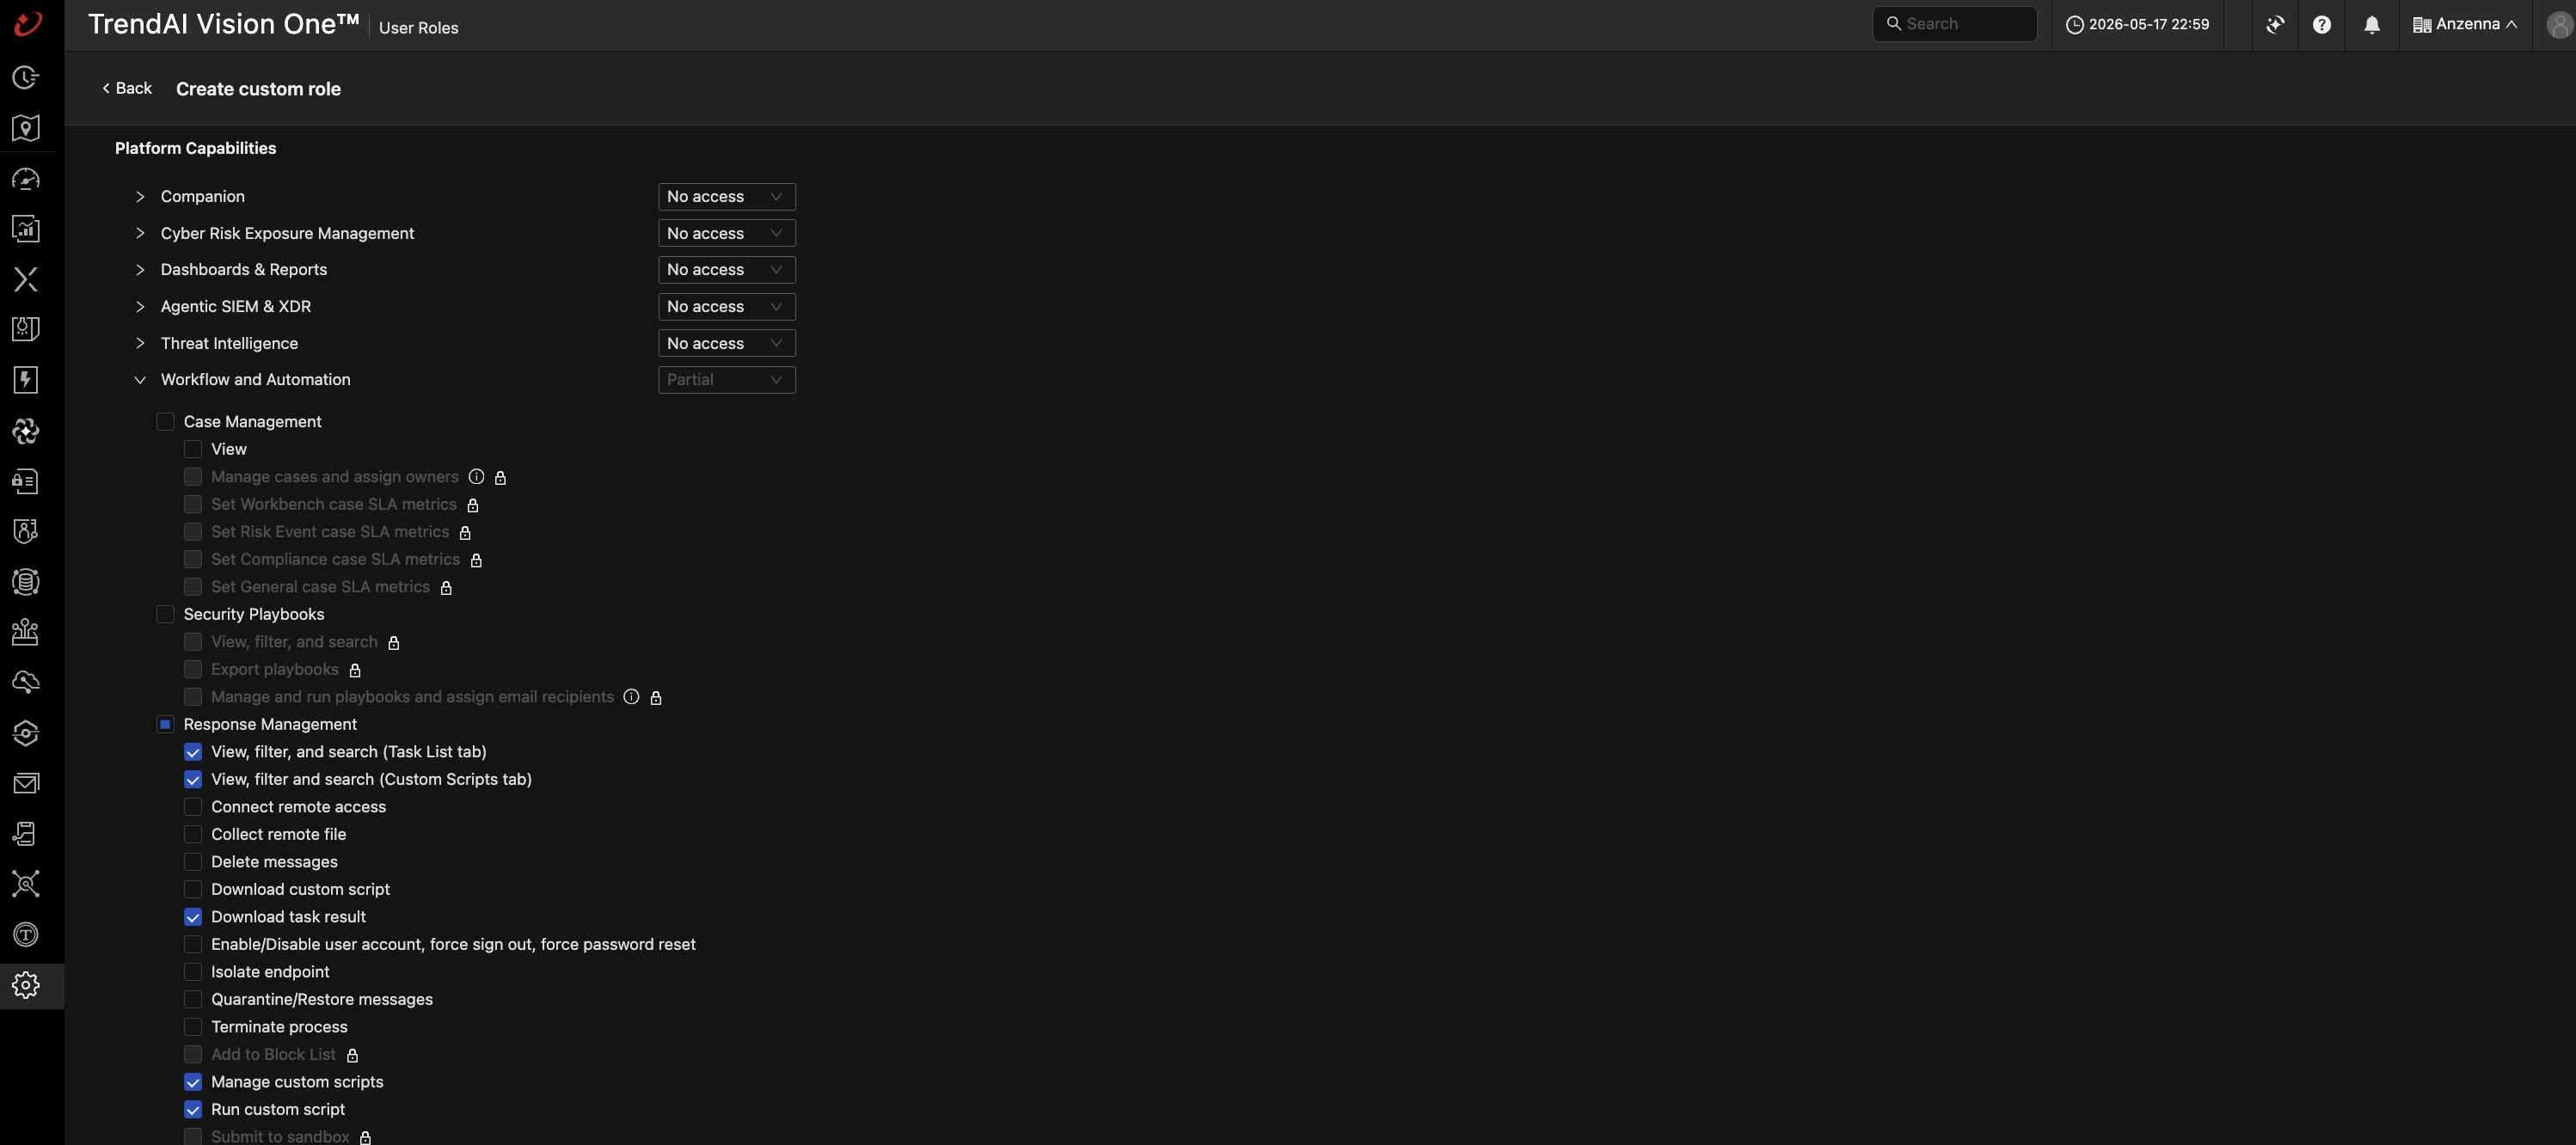
Expand Agentic SIEM & XDR and, under Workbench, grant View Execution Profile and View, filter, and search so Anzenna can read Workbench alerts. Leave the remaining Agentic SIEM & XDR sections (Detection Model Management, XDR Data Explorer, and the other Workbench actions) at No access. The Agentic SIEM & XDR row will show as Partial.
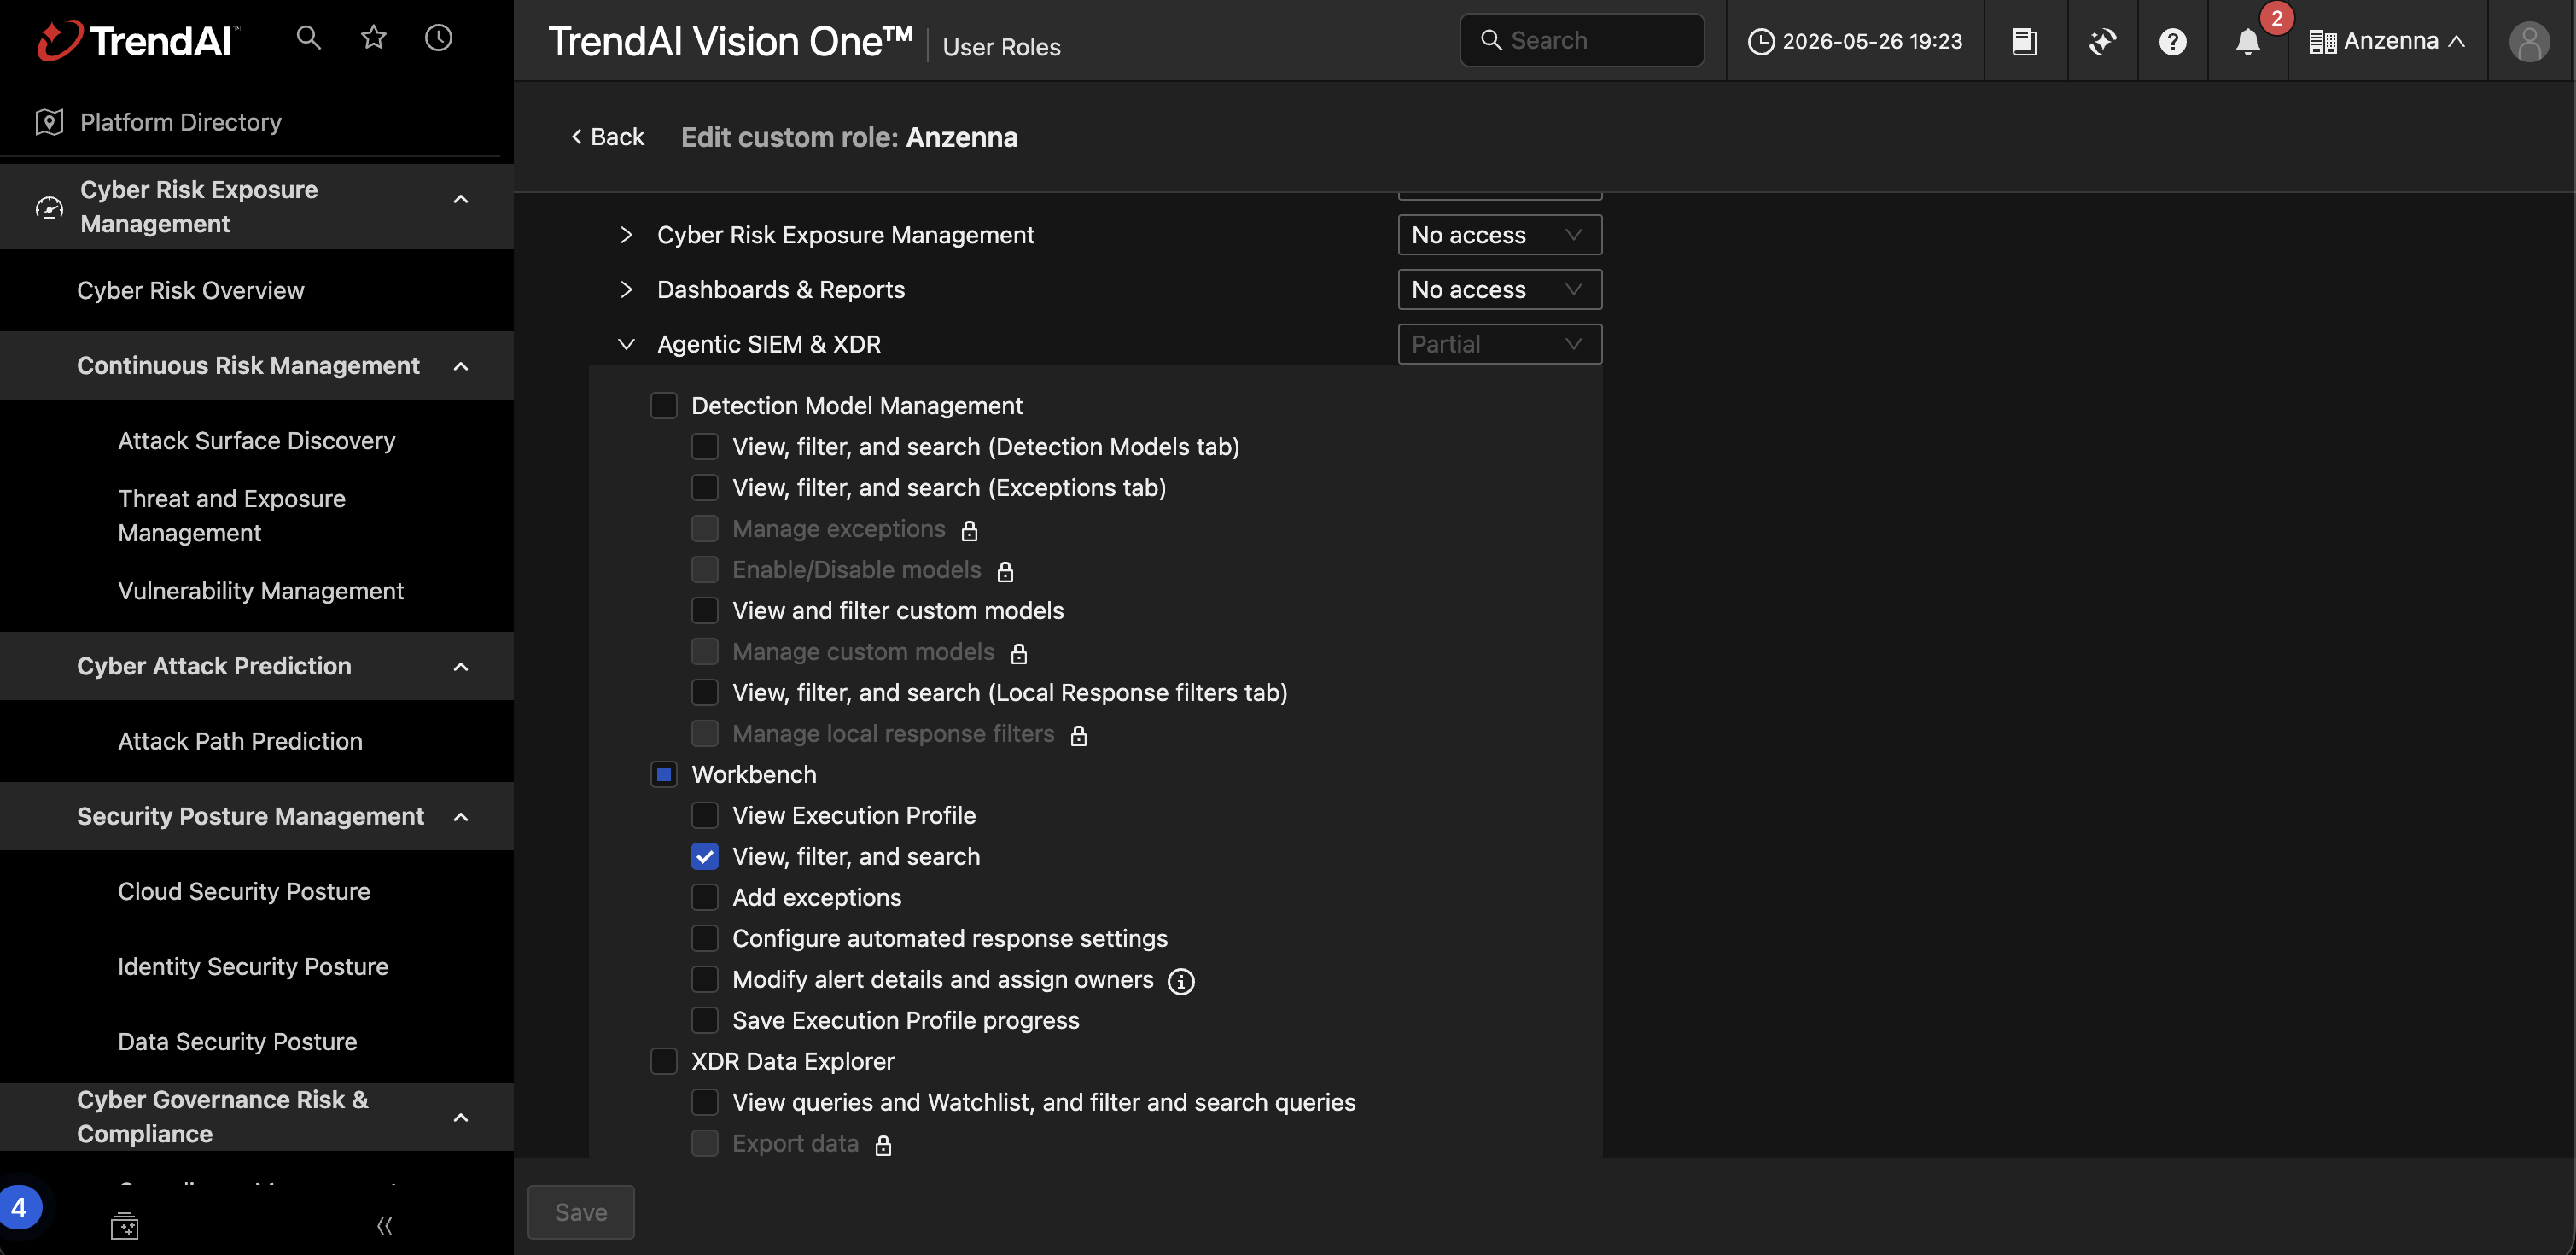
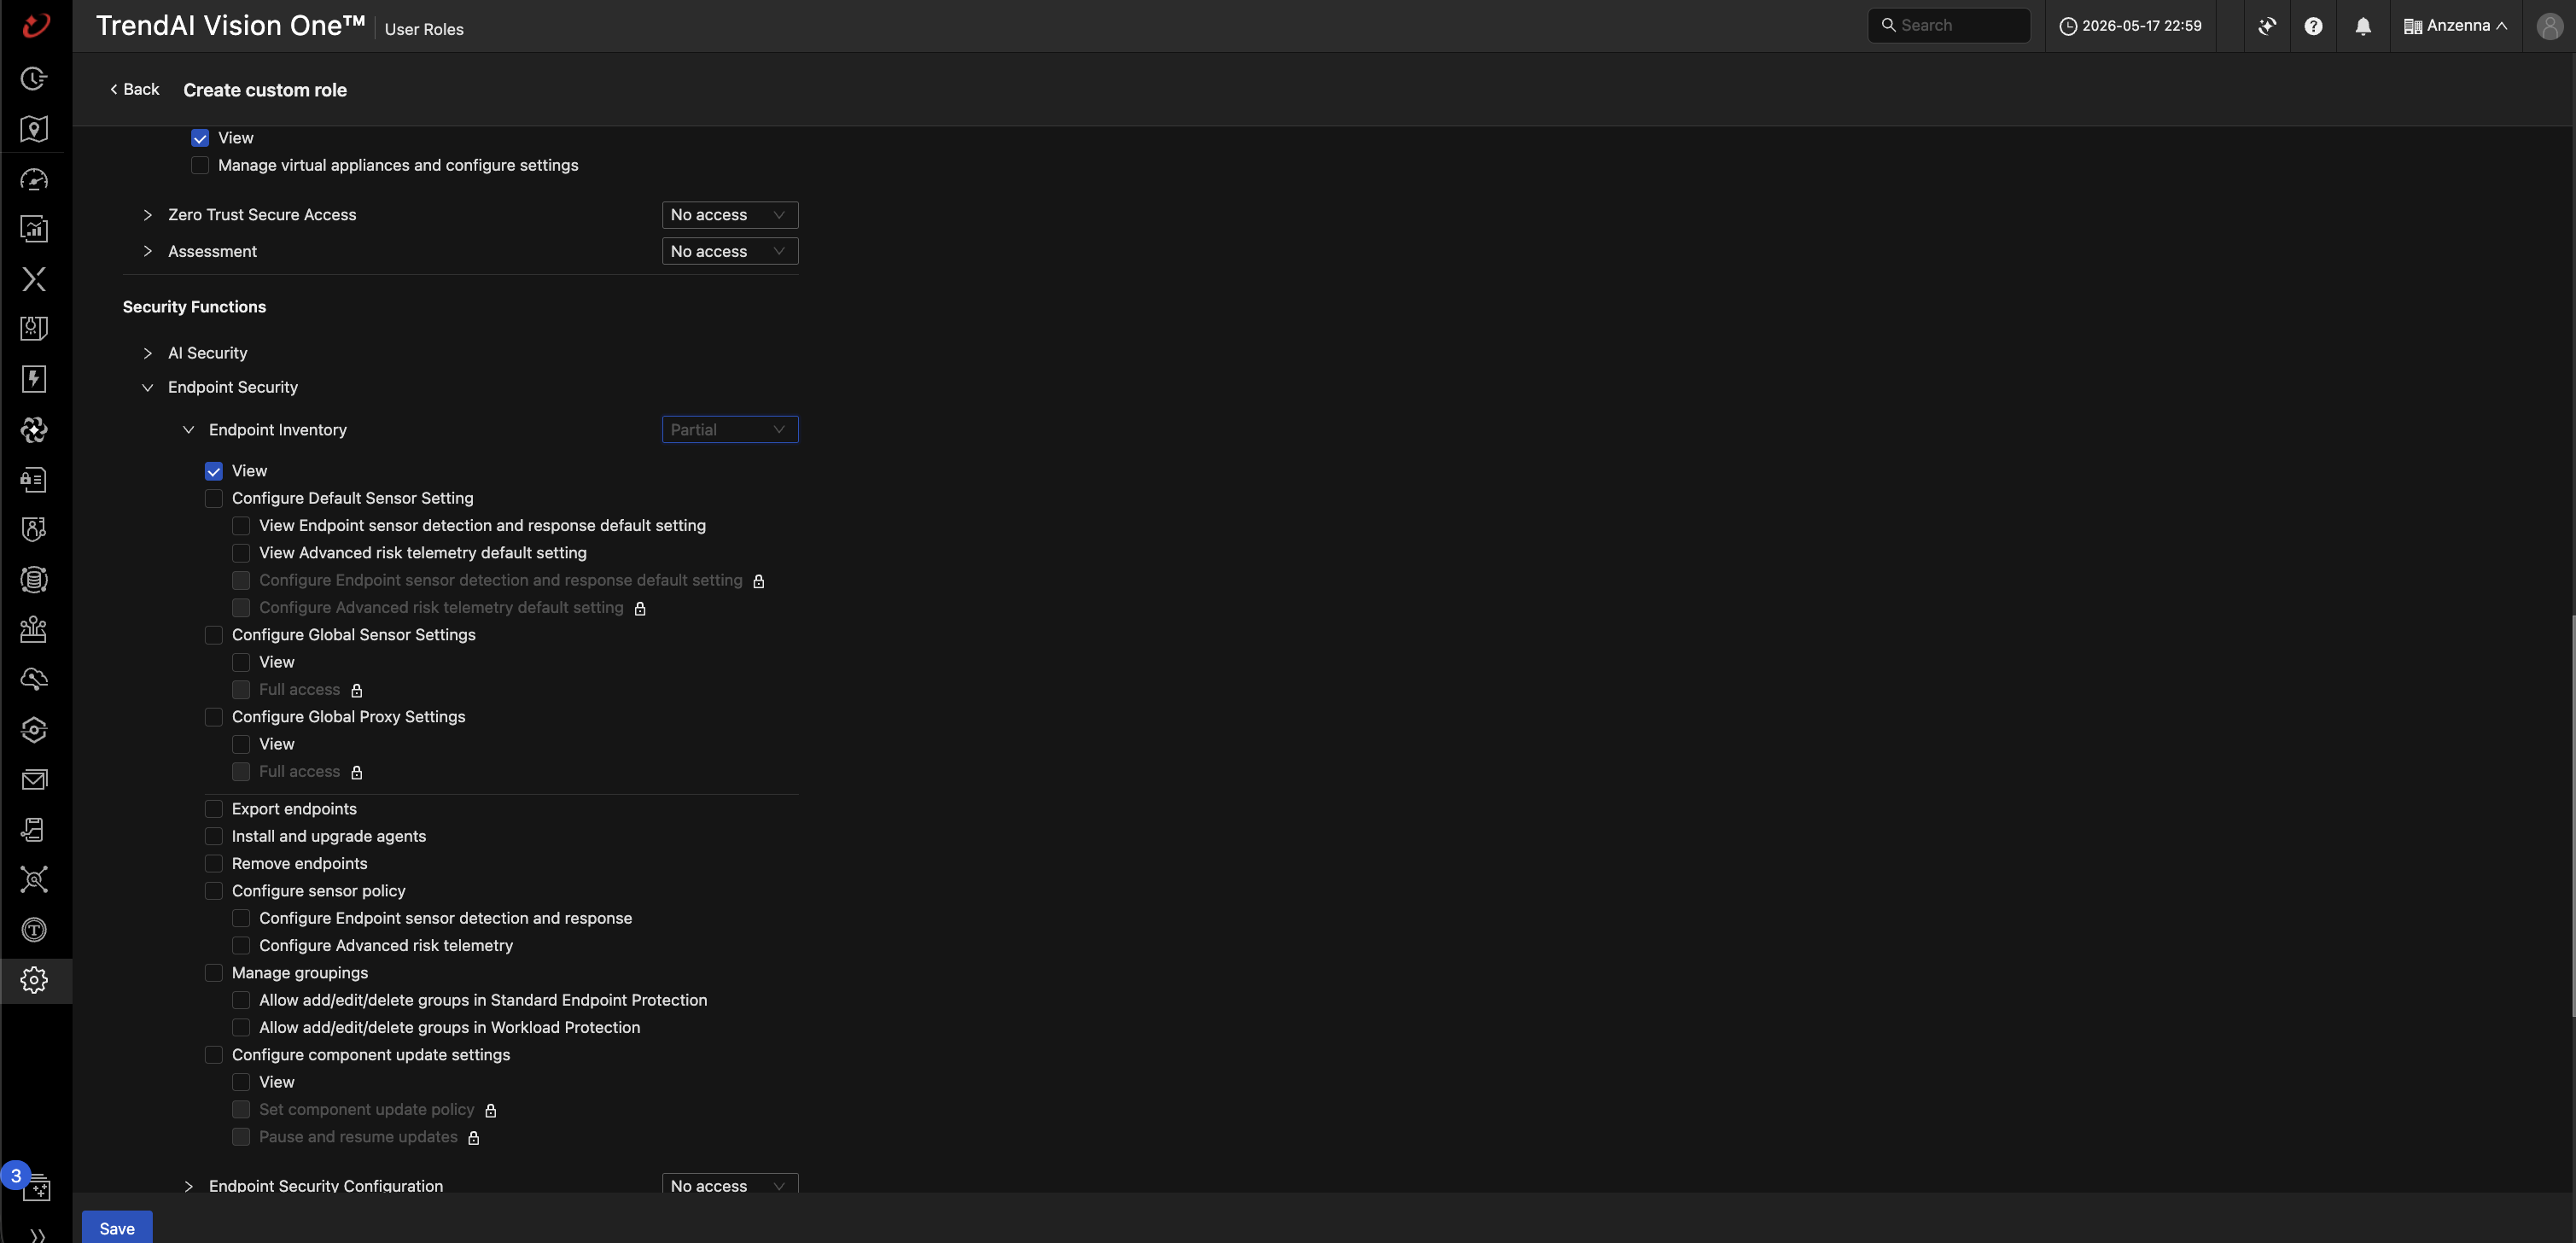
Continue scrolling and expand Endpoint Security > Endpoint Inventory. Grant View on Endpoint Inventory and on the sensor / proxy settings so Anzenna can read endpoint data. Leave Endpoint Security Configuration at No access.
Click Save to create the role.
Start with the minimum read permissions shown above. If you later enable Anzenna remediation actions for Trend Micro, return to this role and grant the additional write permissions then.
Part 2: Create an API Key with the Anzenna Role
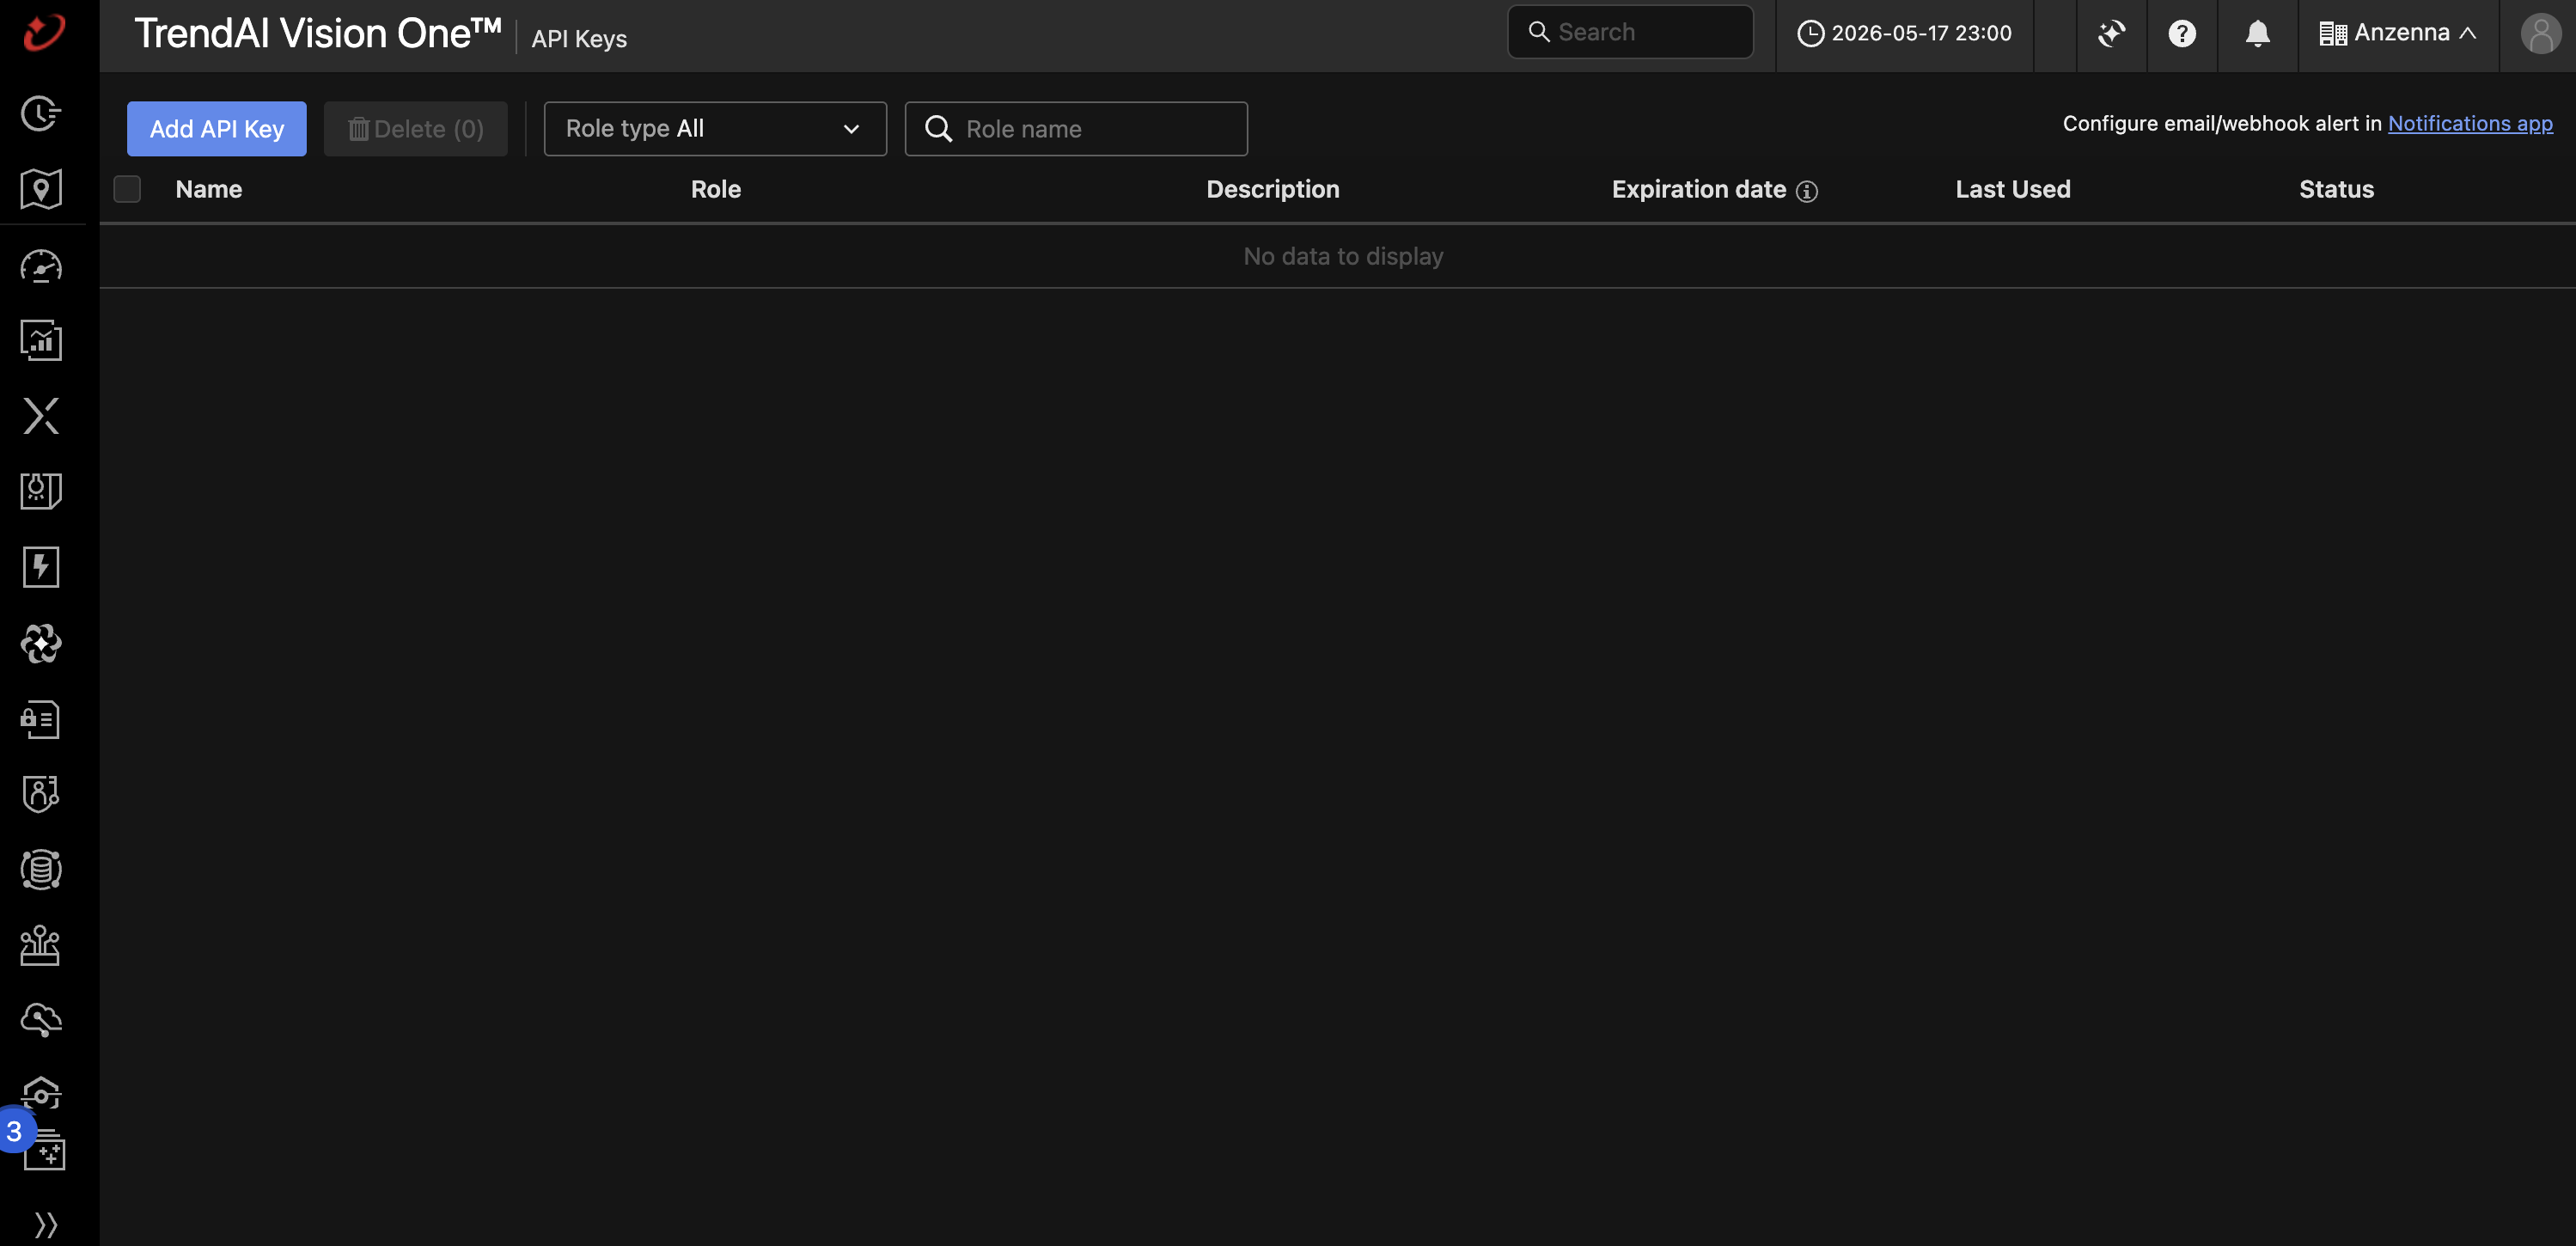
In the Vision One console, navigate to Administration > User Accounts & Roles > API Keys.
Click Add API Key.
Set the Name to
Anzenna.Set the Role to the Anzenna role you created in Part 1.
Set the Expiration Time to the longest interval your security policy allows (for example, 15 years) — rotating the key is a manual operation.
Optionally enter a Description such as
Anzenna API Key, leave Status set to Enabled, then click Add.
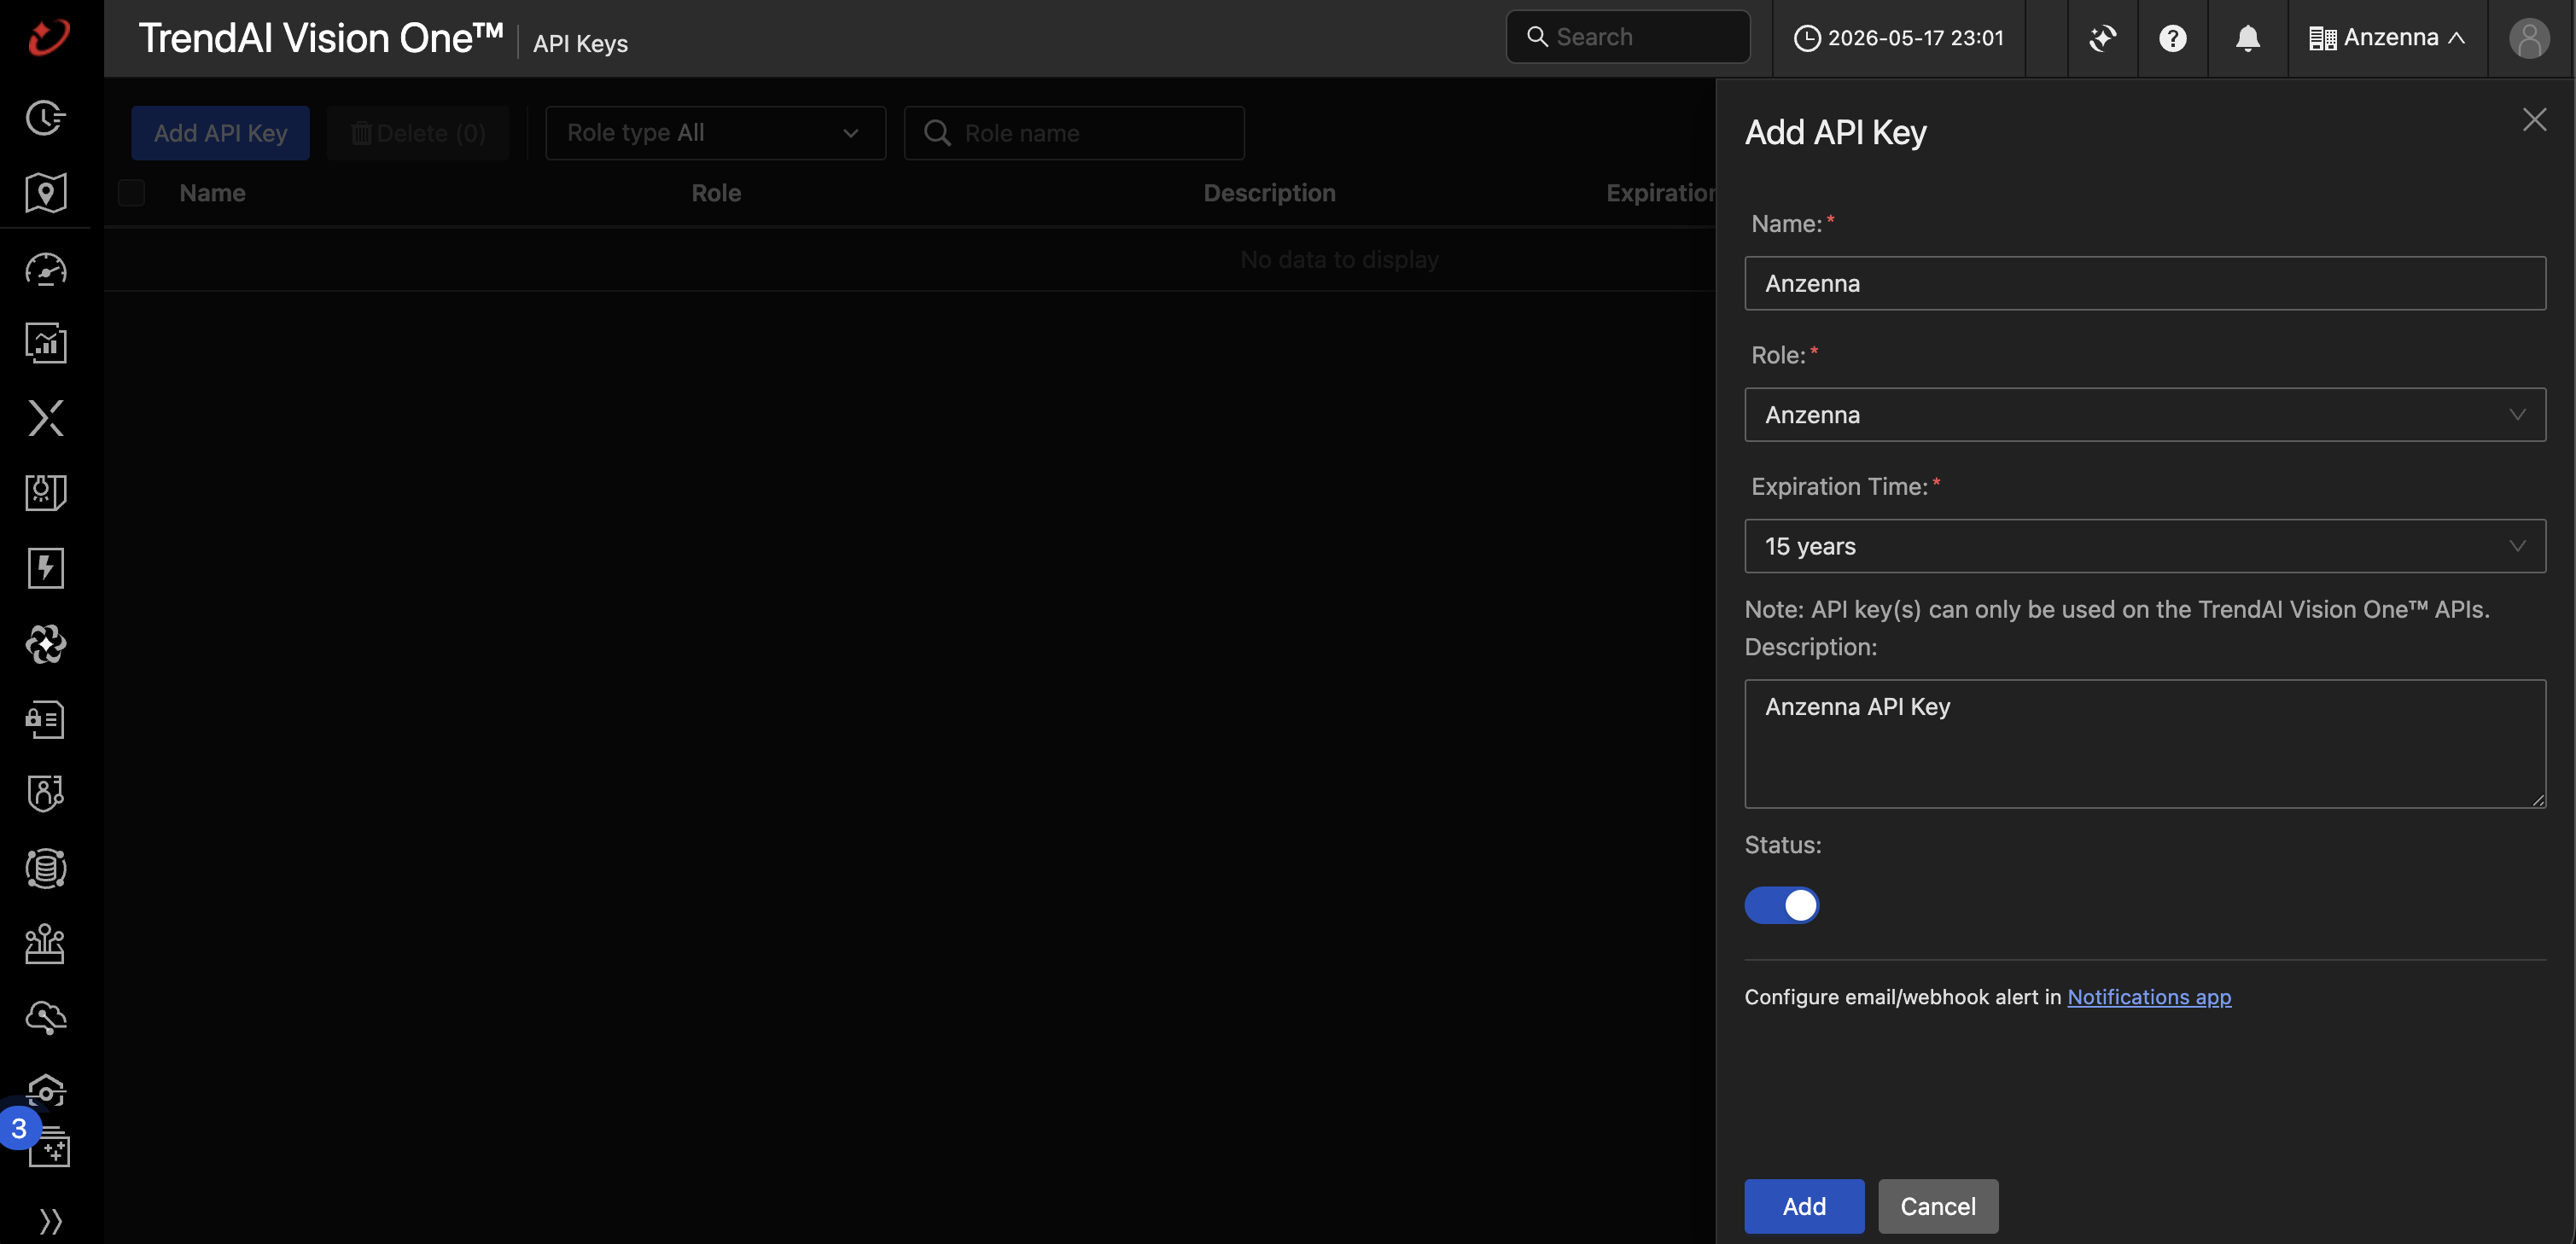
When the API Key Value is shown, click the copy icon and store the value somewhere temporary — you'll paste it into Anzenna in Part 4.
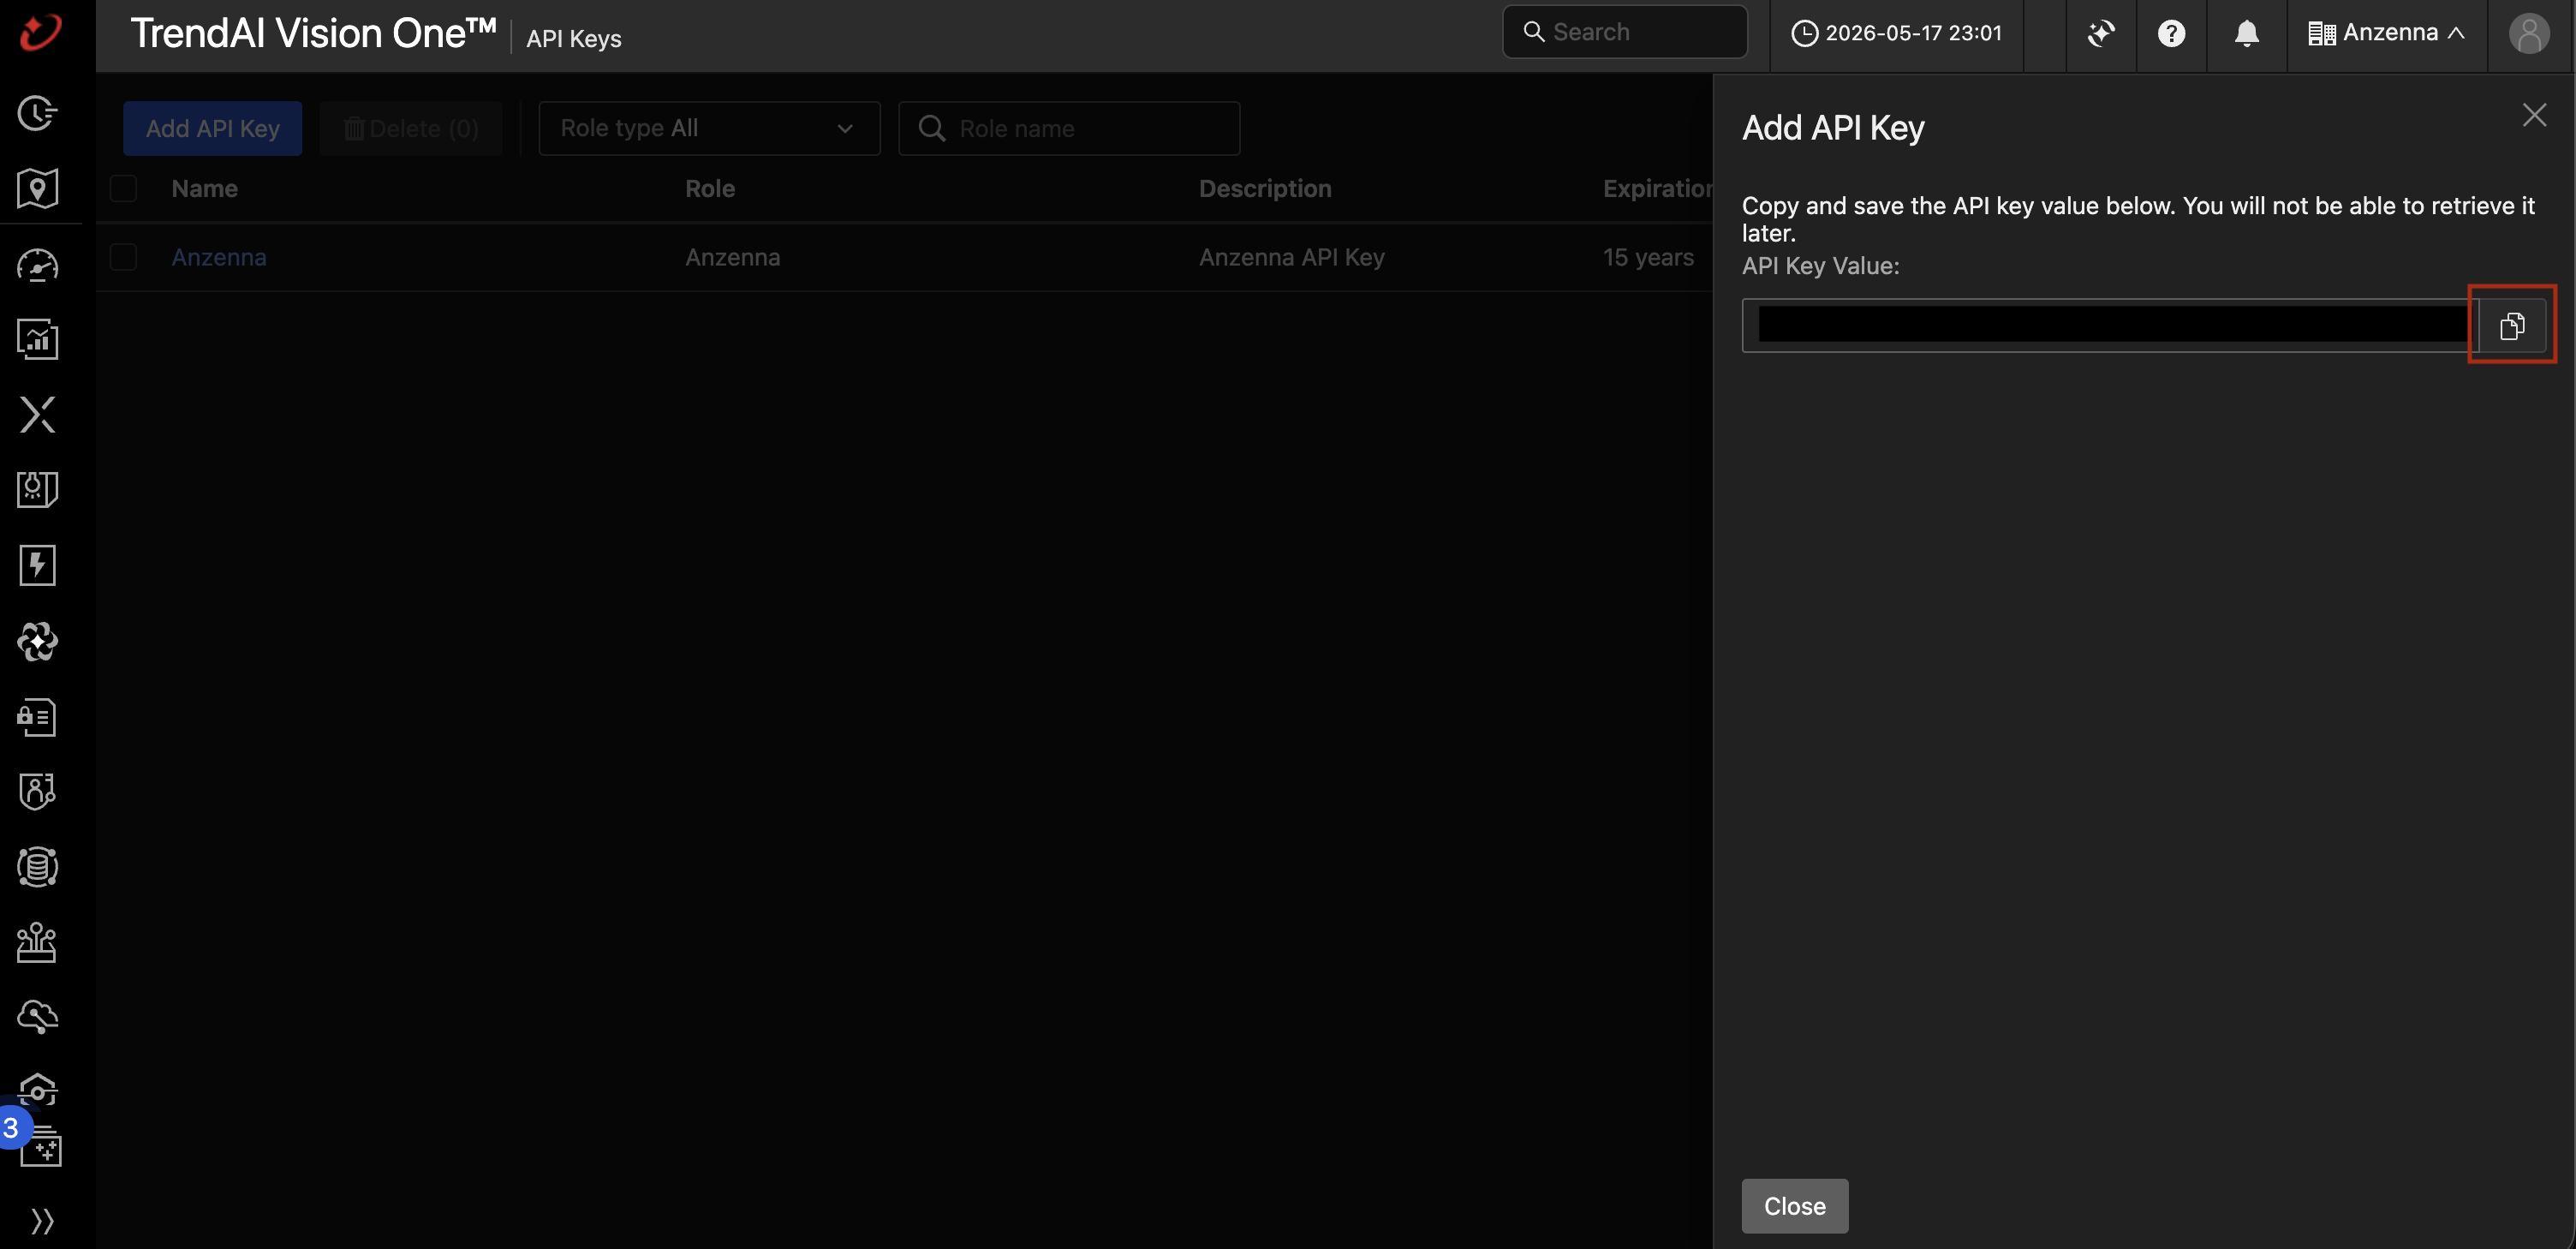
The API key value is only displayed once, immediately after creation. If you close this dialog without copying it, you will have to delete the key and create a new one.
Part 3: Identify Your Regional API URL
In the Vision One console URL, note the region embedded in the host name (for example,
portal.xdr.trendmicro.comis the US region;portal.eu.xdr.trendmicro.comis the EU region).Map the console region to the matching API URL using the table below.
Australia —
https://api.au.xdr.trendmicro.comJapan —
https://api.xdr.trendmicro.co.jpSingapore —
https://api.sg.xdr.trendmicro.com
If you are unsure which API URL applies, check Administration > API Keys in the Vision One console — the page header generally cites the regional API endpoint to use.
Part 4: Connect Trend Micro in Anzenna
Sign in to app.anzenna.ai.
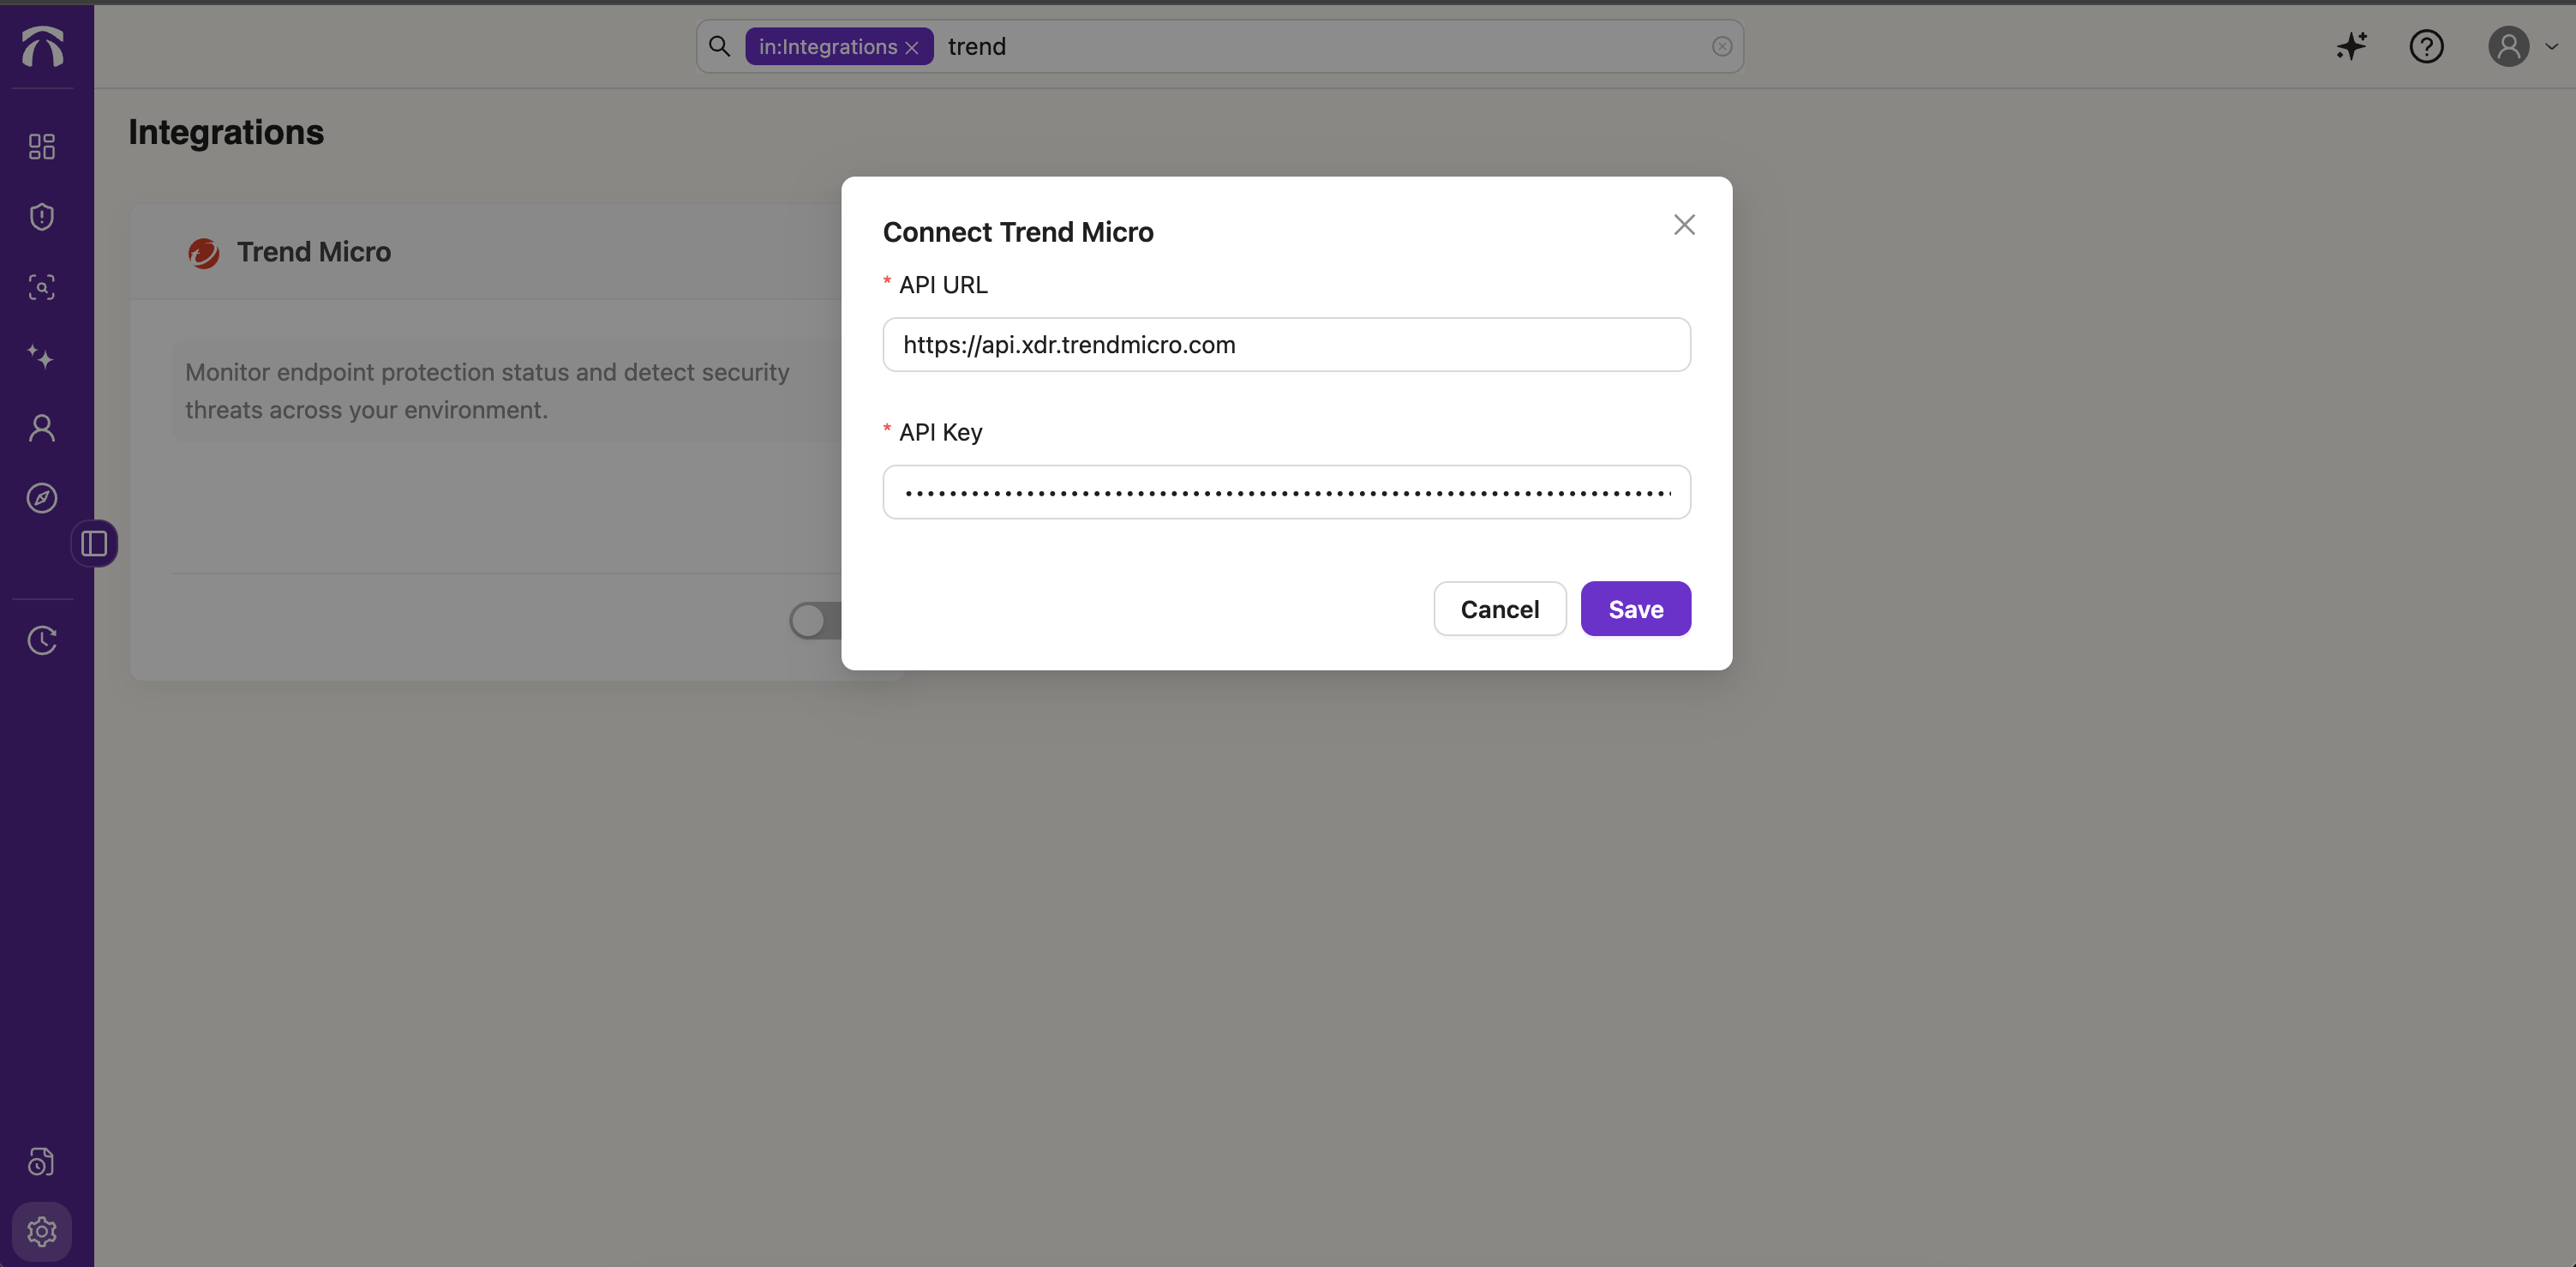
Go to Settings > Integrations and find Trend Micro.
- Click the toggle to begin the connection.
Paste your regional API URL into the API URL field.
Paste the API key you copied from Vision One into the API Key field.
Click Save.
Part 5: Verify the Connection
Wait a few seconds, then refresh the Integrations page.
Confirm that the Trend Micro card shows a Connected to ... status and a green toggle.
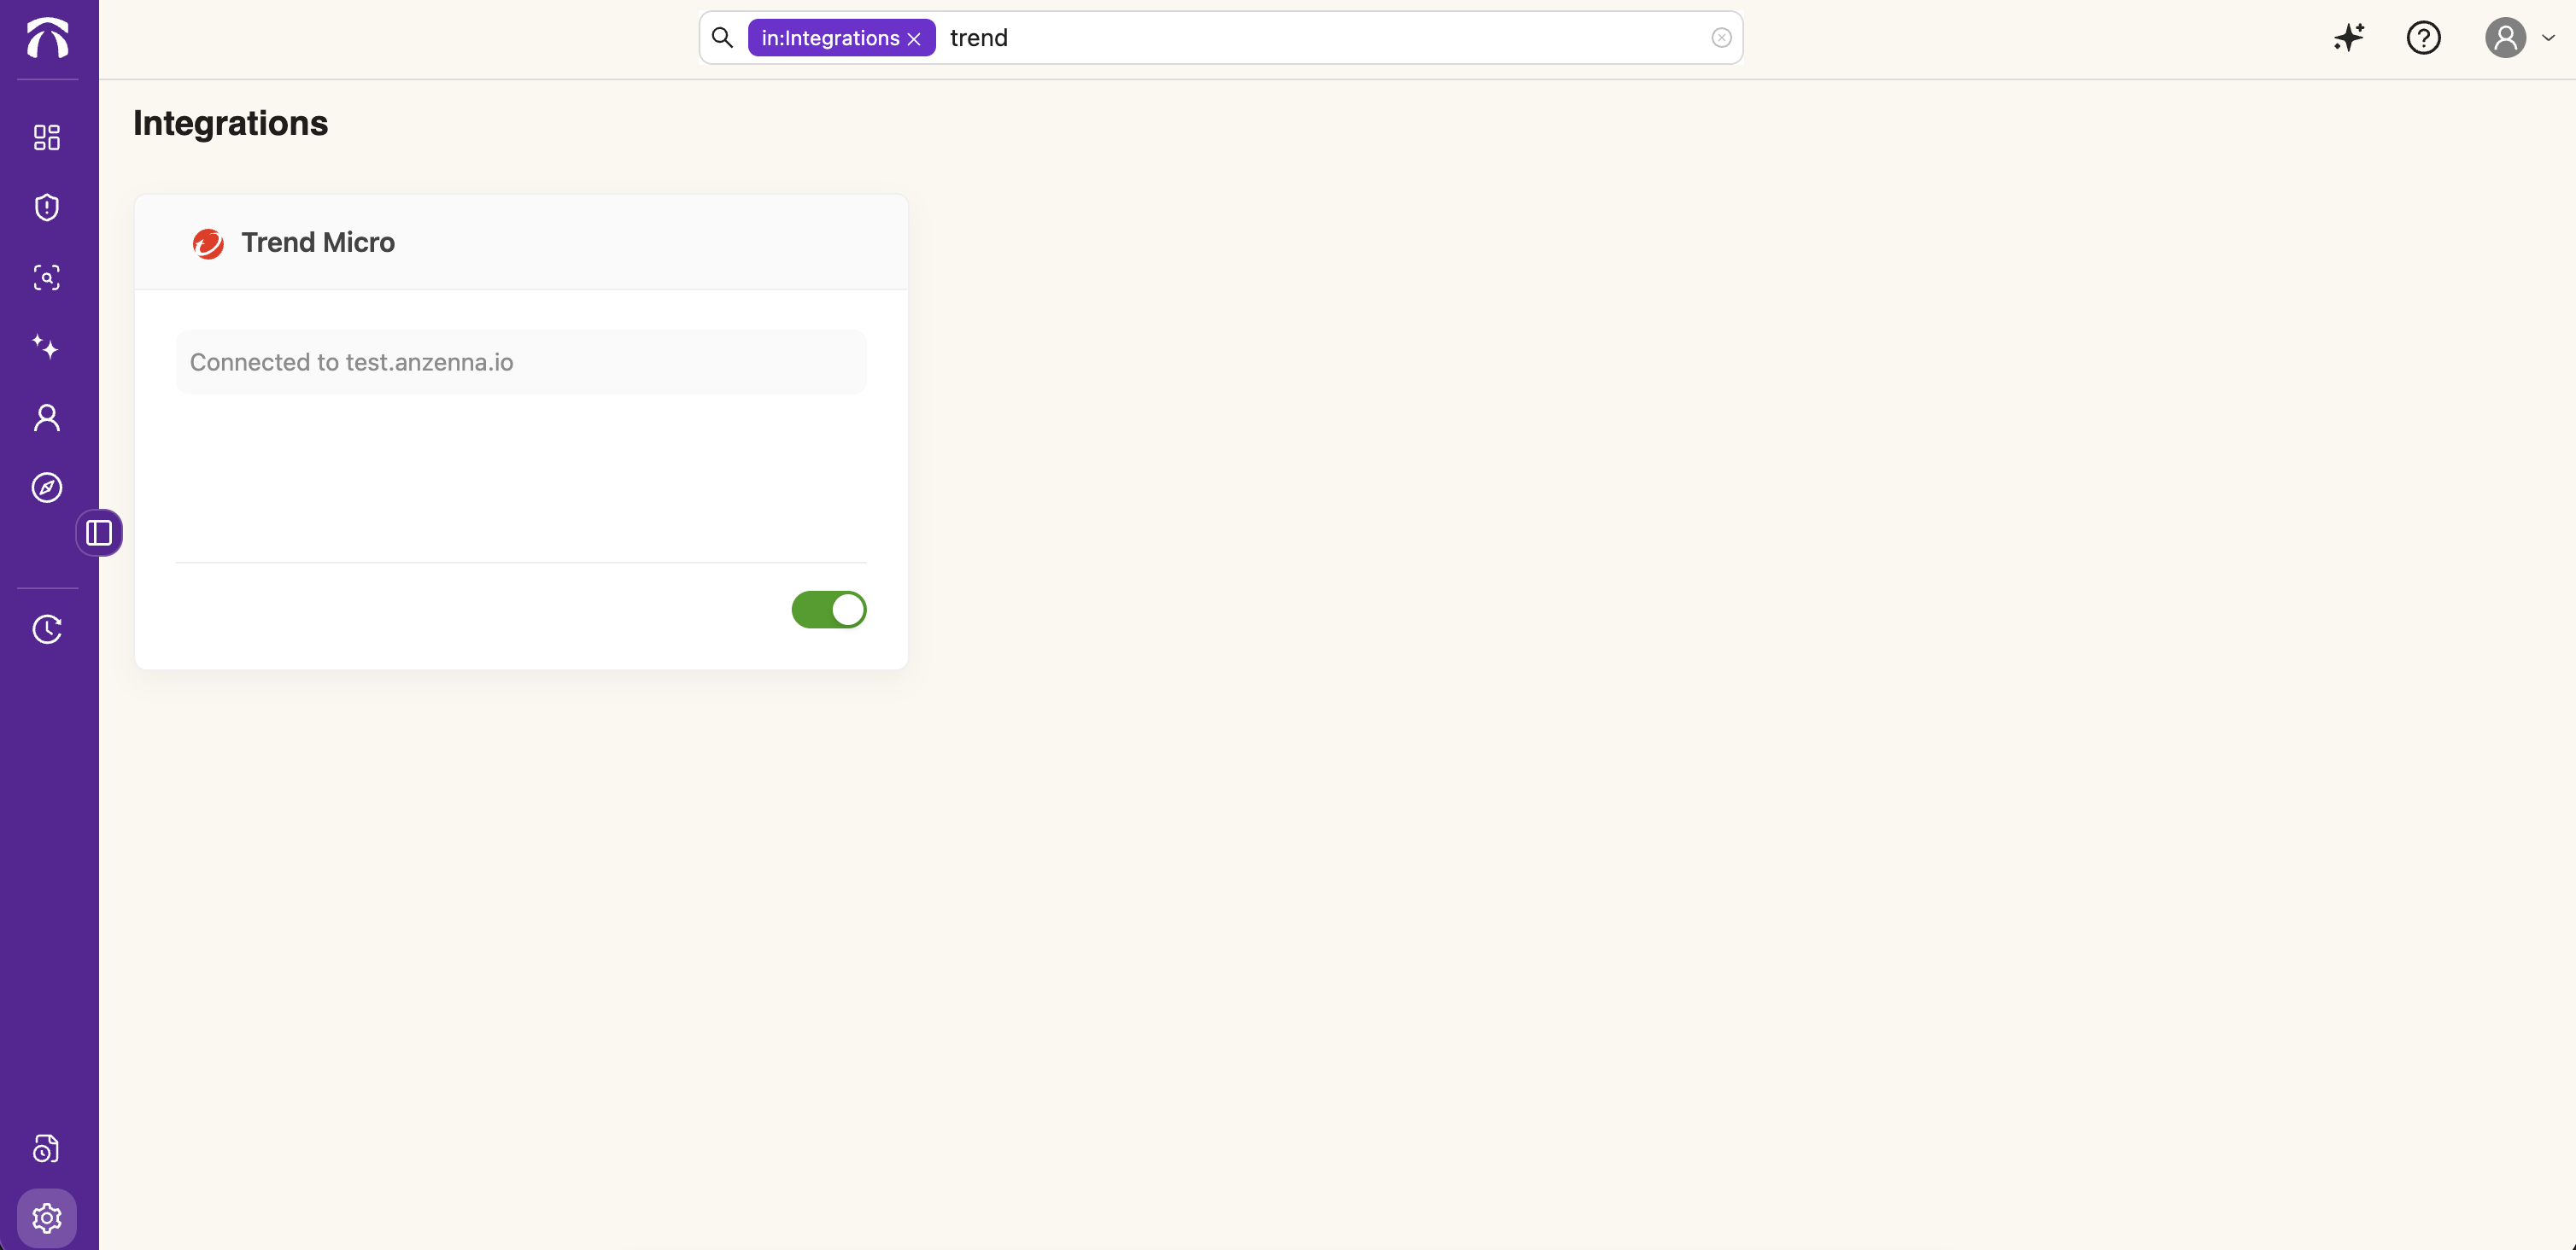
Trend Micro Vision One is now connected to Anzenna. Anzenna will begin pulling Workbench alerts and endpoint inventory from your tenant.