Connect Workday to Anzenna
This guide walks you through setting up an Integration System User and a custom RaaS report in Workday, then connecting them to Anzenna for workforce data syncing.
Prerequisites
Workday administrator access (ability to create Integration System Users and Security Groups)
- Access to Workday Workbench
- Access to the Anzenna platform
Step-by-Step Instructions
Part 1: Start Enrollment in Anzenna
In Anzenna, click the switch in the Workday Enrollment Card to begin setup.
Part 2: Create an Integration System User in Workday
In the Workday Workbench search box, enter Create Integration System User and click on the task.
In the username field, enter anzenna, then click Generate Random Password.
Copy the generated password, then click Save. Store this password — it will be needed during enrollment.
Part 3: Create a Security Group
In Workday Workbench, search for Create Security Group and click on the task.
Select Integration System Security Group (Unconstrained).
Enter anzenna as the group name and click OK.
Add anzenna (user) to the Integration System User field and click OK.
Part 4: Apply Domain Security Permissions
In Workday Workbench, search for Maintain Permissions for Security Group and click on the task.
Choose Maintain for Operation and add anzenna to the Source Security Group field.
In Domain Security Policy Permission, choose Get Only for the following policies: Reports: Learning Record, Worker Data: Active and Terminated Workers, Worker Data: Current staffing information, Worker Data: Business Title on Worker Profile, Worker Data: Organization Information, Worker Data: All Positions, Worker Data: Public Worker Reports, Workday Accounts.
Part 5: Activate Security Changes
In Workday Workbench, search for Activate Pending Security Policy Changes and click on the task, then click OK.
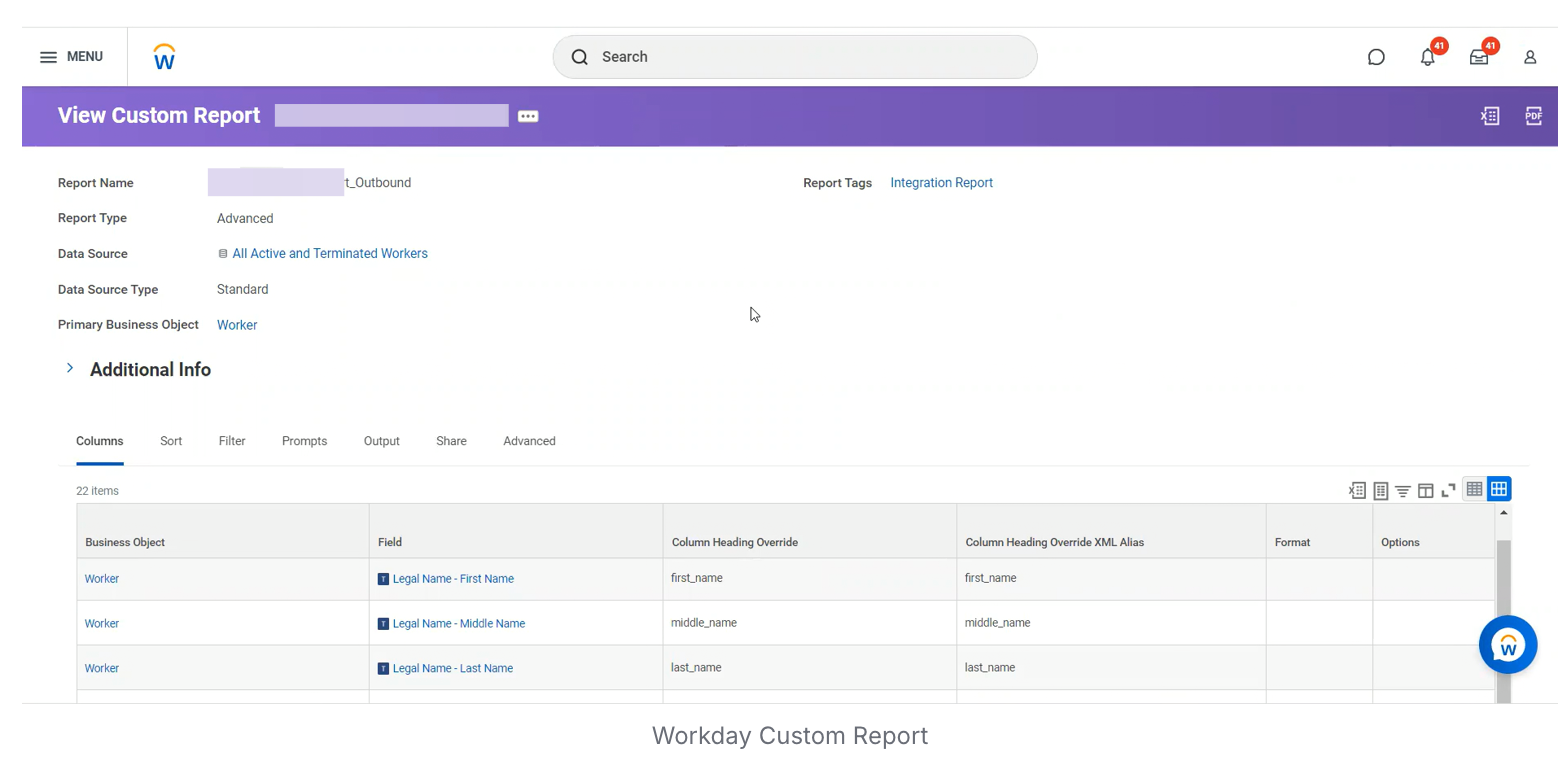
Part 6: Create the RaaS Sync Report
In Workday Workbench, search for Create Custom Report and click on the task.
Configure the report with these parameters: Title: Anzenna Sync, Report Type: Advanced, Data source: All users (active, terminated, pre-hire), Data source type: Standard, Primary business object: Worker.
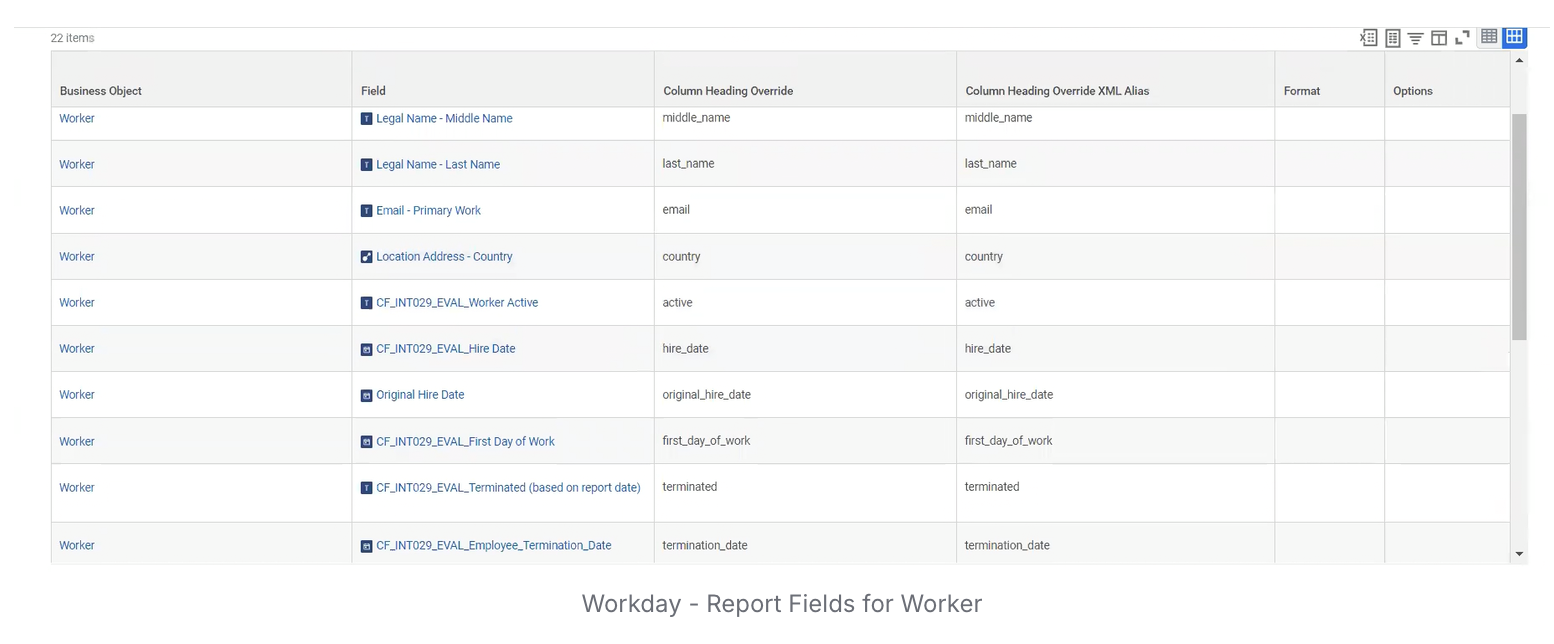
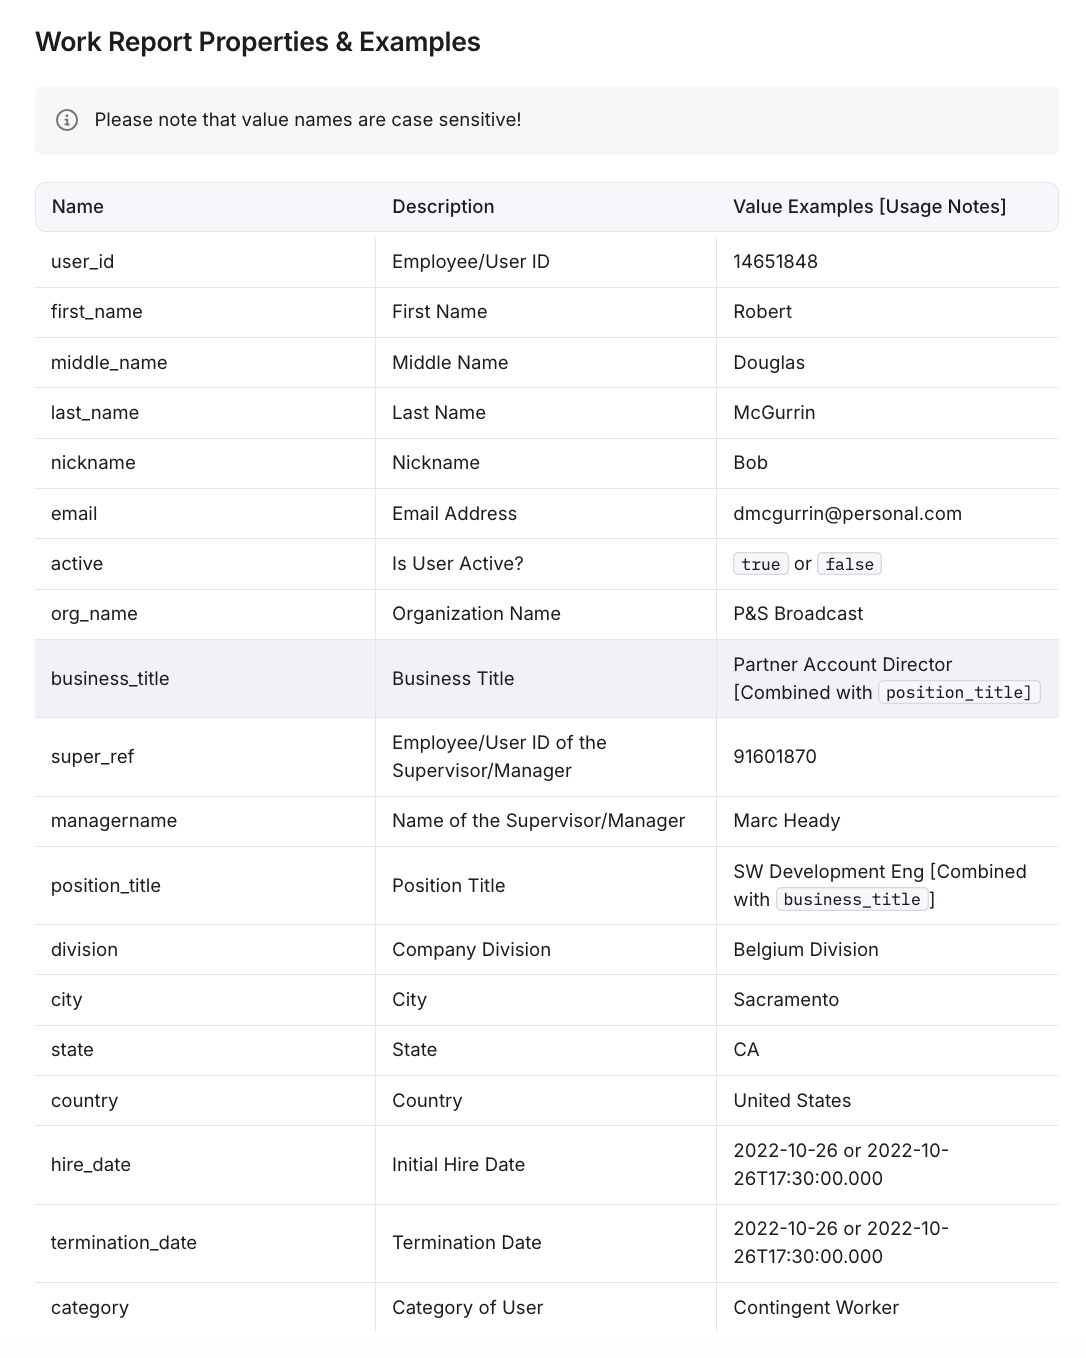
Add the following report fields: user_id, first_name, middle_name, last_name, nickname, email, active, org_name, business_title, super_ref, managername, position_title, division, city, state, country, hire_date, termination_date, category.
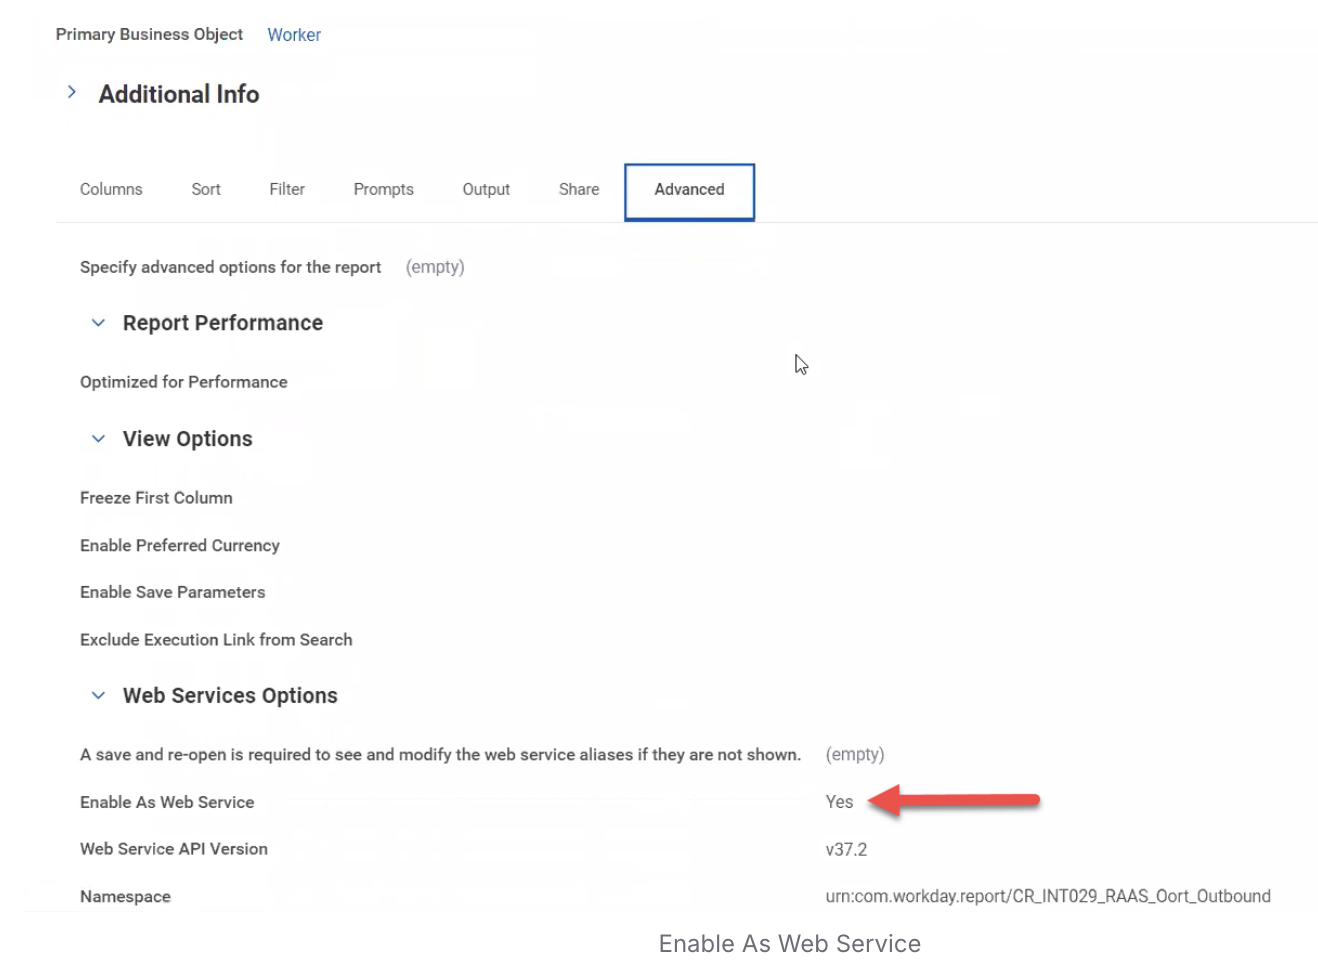
In the Advanced tab, enable Enable as Web Service and Optimized for performance.
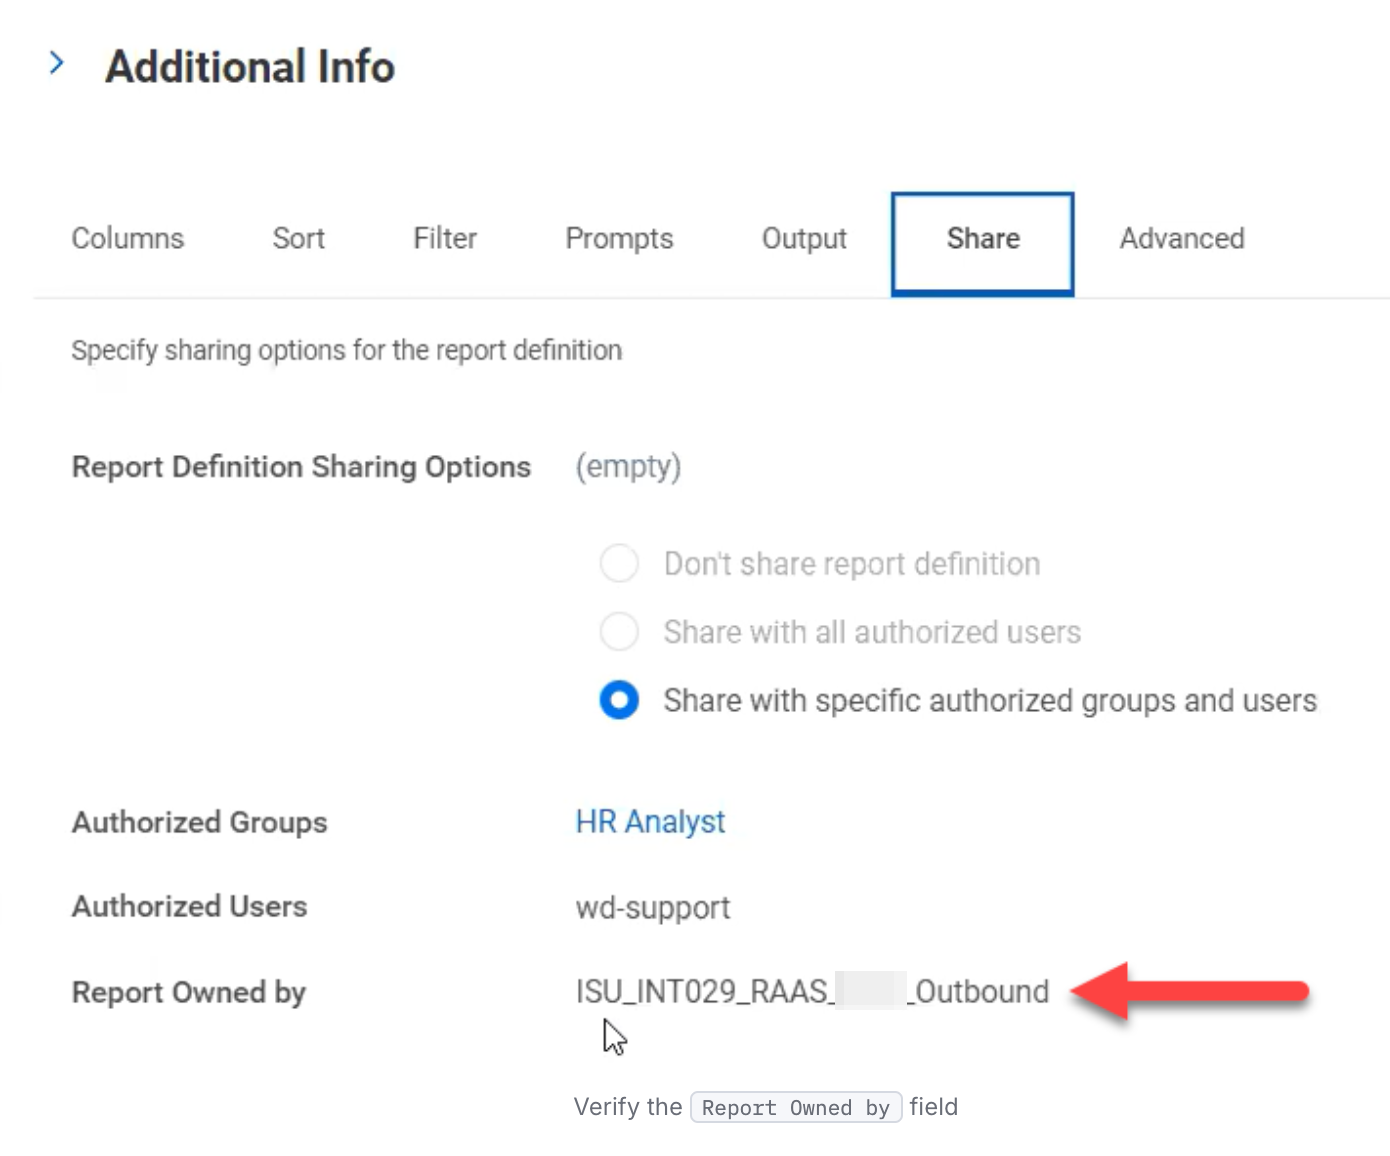
In the Share tab, ensure the report is owned by the integration system user (anzenna).
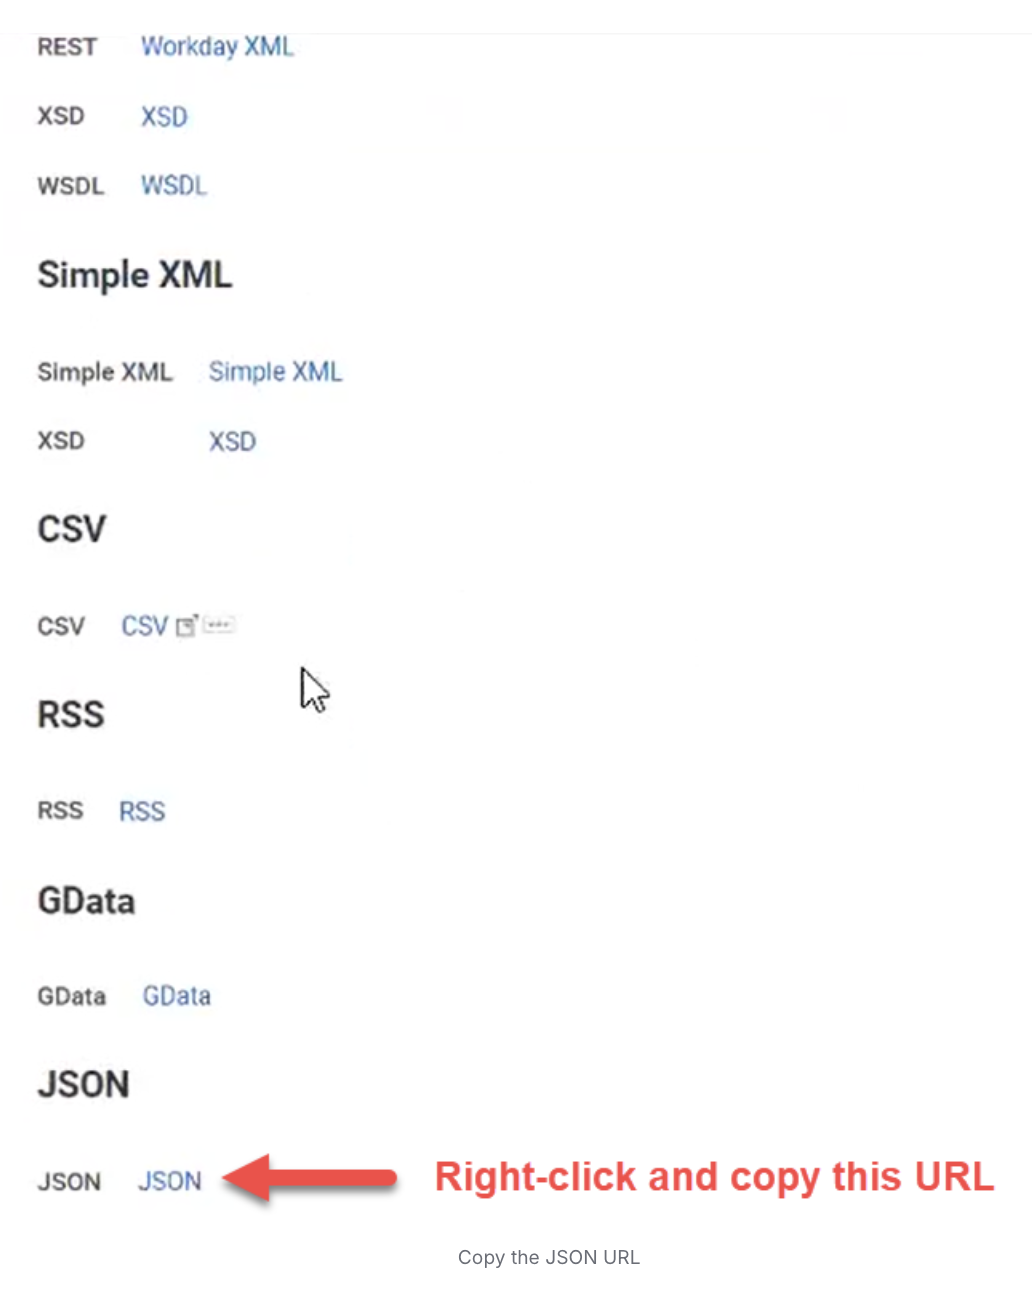
Copy the Report URL in JSON format. Open the list of Report URLs in a new tab, right-click and copy the JSON URL link.
Part 7: Complete the Connection in Anzenna
In Anzenna, enter your Workday Tenant ID in the tenant field.
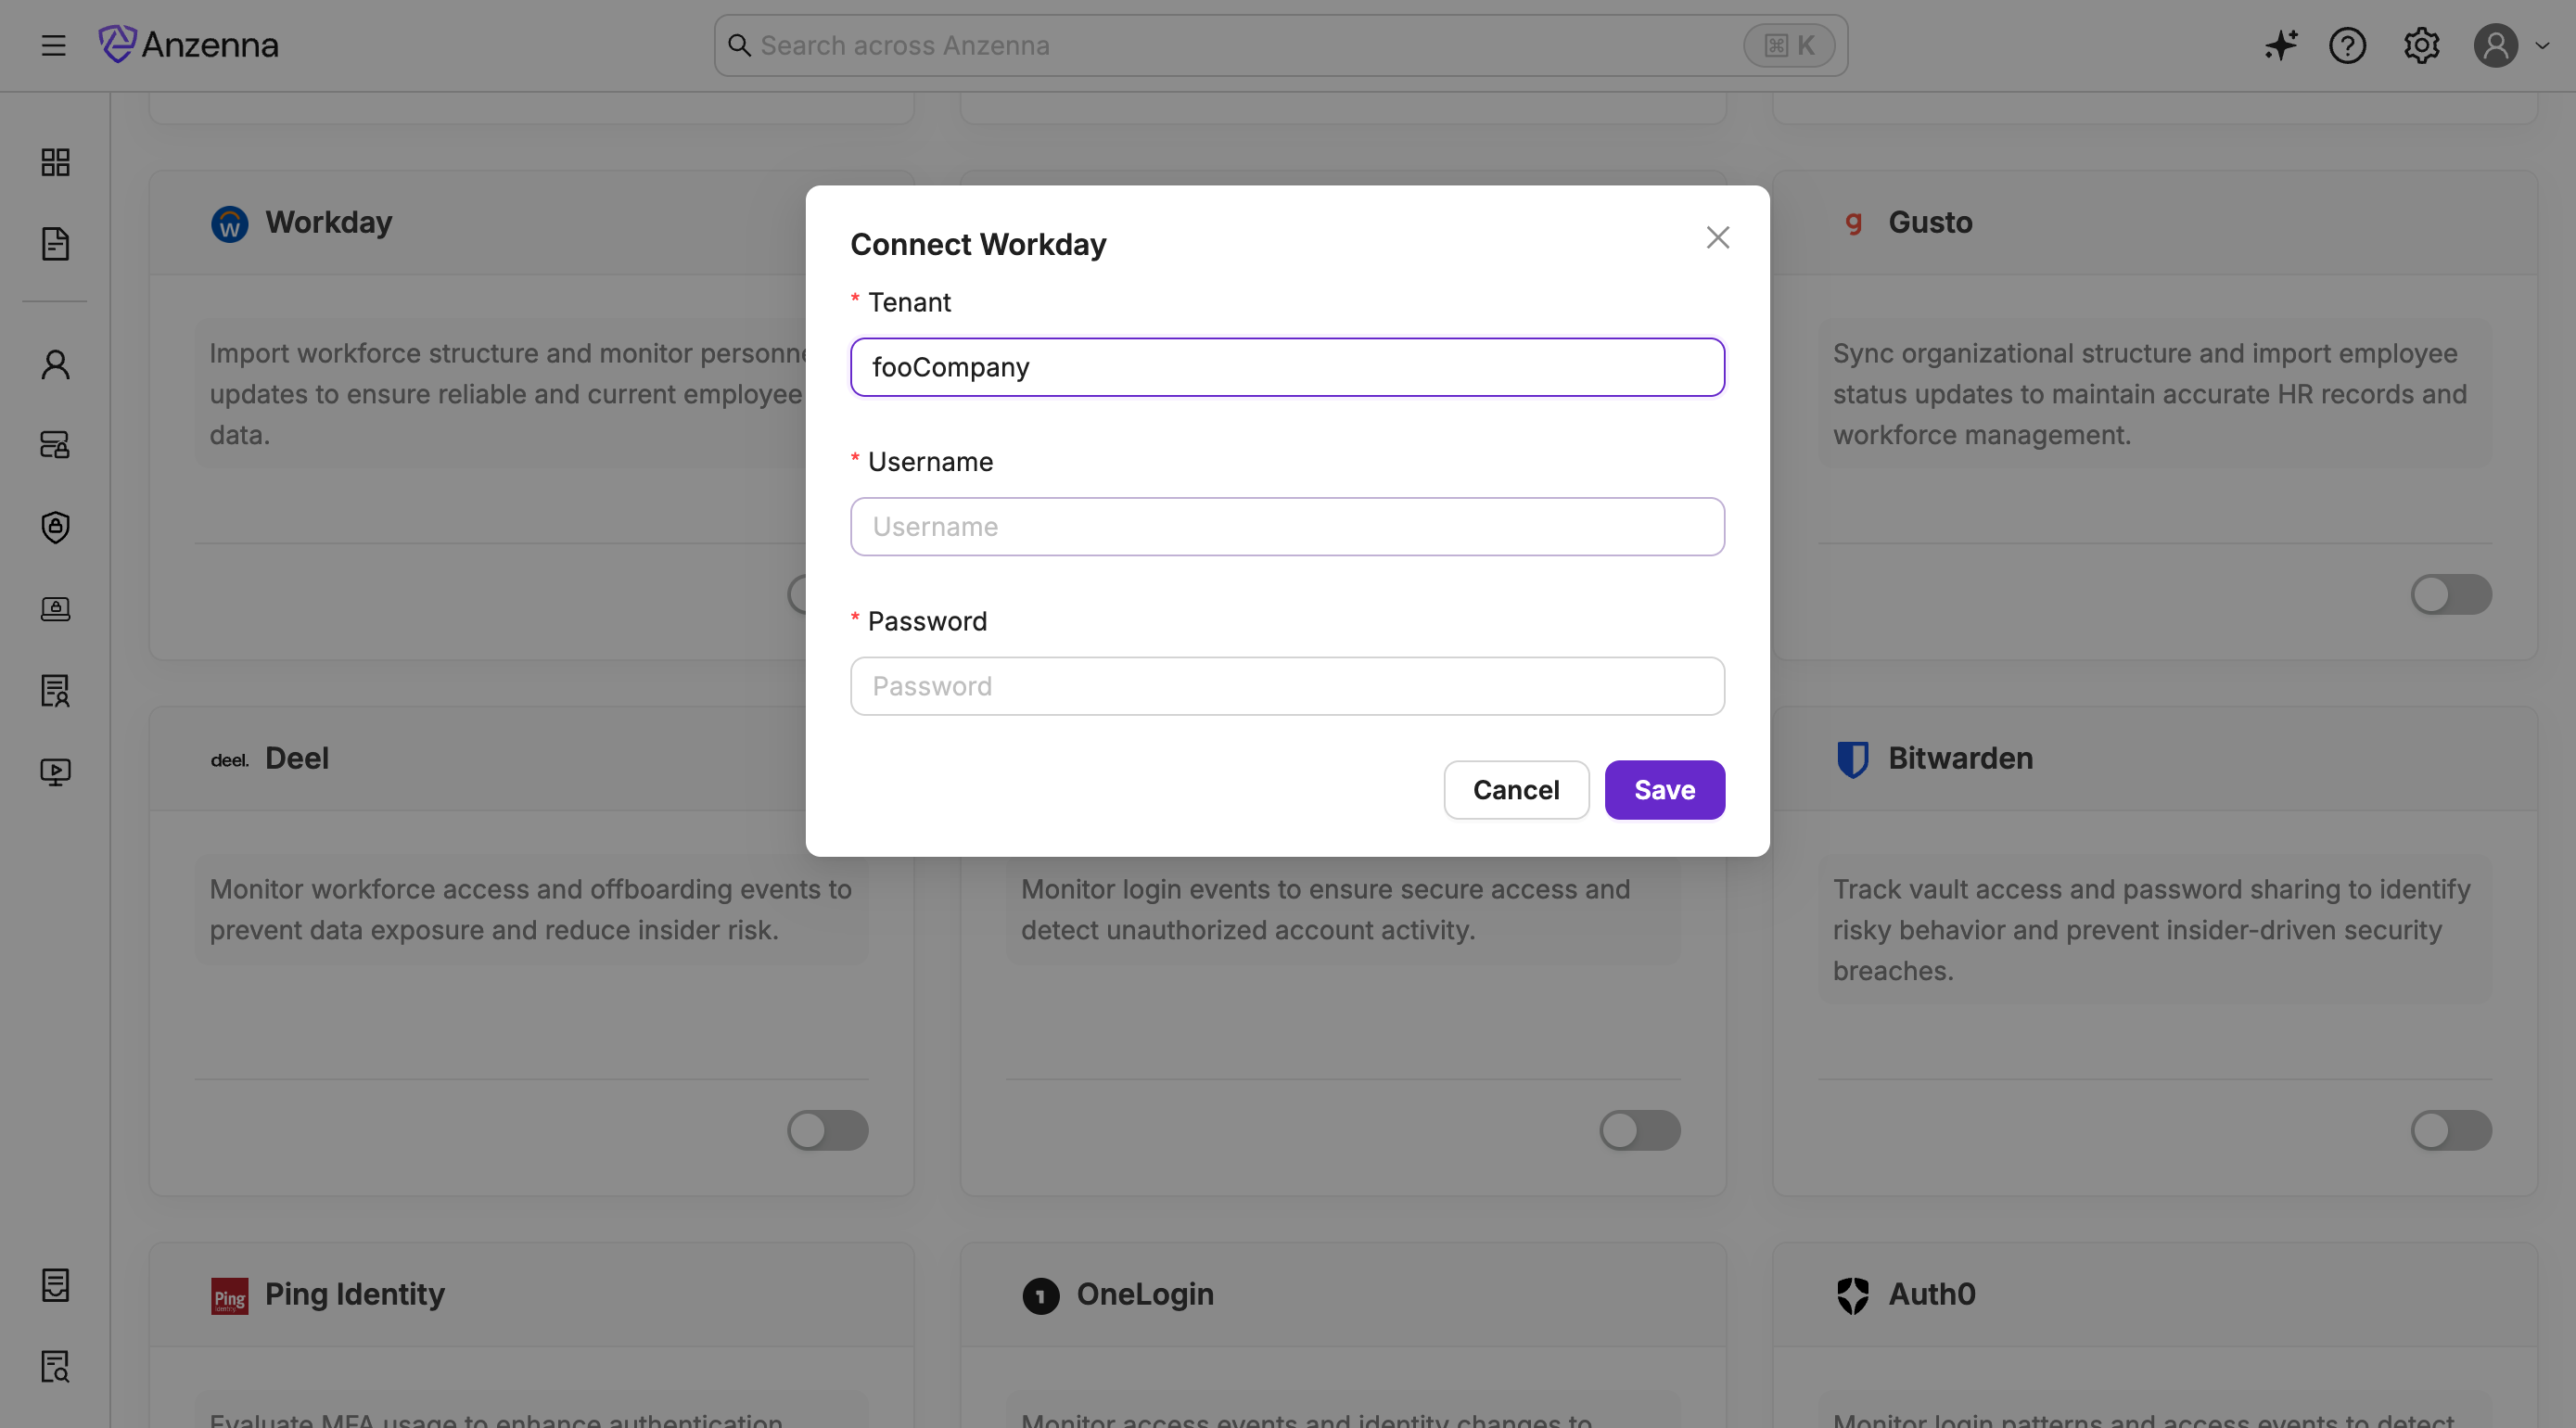
Enter anzenna as the username (or whatever name you used for the integration system user).
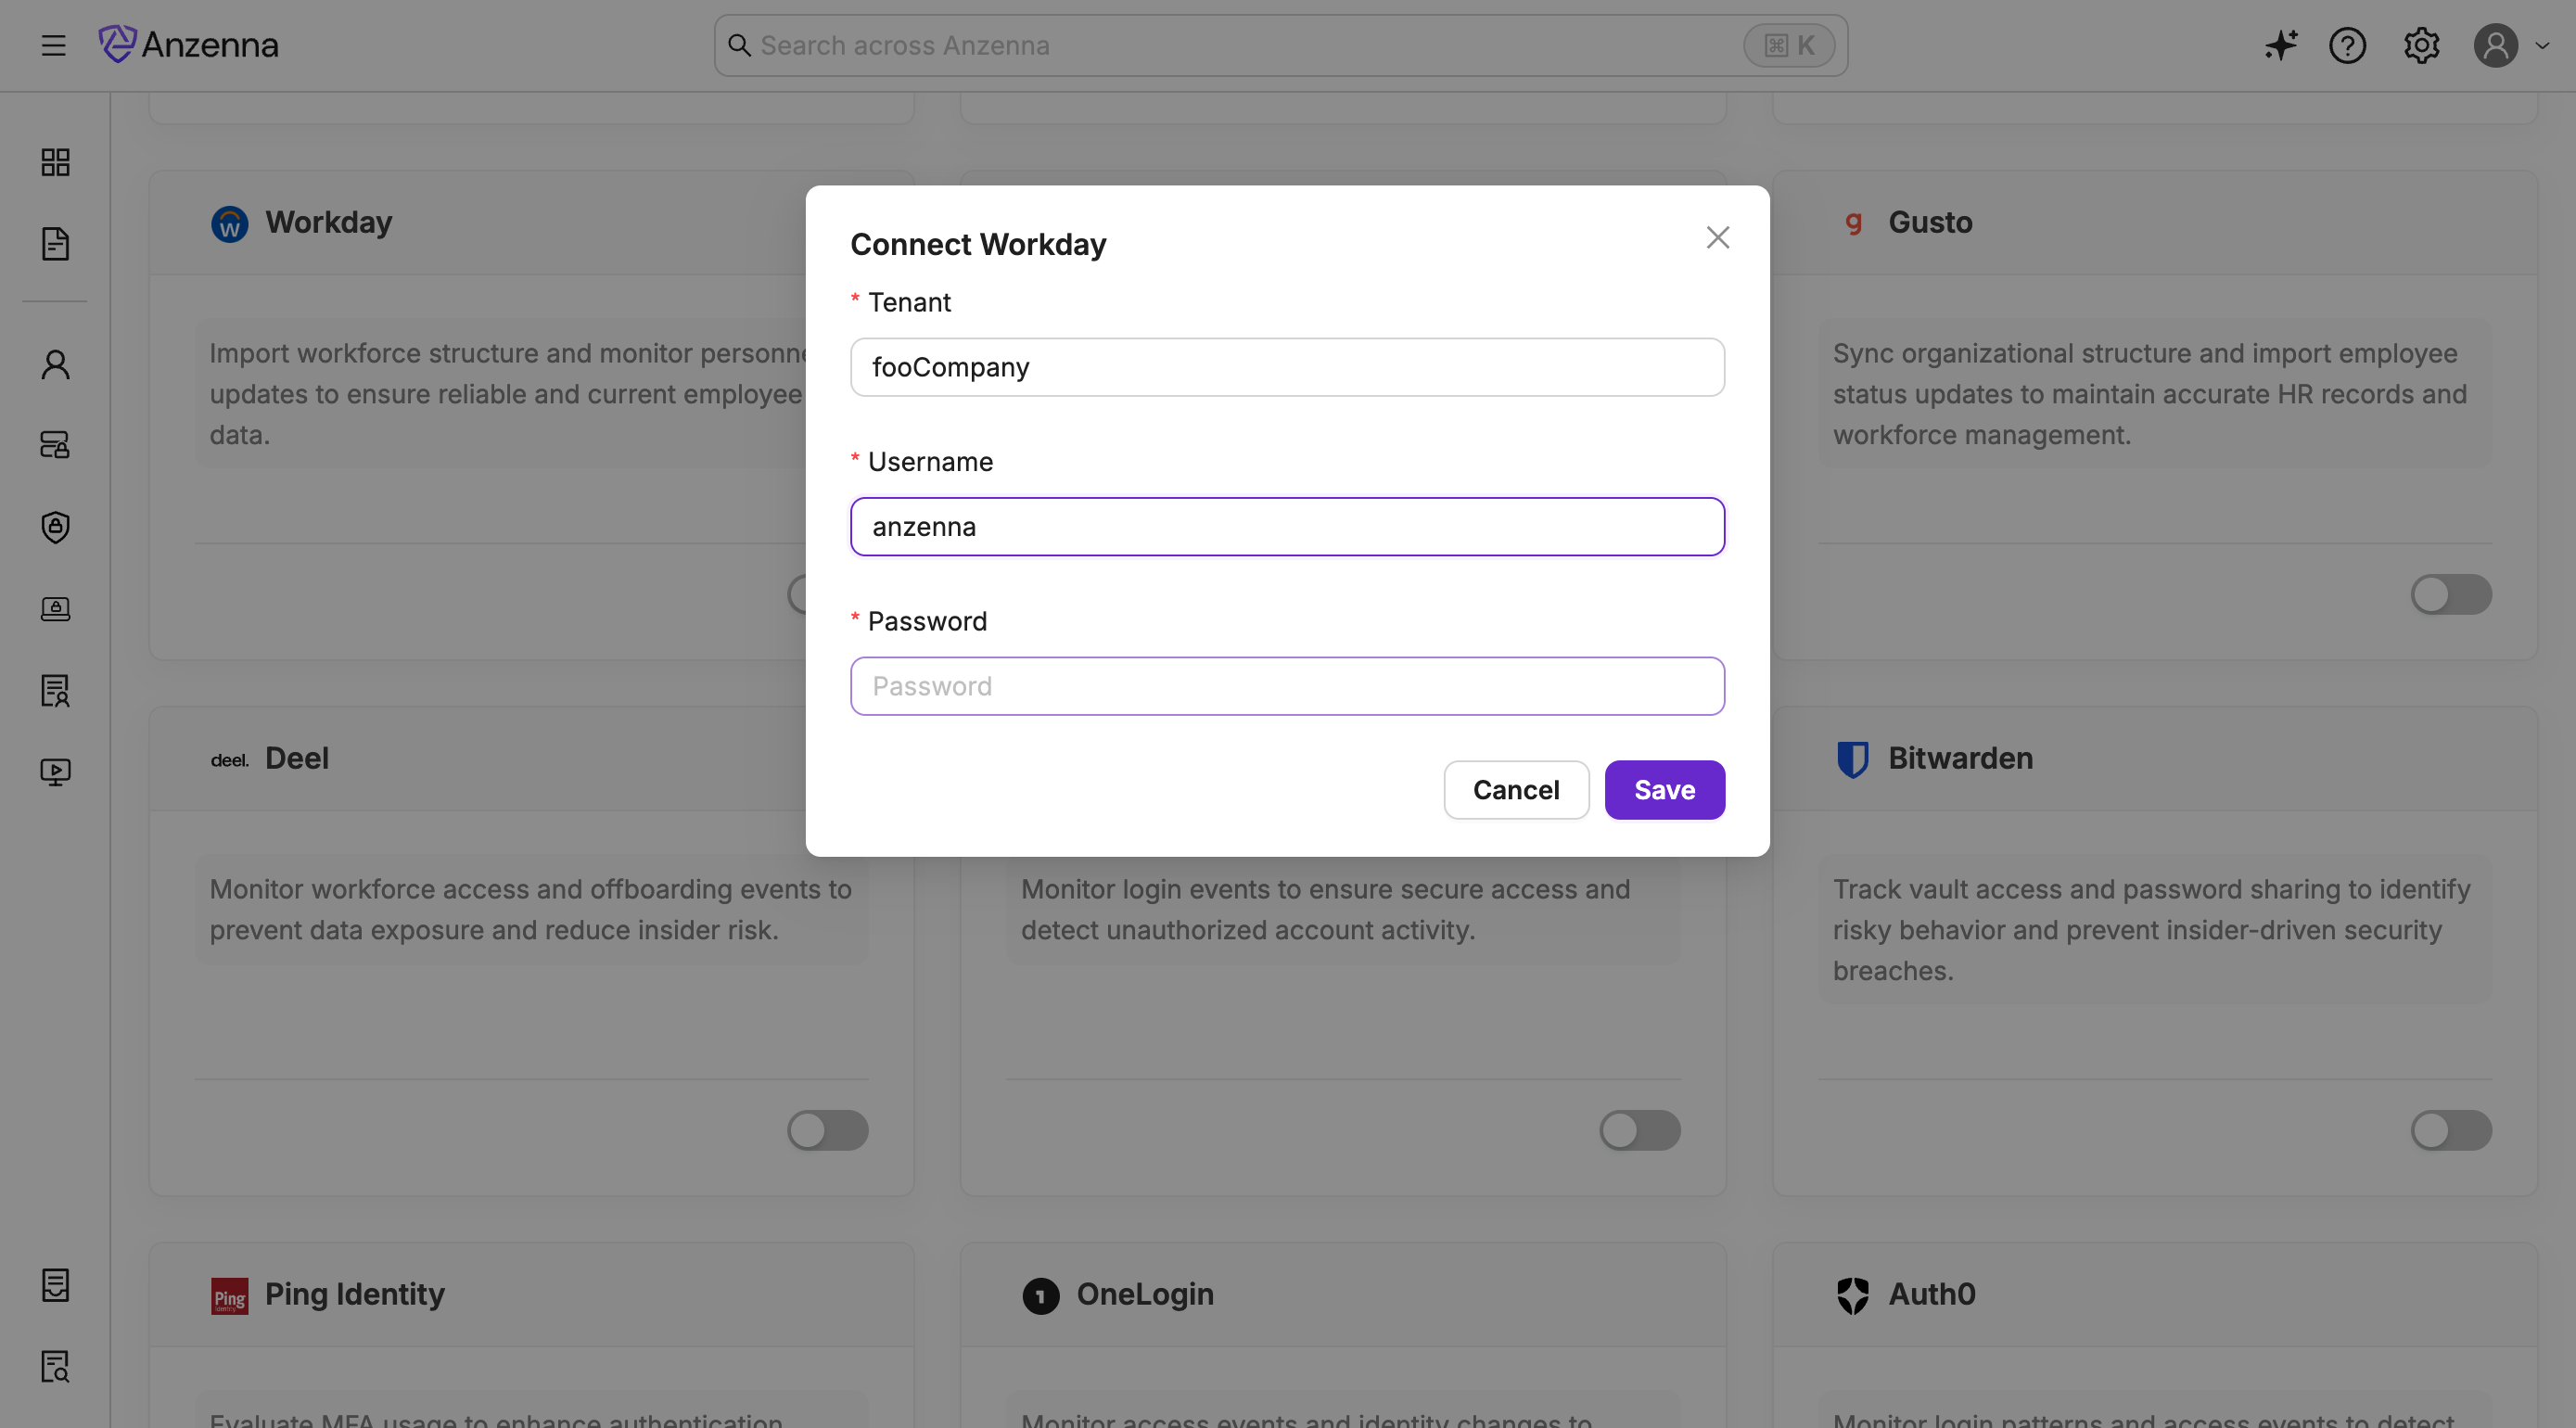
- Paste the password you copied earlier.
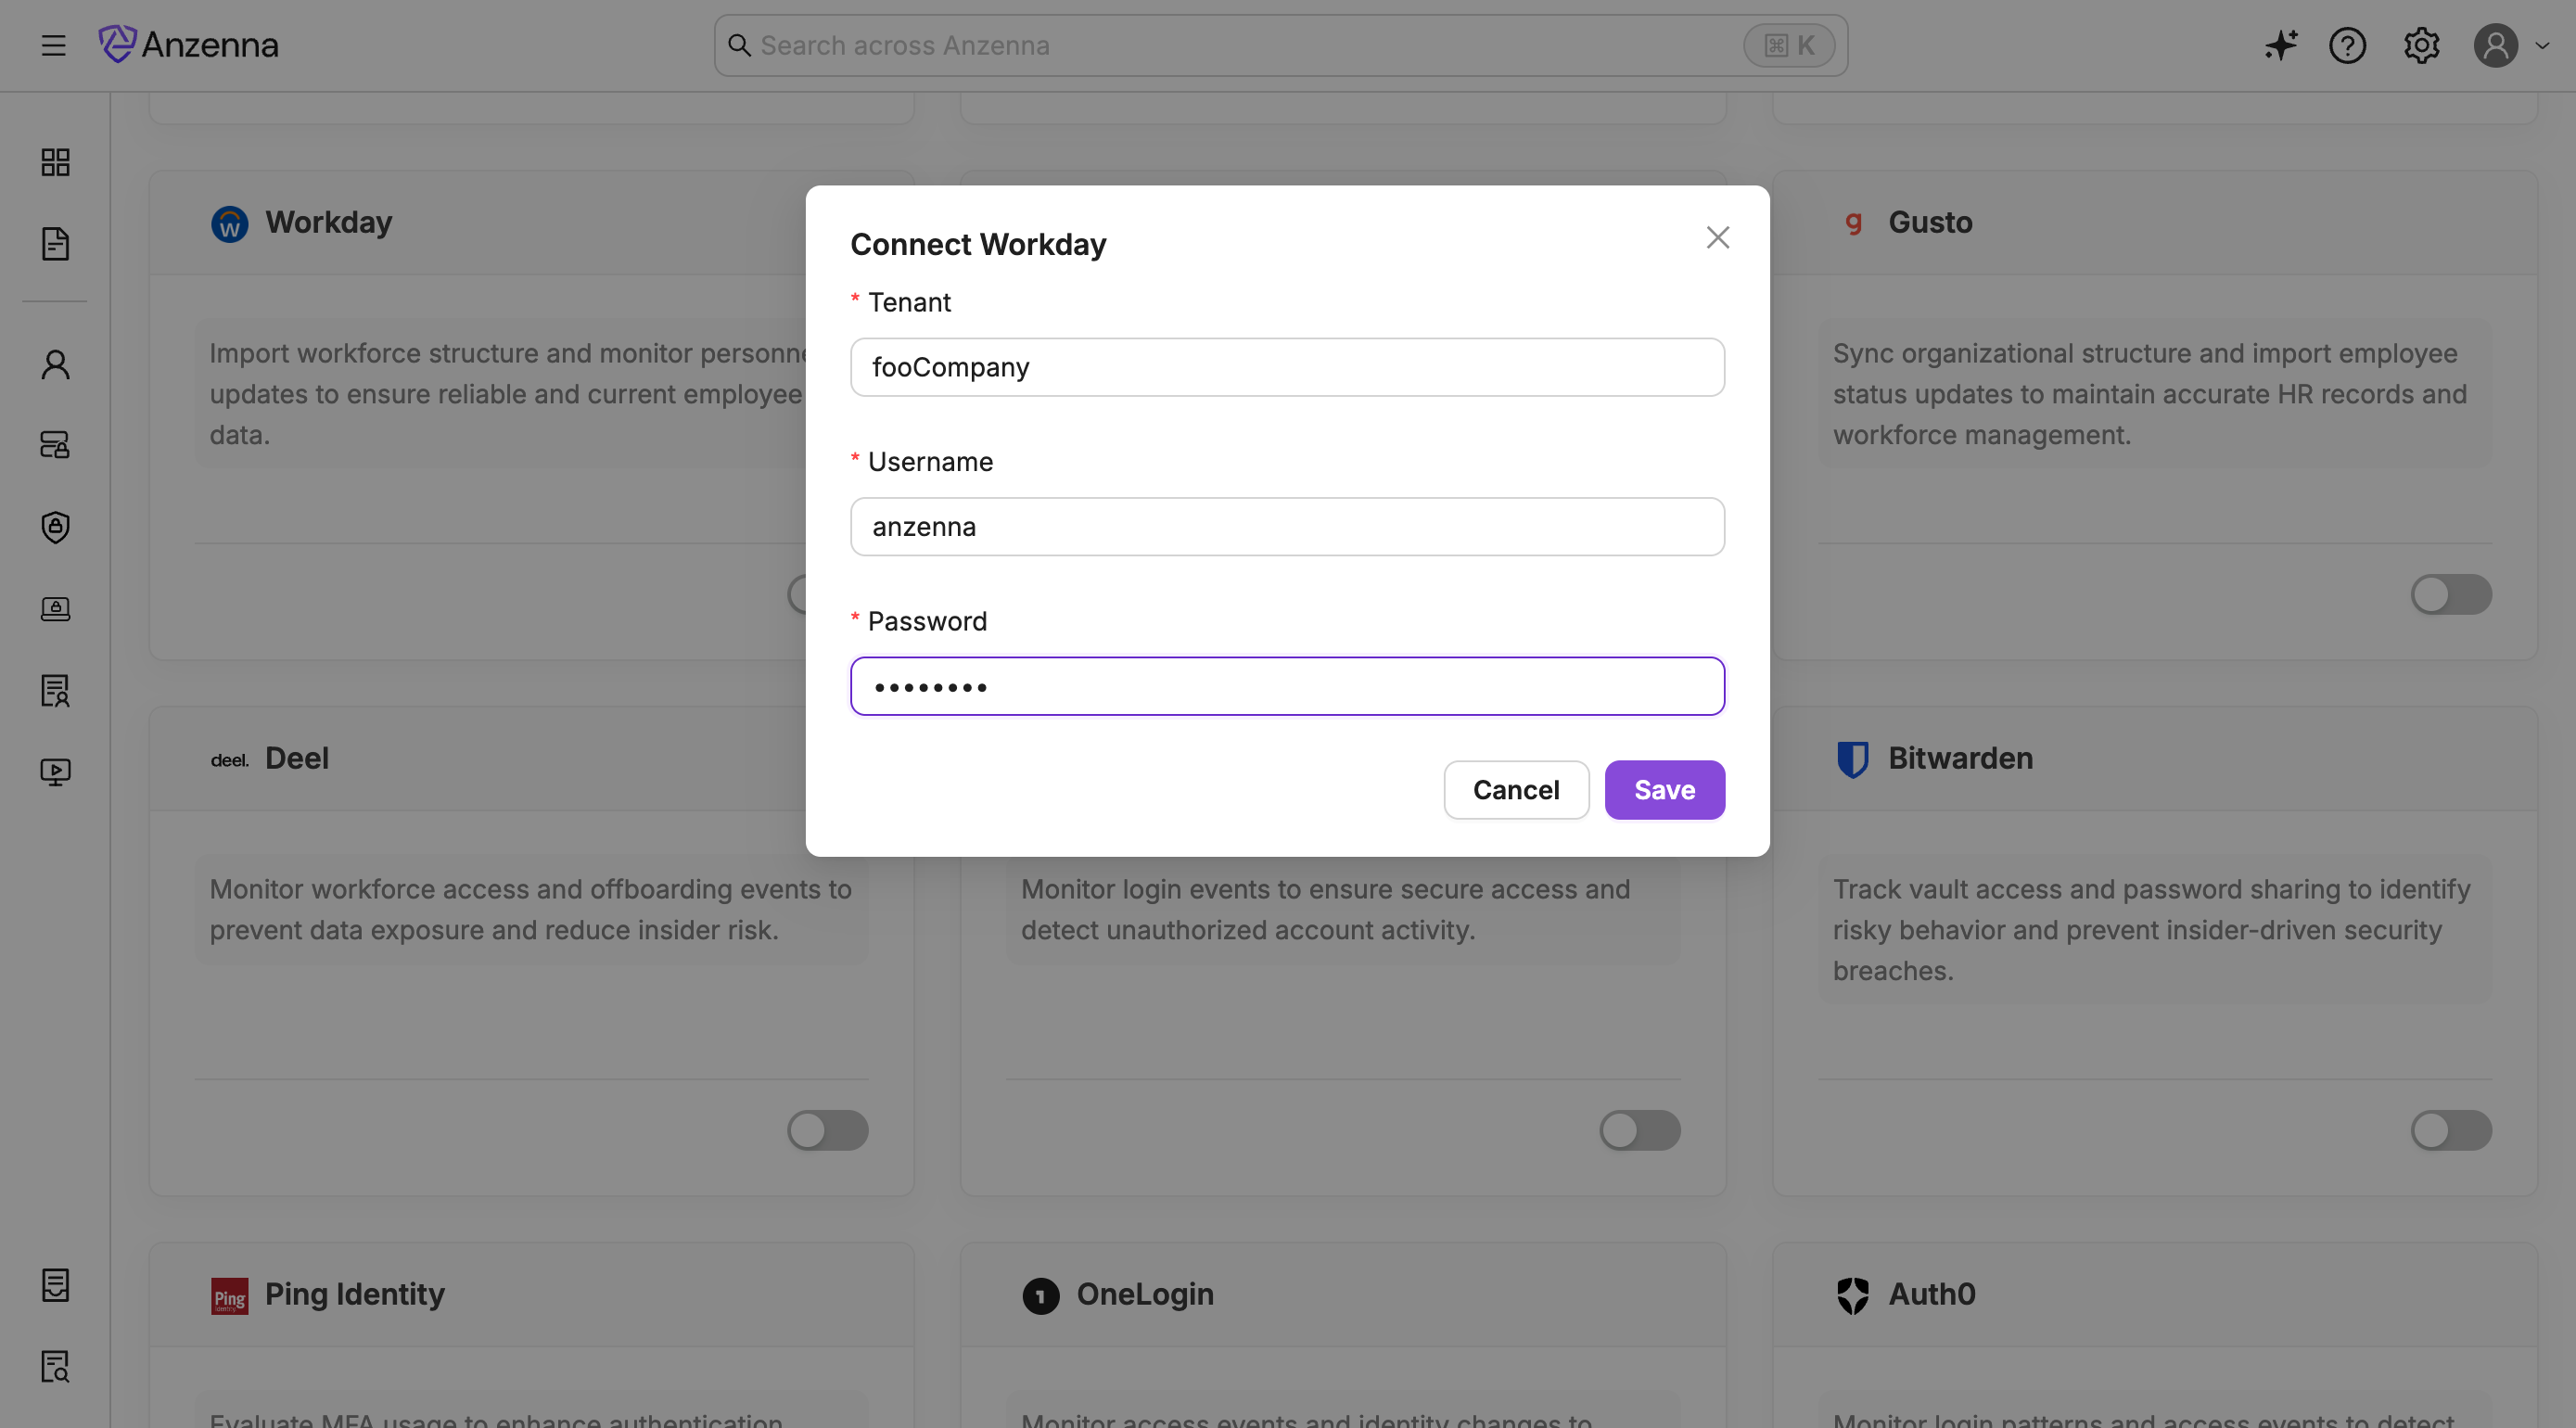
Click Save.
Workday is now connected to Anzenna. Anzenna will begin syncing workforce data for security monitoring and organizational visibility.