Investigations
An investigation is Anzenna's AI agent looking into a single user after one of their detections triggers. The agent gathers context, queries related security events, and produces a summary, a confidence level, a risk score, and a recommended action — so your team can decide what to do without rebuilding the picture from scratch.
Investigations live in their own page in the left navigation. Each user with at least one triggered detection in the last 30 days appears here, with all of their investigations grouped together.
How an investigation gets created
- A detection triggers on a user (for example, an outbound activity rule matching events for John Smith)
- The investigation agent is enqueued for that user + detection pair
- The agent calls tools to pull detection details, related events, the person's profile, and other security context
- It produces a written summary, an evidence chain, a confidence score, a risk score, and a recommended action
- The investigation appears under the user on the Investigations page and stays active for 30 days
The Investigations page
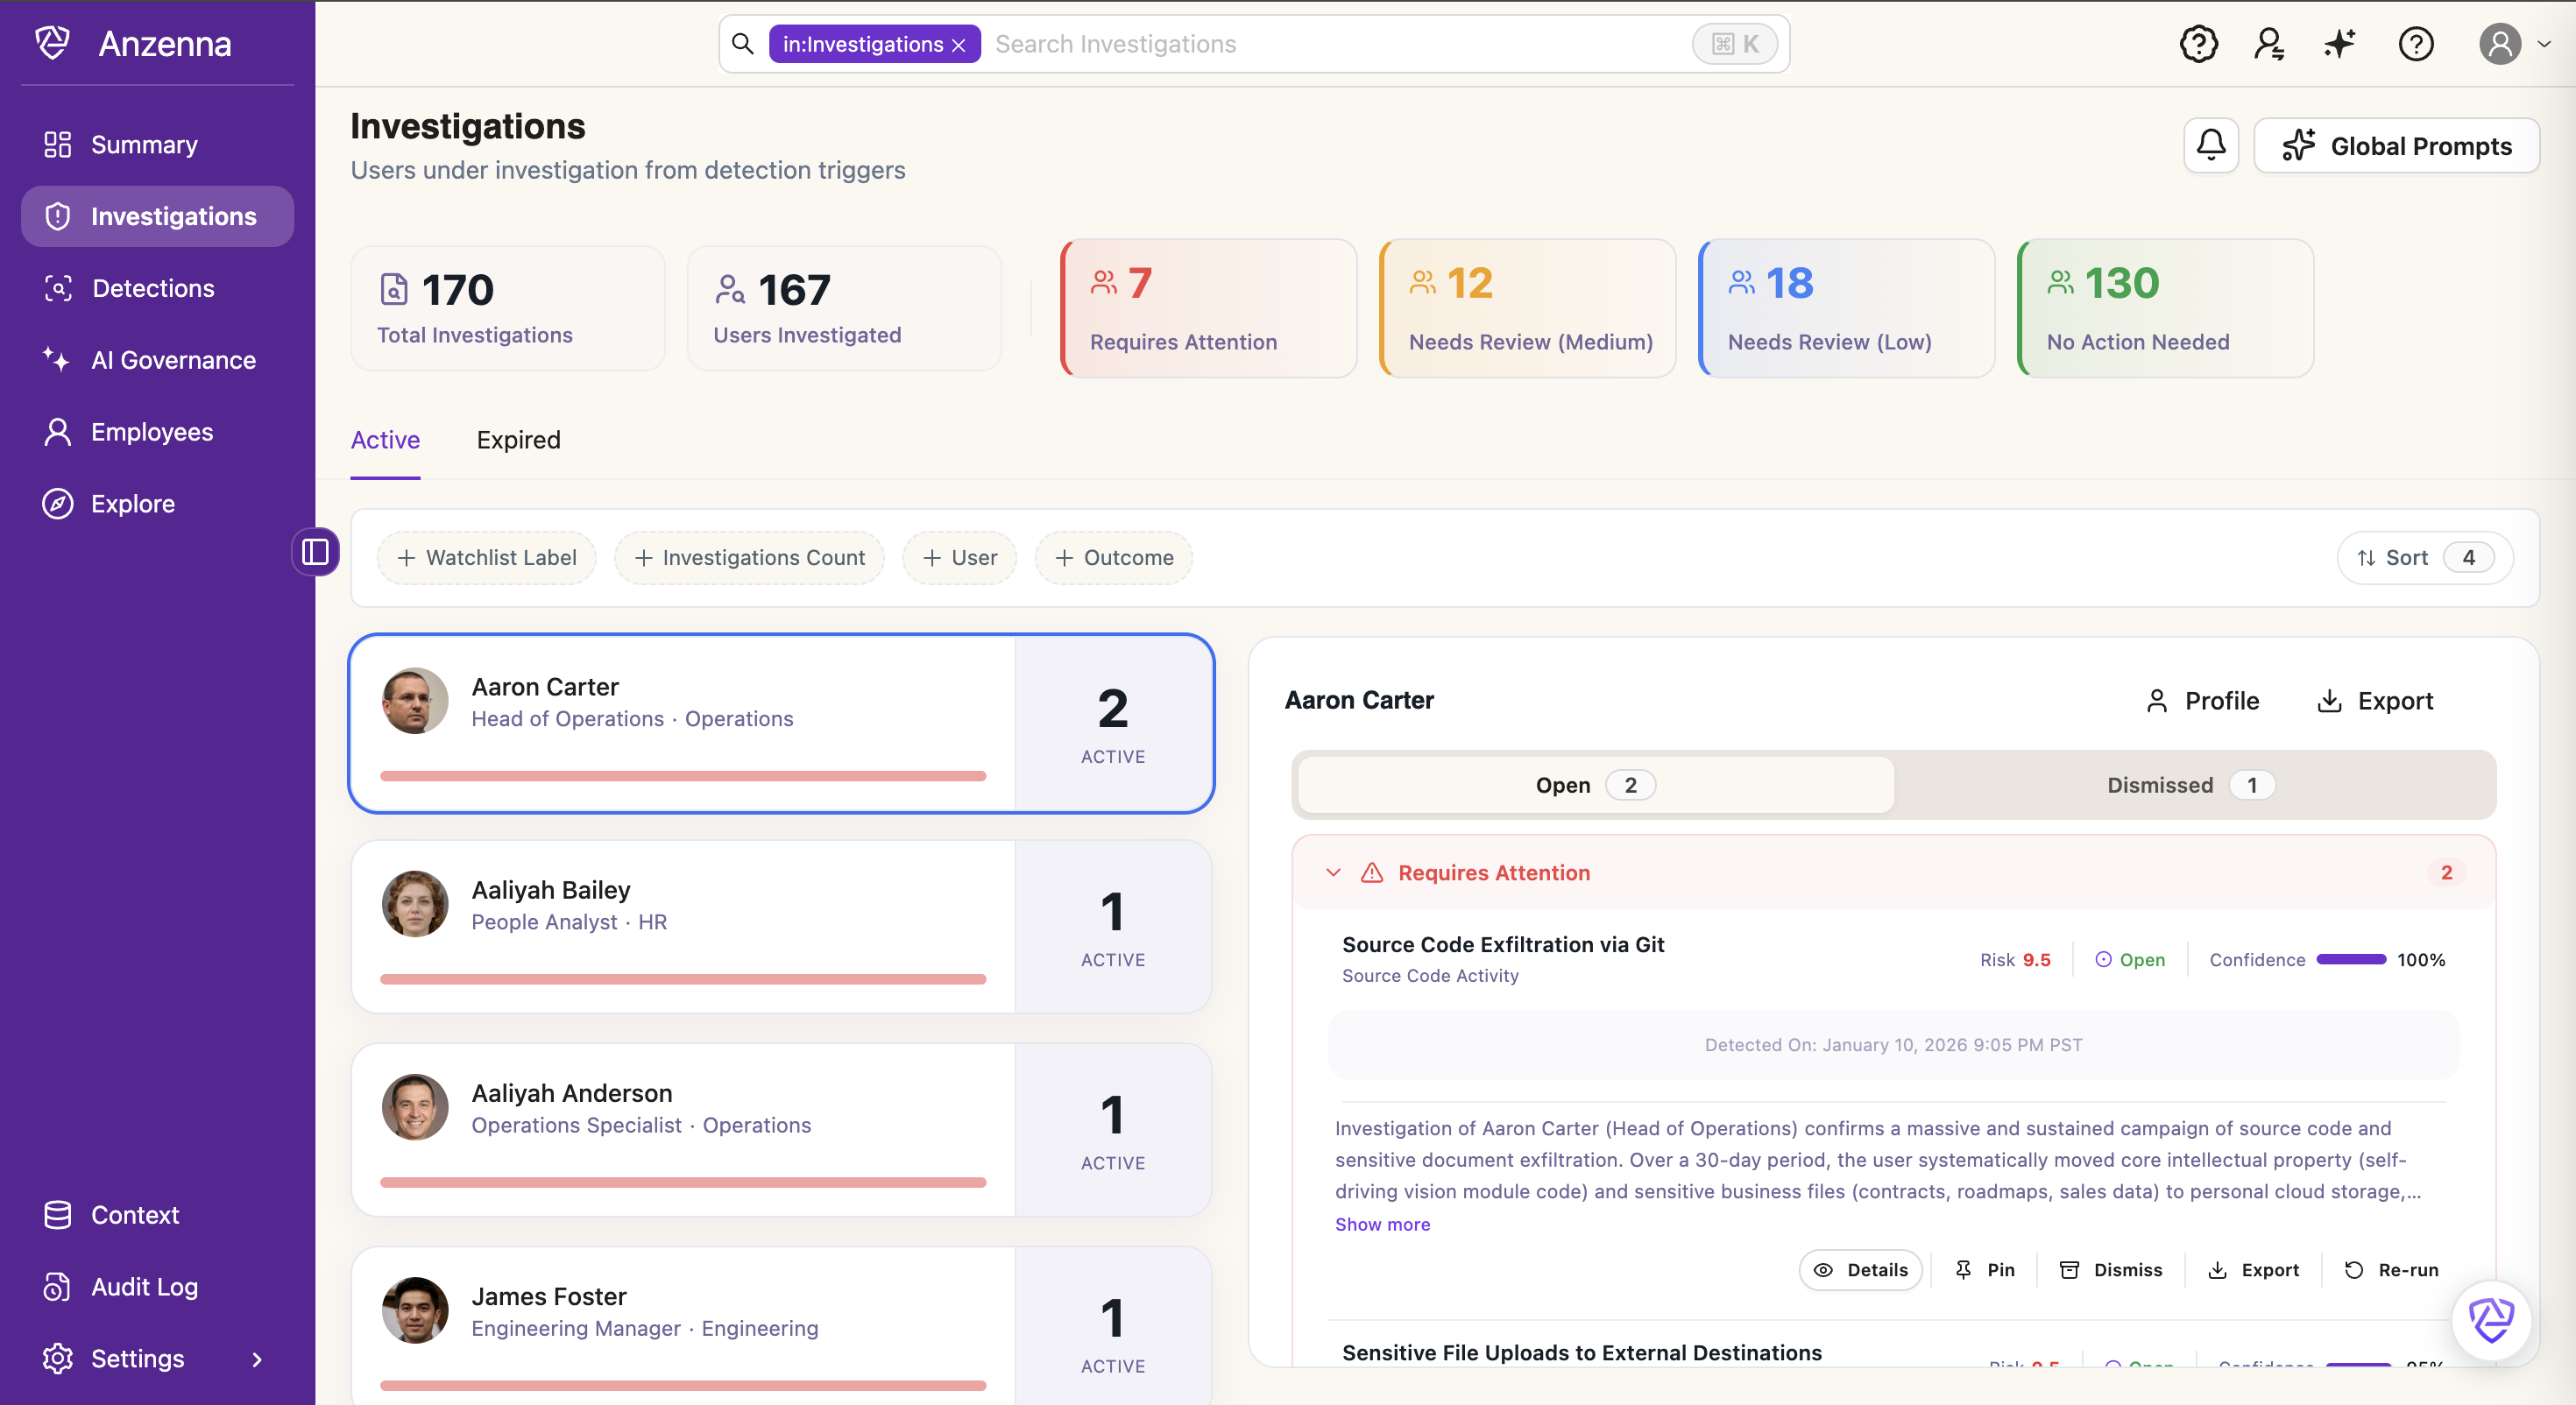
Open Investigations in the left navigation. The page has three regions:
Top stats
The counters at the top summarize the current state of investigations across your tenant:
- Total Investigations — every active investigation
- Users Investigated — distinct users with at least one active investigation
- Requires Attention — investigations the agent flagged for immediate action
- Needs Review (Medium) and Needs Review (Low) — investigations worth reviewing, prioritized by signal strength
- No Action Needed — the agent investigated and found nothing requiring follow-up
User list
The left column lists every user with active investigations. Each card shows:
- The user's name and a composite risk score
- A horizontal bar broken out by recommended-action color (red / amber / blue / green) so you can see at a glance how their investigations are distributed
- A count of active investigations for that user
Use the filter chips above the list (Watchlist Label, Investigations Count, User, Outcome, Risk) to narrow the list, and the sort menu to change the ordering.
Detail panel
The right column shows the selected user's investigations, grouped by recommended action. Two sub-tabs control which set is shown:
- Open — investigations you haven't dismissed
- Dismissed — investigations you've marked as no longer needing attention
Each investigation card surfaces the detection name, the recommended action, risk and confidence, a small Trigger Timeline, and the first few lines of the agent's summary. Show more expands the summary; the action buttons at the bottom let you view details, pin, dismiss, export, or re-run the investigation.
Recommended actions
Every investigation is assigned one of four recommended-action buckets. These drive the color bands on the user list, the top-of-page counters, and the grouping inside the detail panel.
| Bucket | Meaning | Typical response |
|---|---|---|
| Requires Attention | The agent saw a suspicious chain of events that warrants immediate review | Investigate now; consider a response action |
| Needs Review (Medium) | Notable activity but lower confidence or weaker signal | Review when capacity allows |
| Needs Review (Low) | Activity worth a glance but unlikely to be malicious | Periodic review or batch triage |
| No Action Needed | The agent investigated and found nothing actionable | Informational; no follow-up required |
Reading an investigation
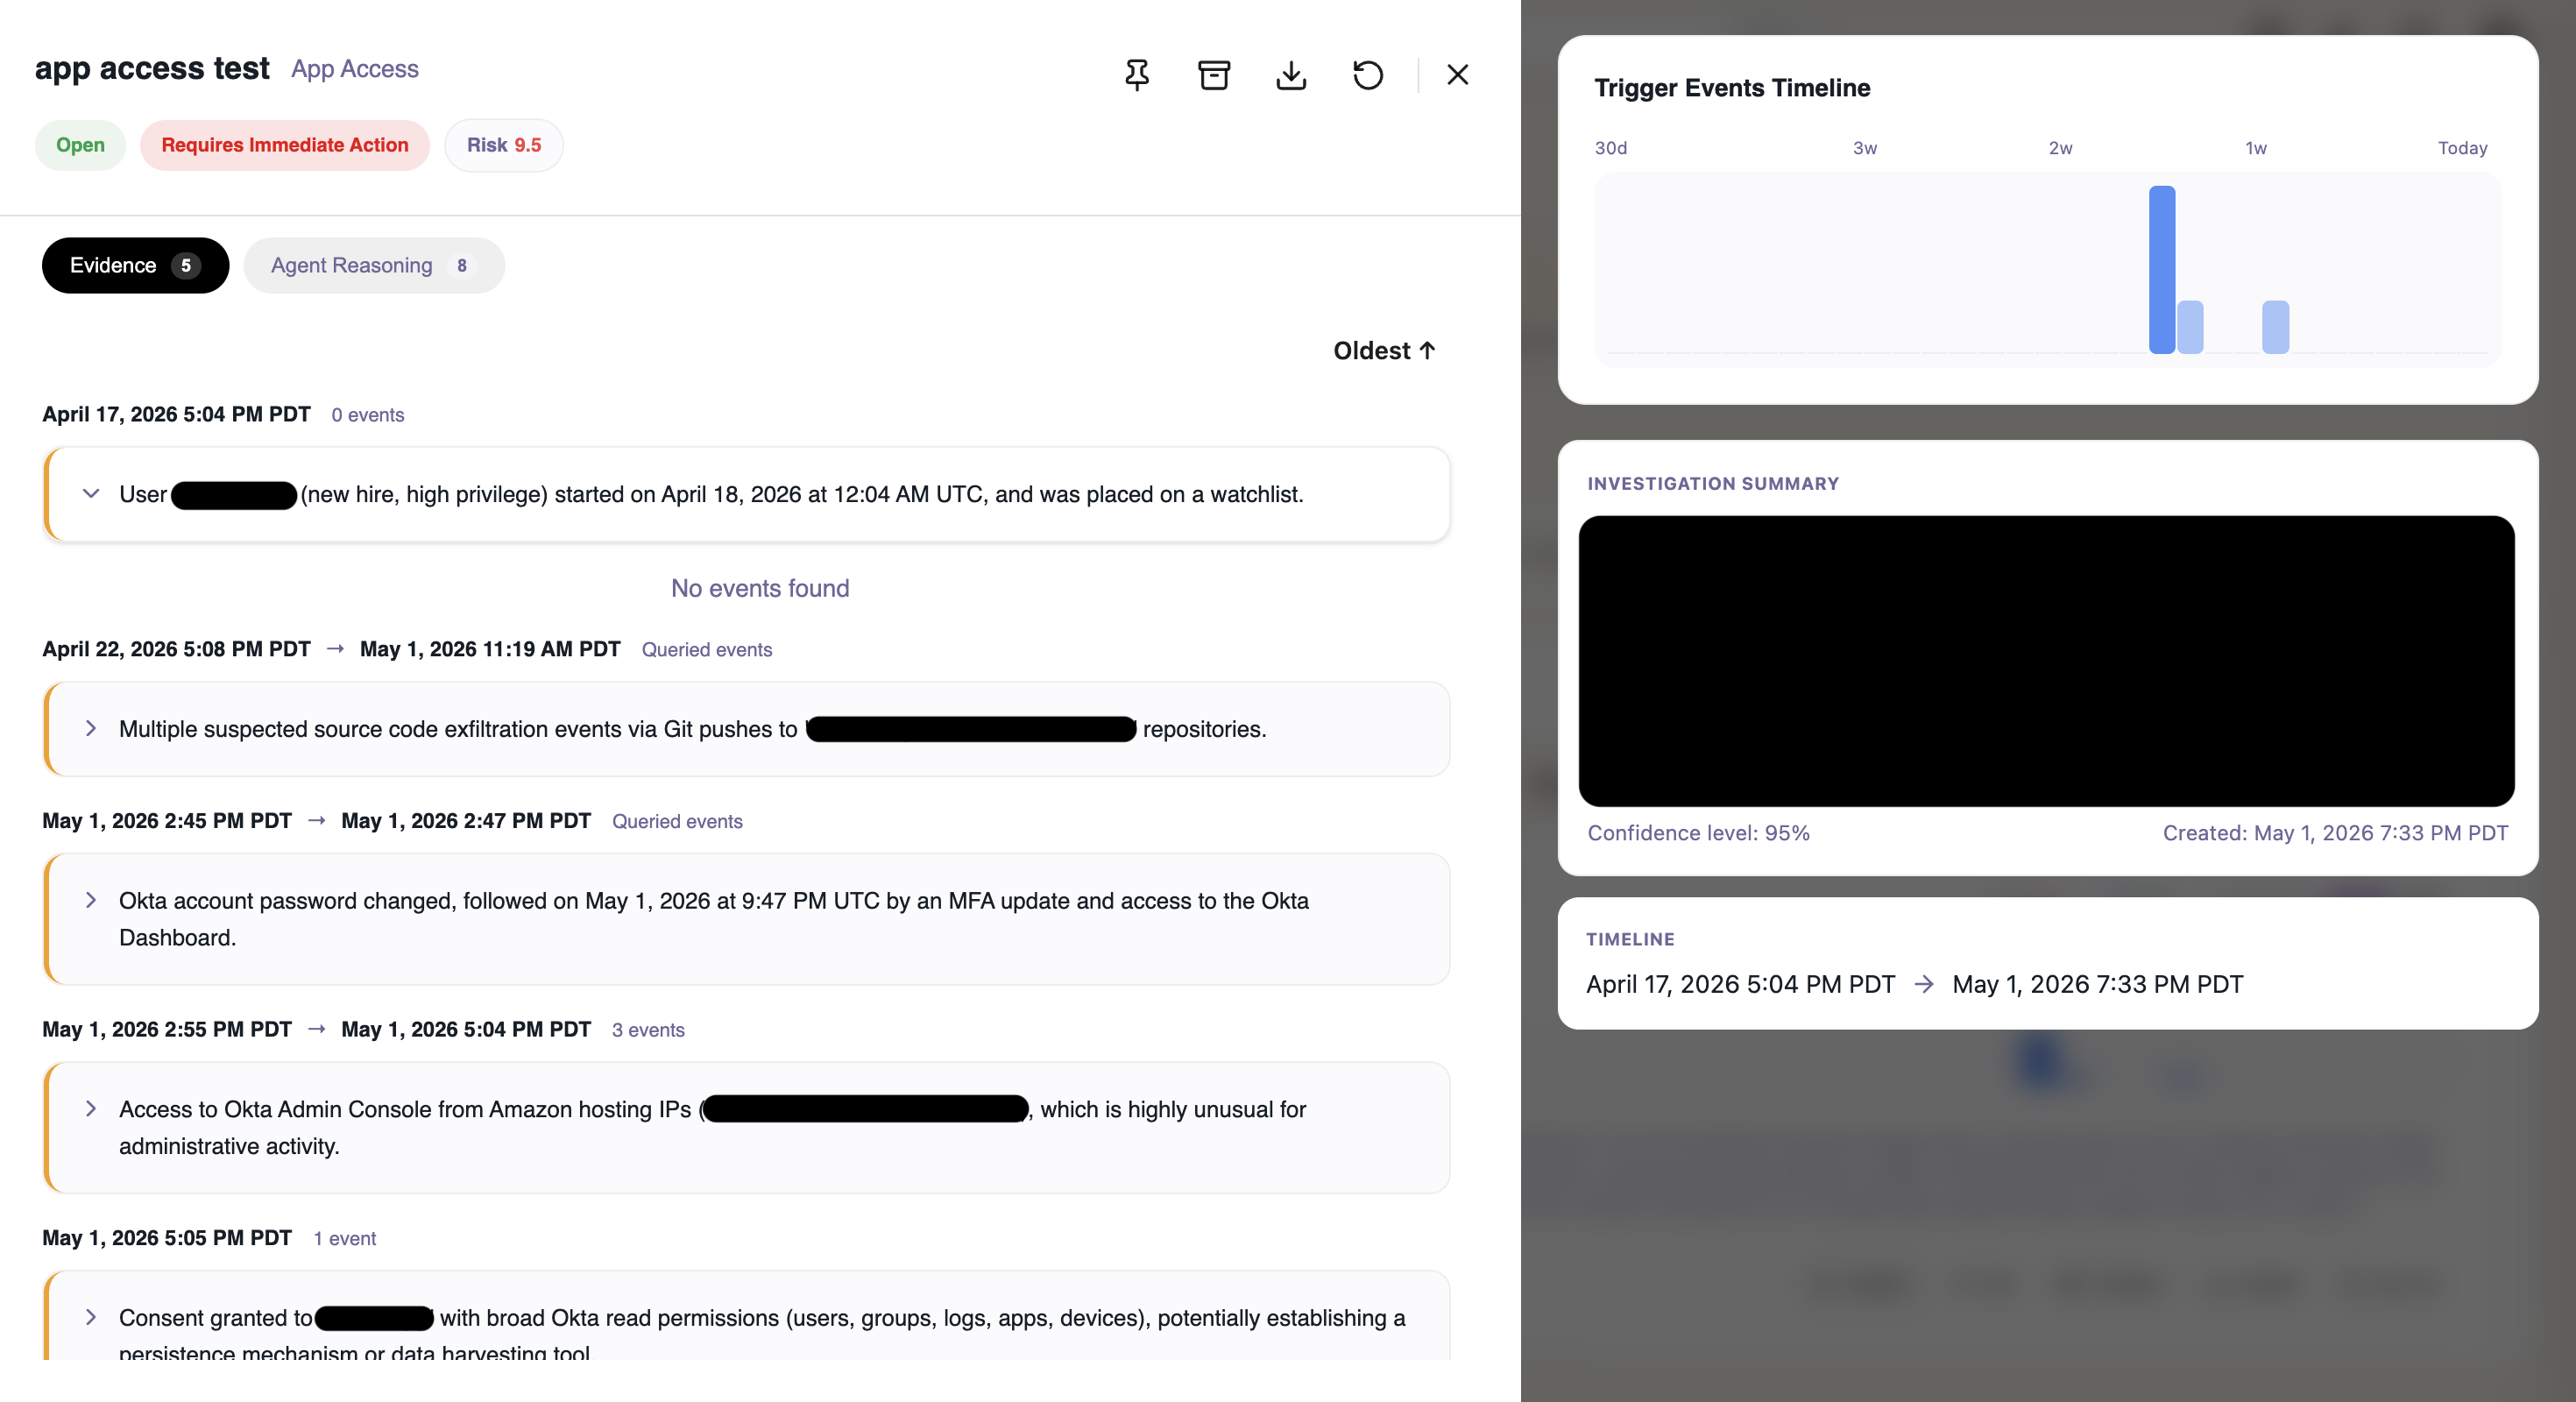
Click Details on an investigation card to open the investigation drawer. The drawer has two tabs on the left and a fixed summary panel on the right.
Summary panel
The right side of the drawer shows the agent's overall conclusion:
- Trigger Events Timeline — bar chart of triggering events over the last 30 days
- Investigation Summary — the agent's narrative explanation of what happened and why it matters
- Confidence level and Created timestamp
- Timeline — the analysis window the agent considered
Evidence tab
The Evidence tab is the chronological case file. The agent groups events by date range and writes a short observation for each one — for example, "User installed AnyDesk, a remote access tool frequently used to facilitate unauthorized data access." Expand any entry to see the underlying events.
Agent Reasoning tab
The Agent Reasoning tab shows every tool call the agent made while building the investigation — what it asked for, the parameters it used, and what came back. Use this when you want to verify the agent's reasoning or understand exactly which queries produced a finding.
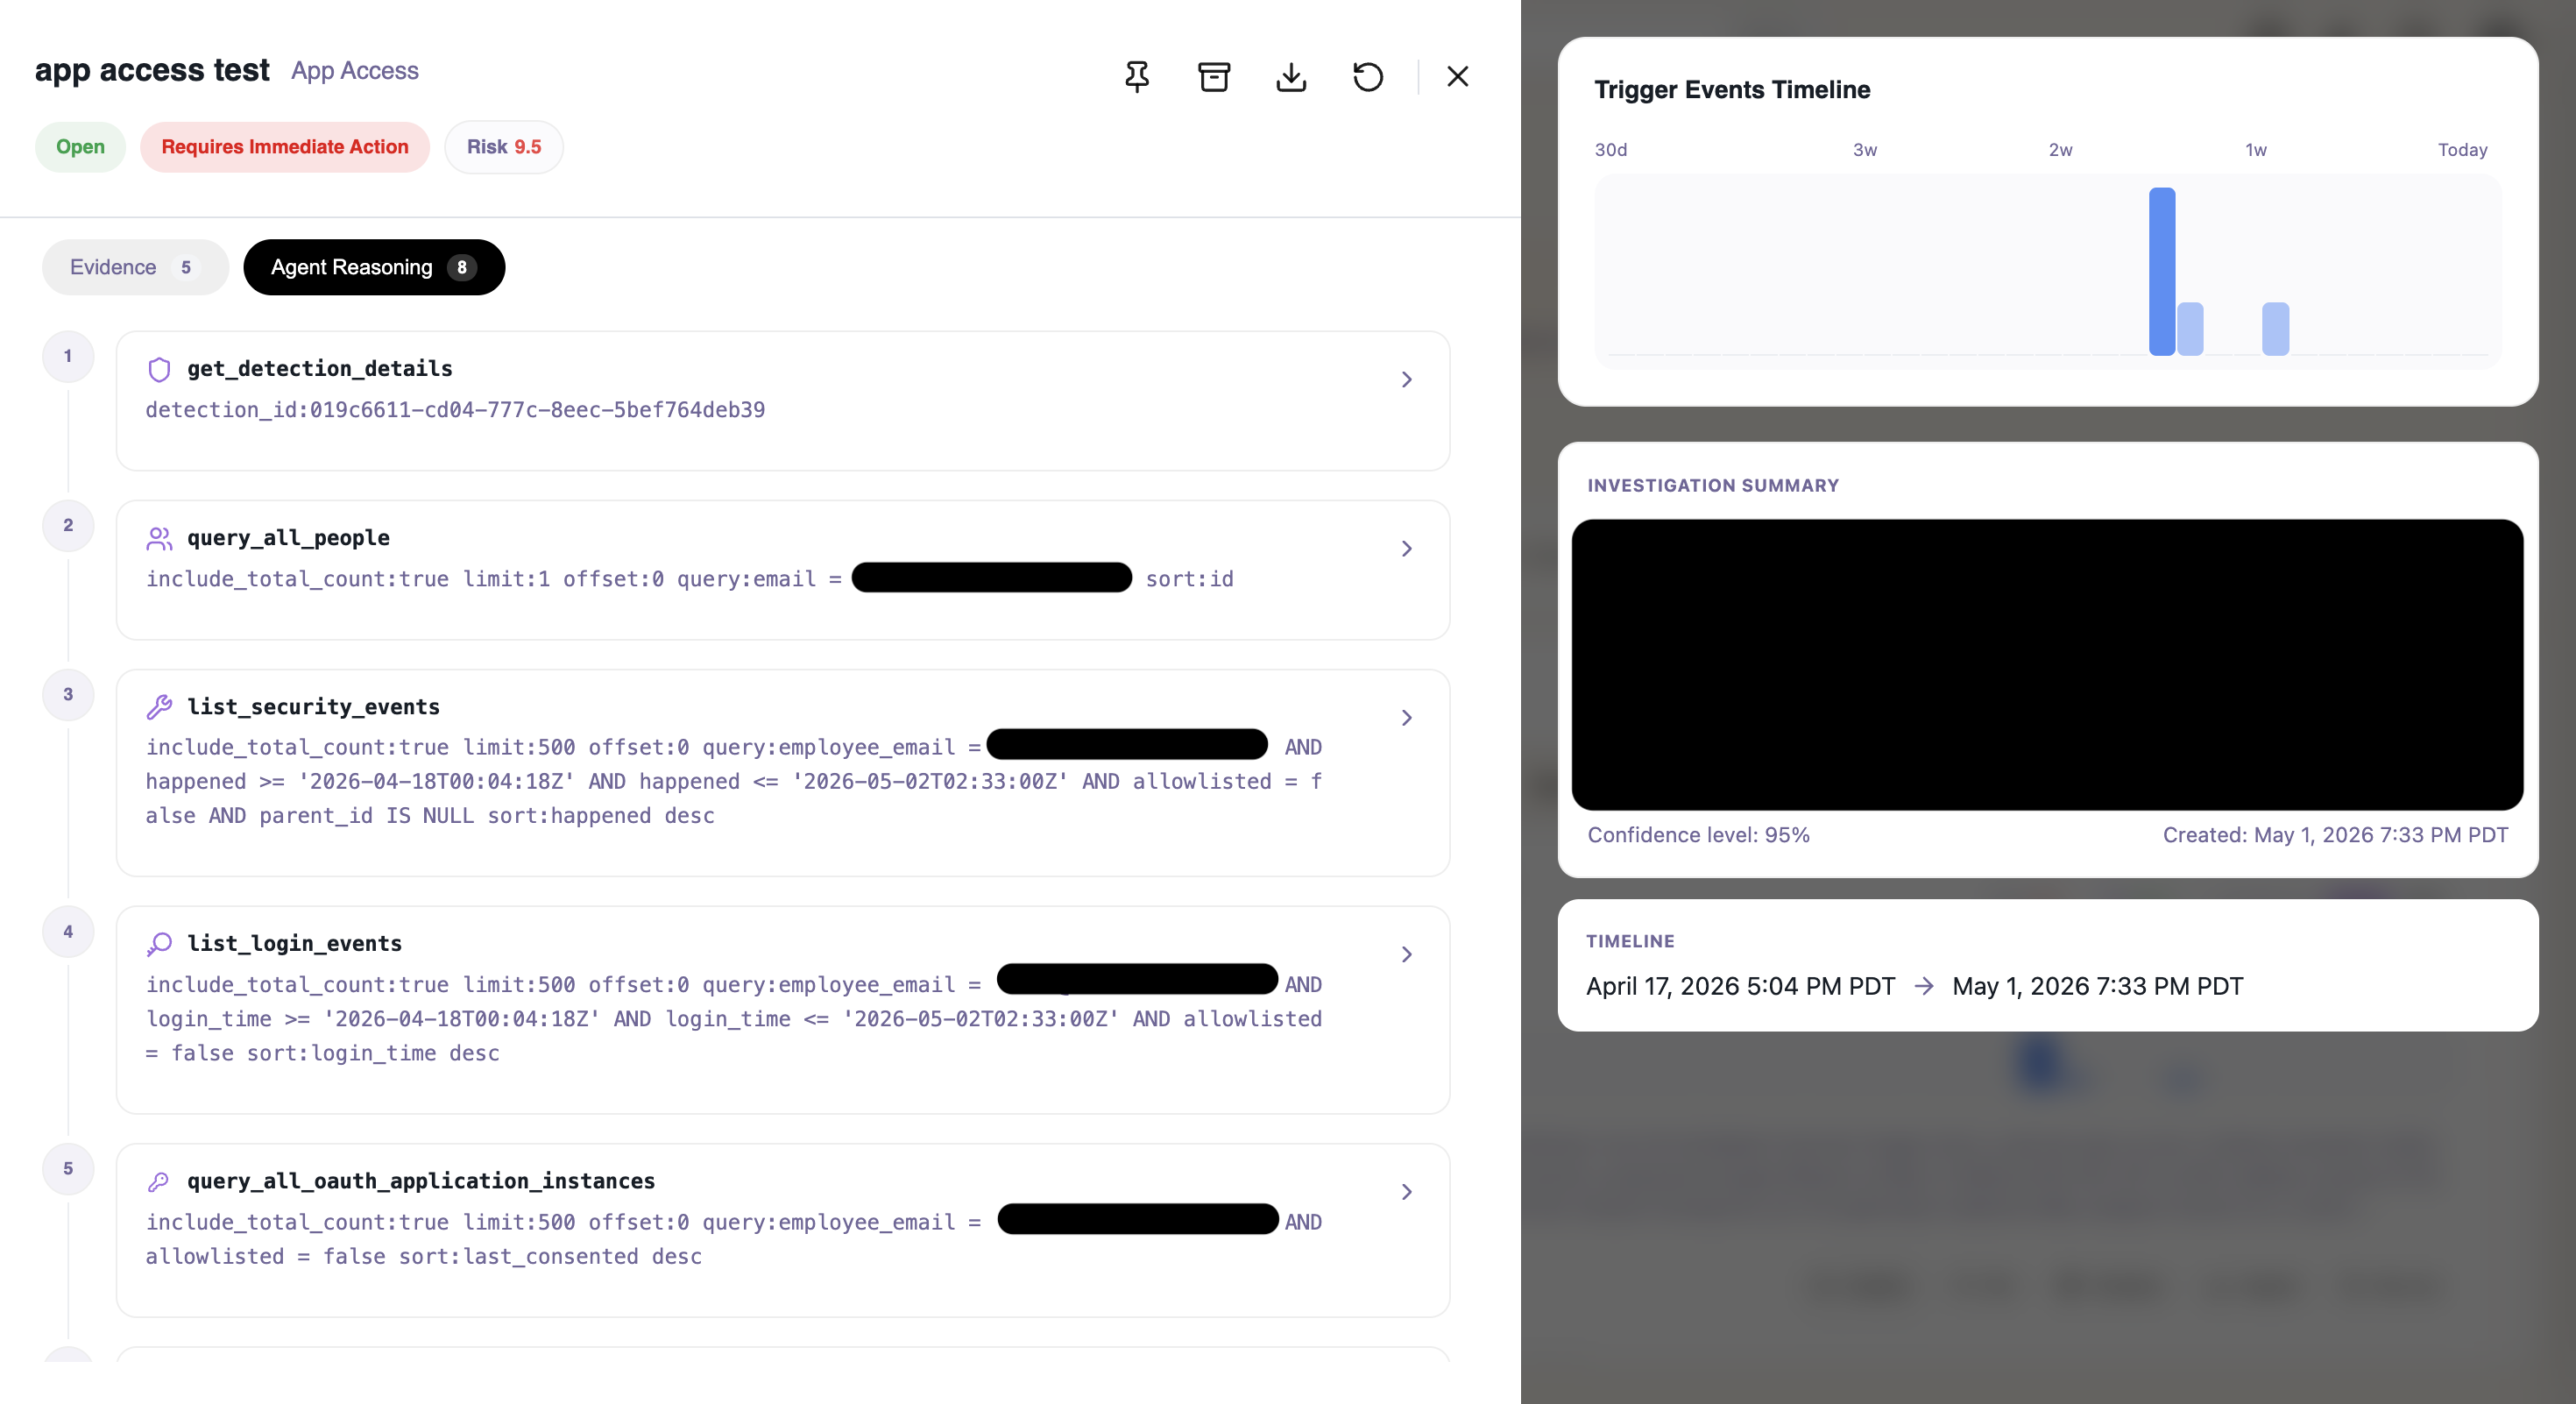
Every tool call shows the exact parameters the agent used. If you think the agent missed something, this is the first place to look.
Acting on an investigation
Each investigation card and the drawer header expose the same set of actions:
| Action | What it does |
|---|---|
| Details | Opens the full investigation drawer (Evidence + Agent Reasoning + Summary) |
| Pin | Keeps the investigation pinned at the top of the user's list while you work it |
| Dismiss | Moves the investigation to the user's Dismissed sub-tab. Use this when you've decided no further action is needed |
| Export | Downloads the investigation (summary, evidence, and underlying events) for ticketing or audit |
| Re-run | Re-runs the agent against the same detection and user. Use this after editing prompts, or when new events have come in since the last run |
Dismissing an investigation only affects how it appears in the UI — it does not silence the underlying detection. If you want to stop a detection from triggering further investigations, edit the detection itself or add the relevant activity to your allowlist.
Expired investigations
Investigations stay active for 30 days from the triggering detection. After that, they move to the Expired tab. Expired investigations are read-only — you can still open them, review the evidence and summary, pin, and export, but they no longer accept dismissal or re-run.
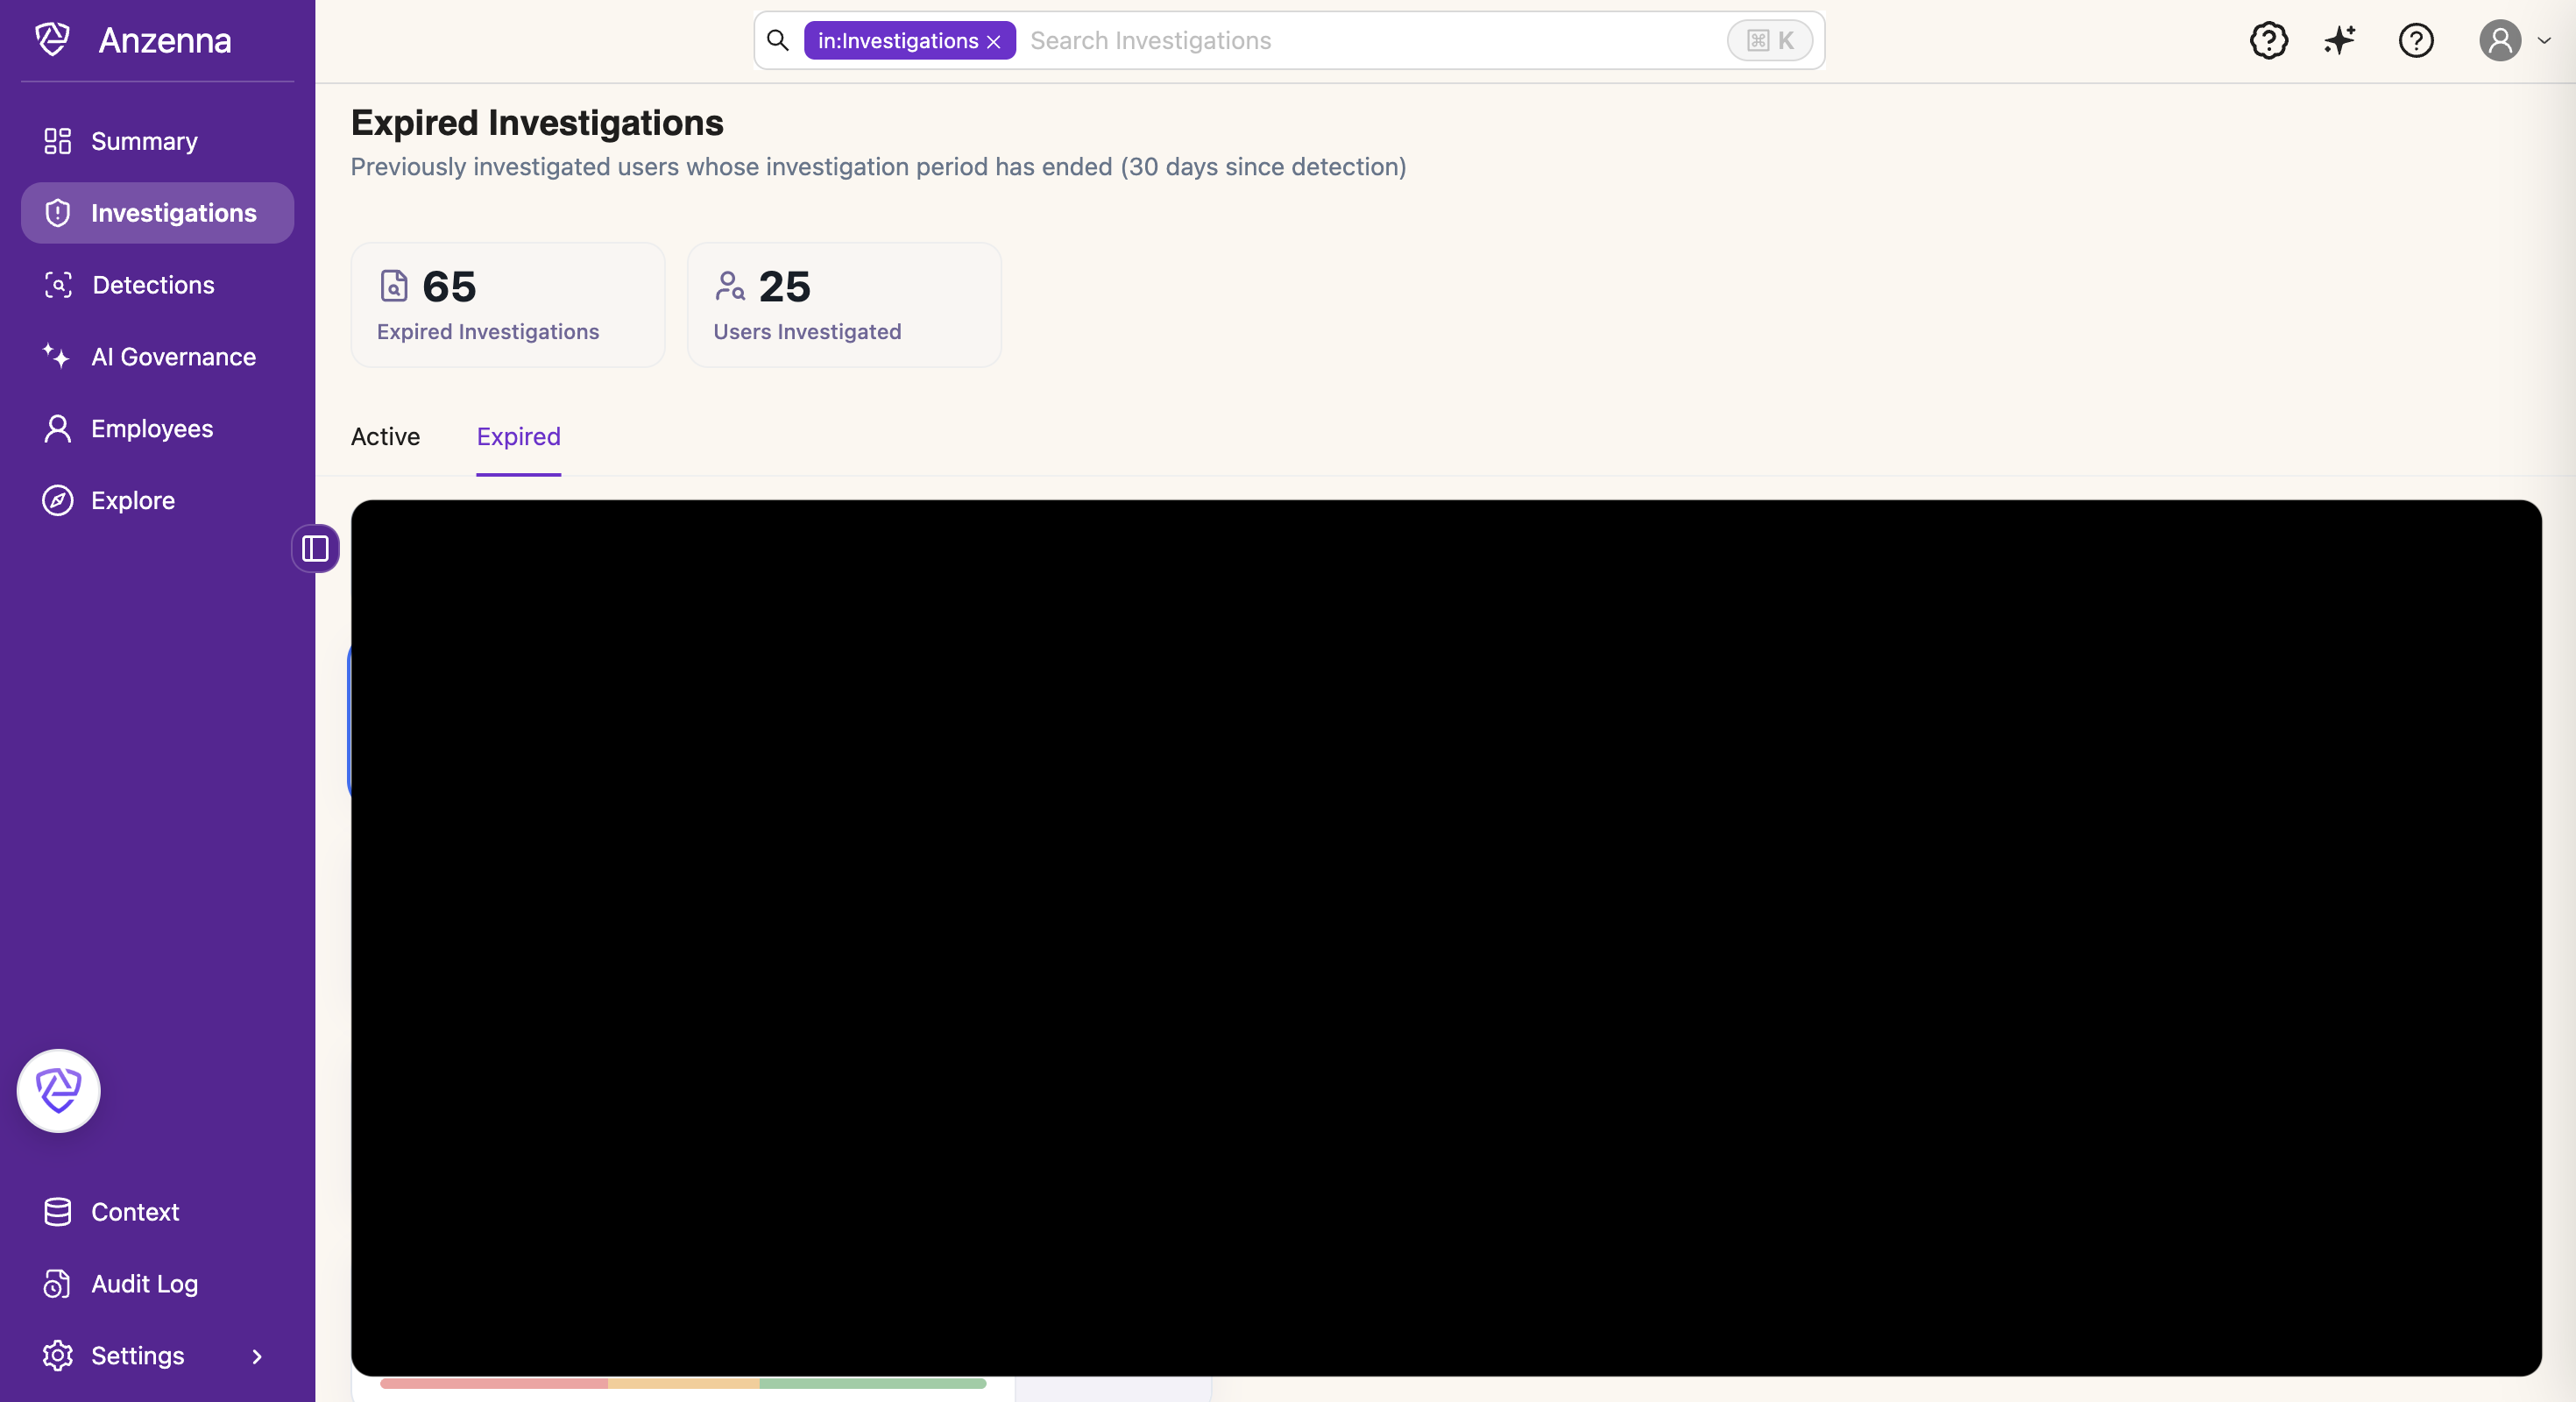
The Expired tab is useful for retrospective review — confirming a user that was previously flagged is now clean, or pulling historical context when a new detection fires on the same person.
Steering the agent with Investigation Prompts
Investigation prompts let you give the agent additional instructions to follow when it analyzes incidents — for example, "Check for lateral movement across systems," or "Flag any access from non-corporate IP ranges." Prompts come in two scopes:
- Global prompts — applied to every investigation, across all detections
- Detection prompts — applied only to investigations triggered by a specific detection
There are four places you can edit prompts, each scoped to where you are in the product:
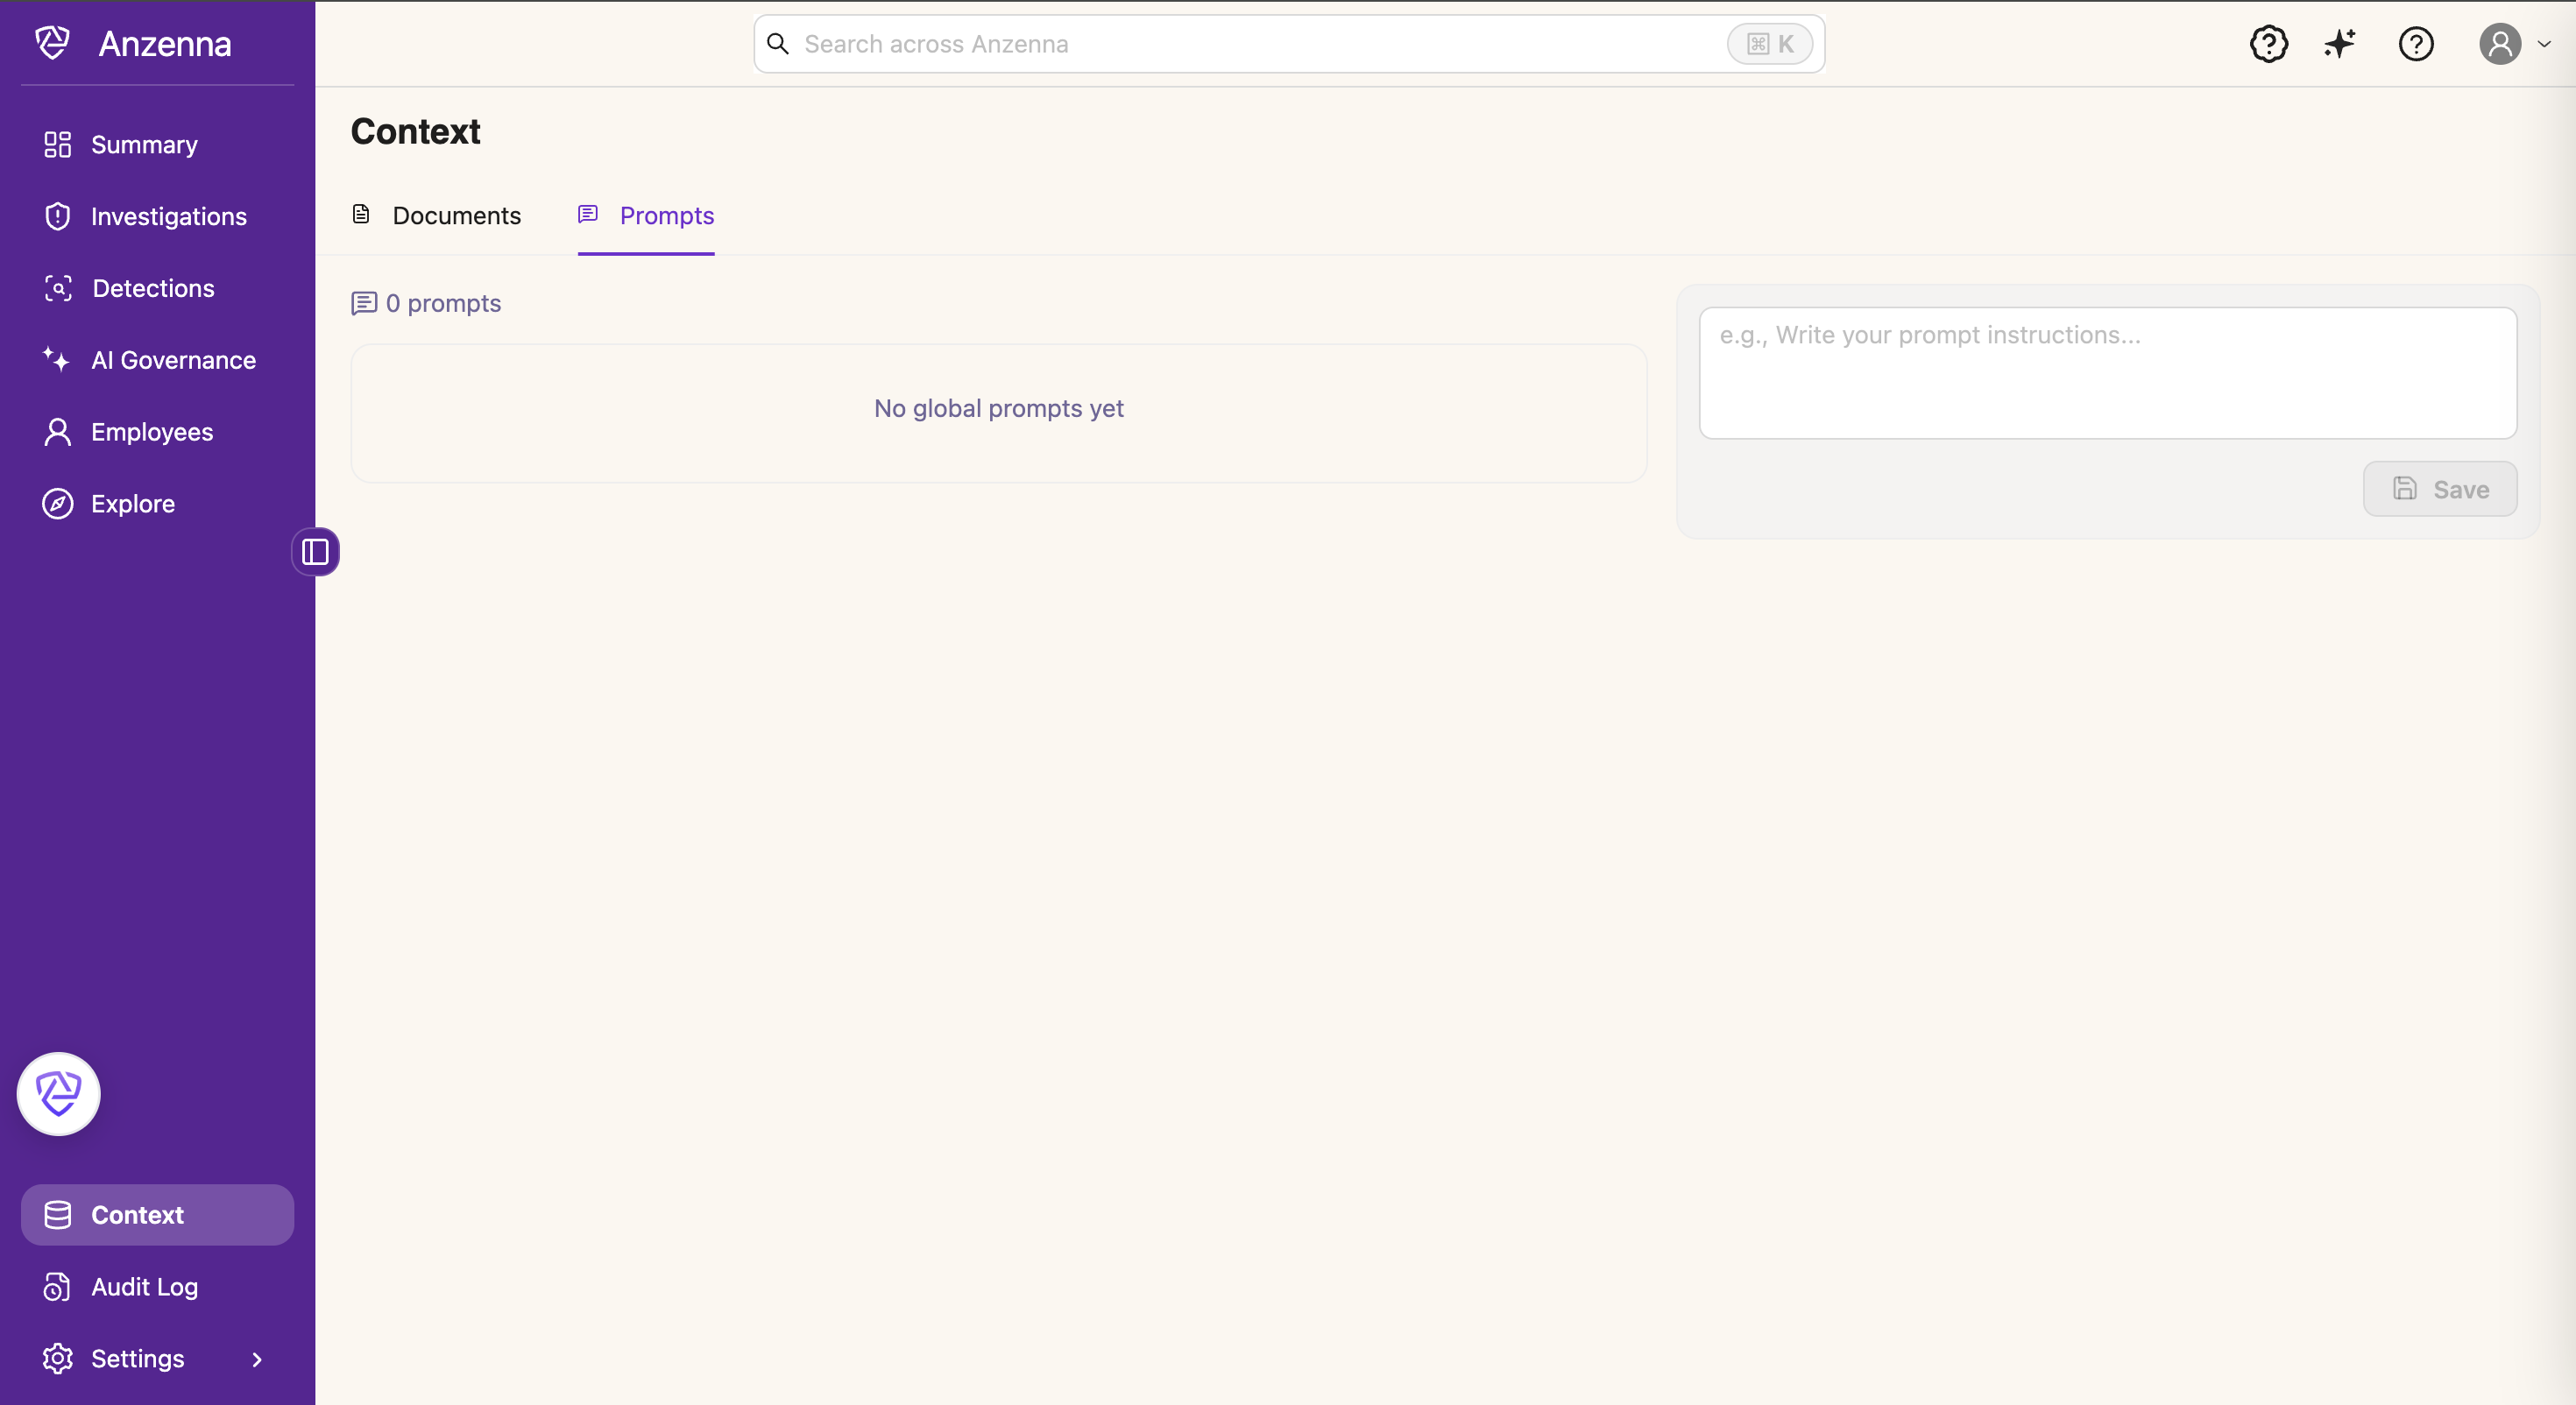
From the Context page — global prompts
The Context page (left nav) has a Prompts tab that's the dedicated home for global prompts. Use it when you want a full-page view to write, review, or organize multiple prompts at once. Click Save to persist your changes.
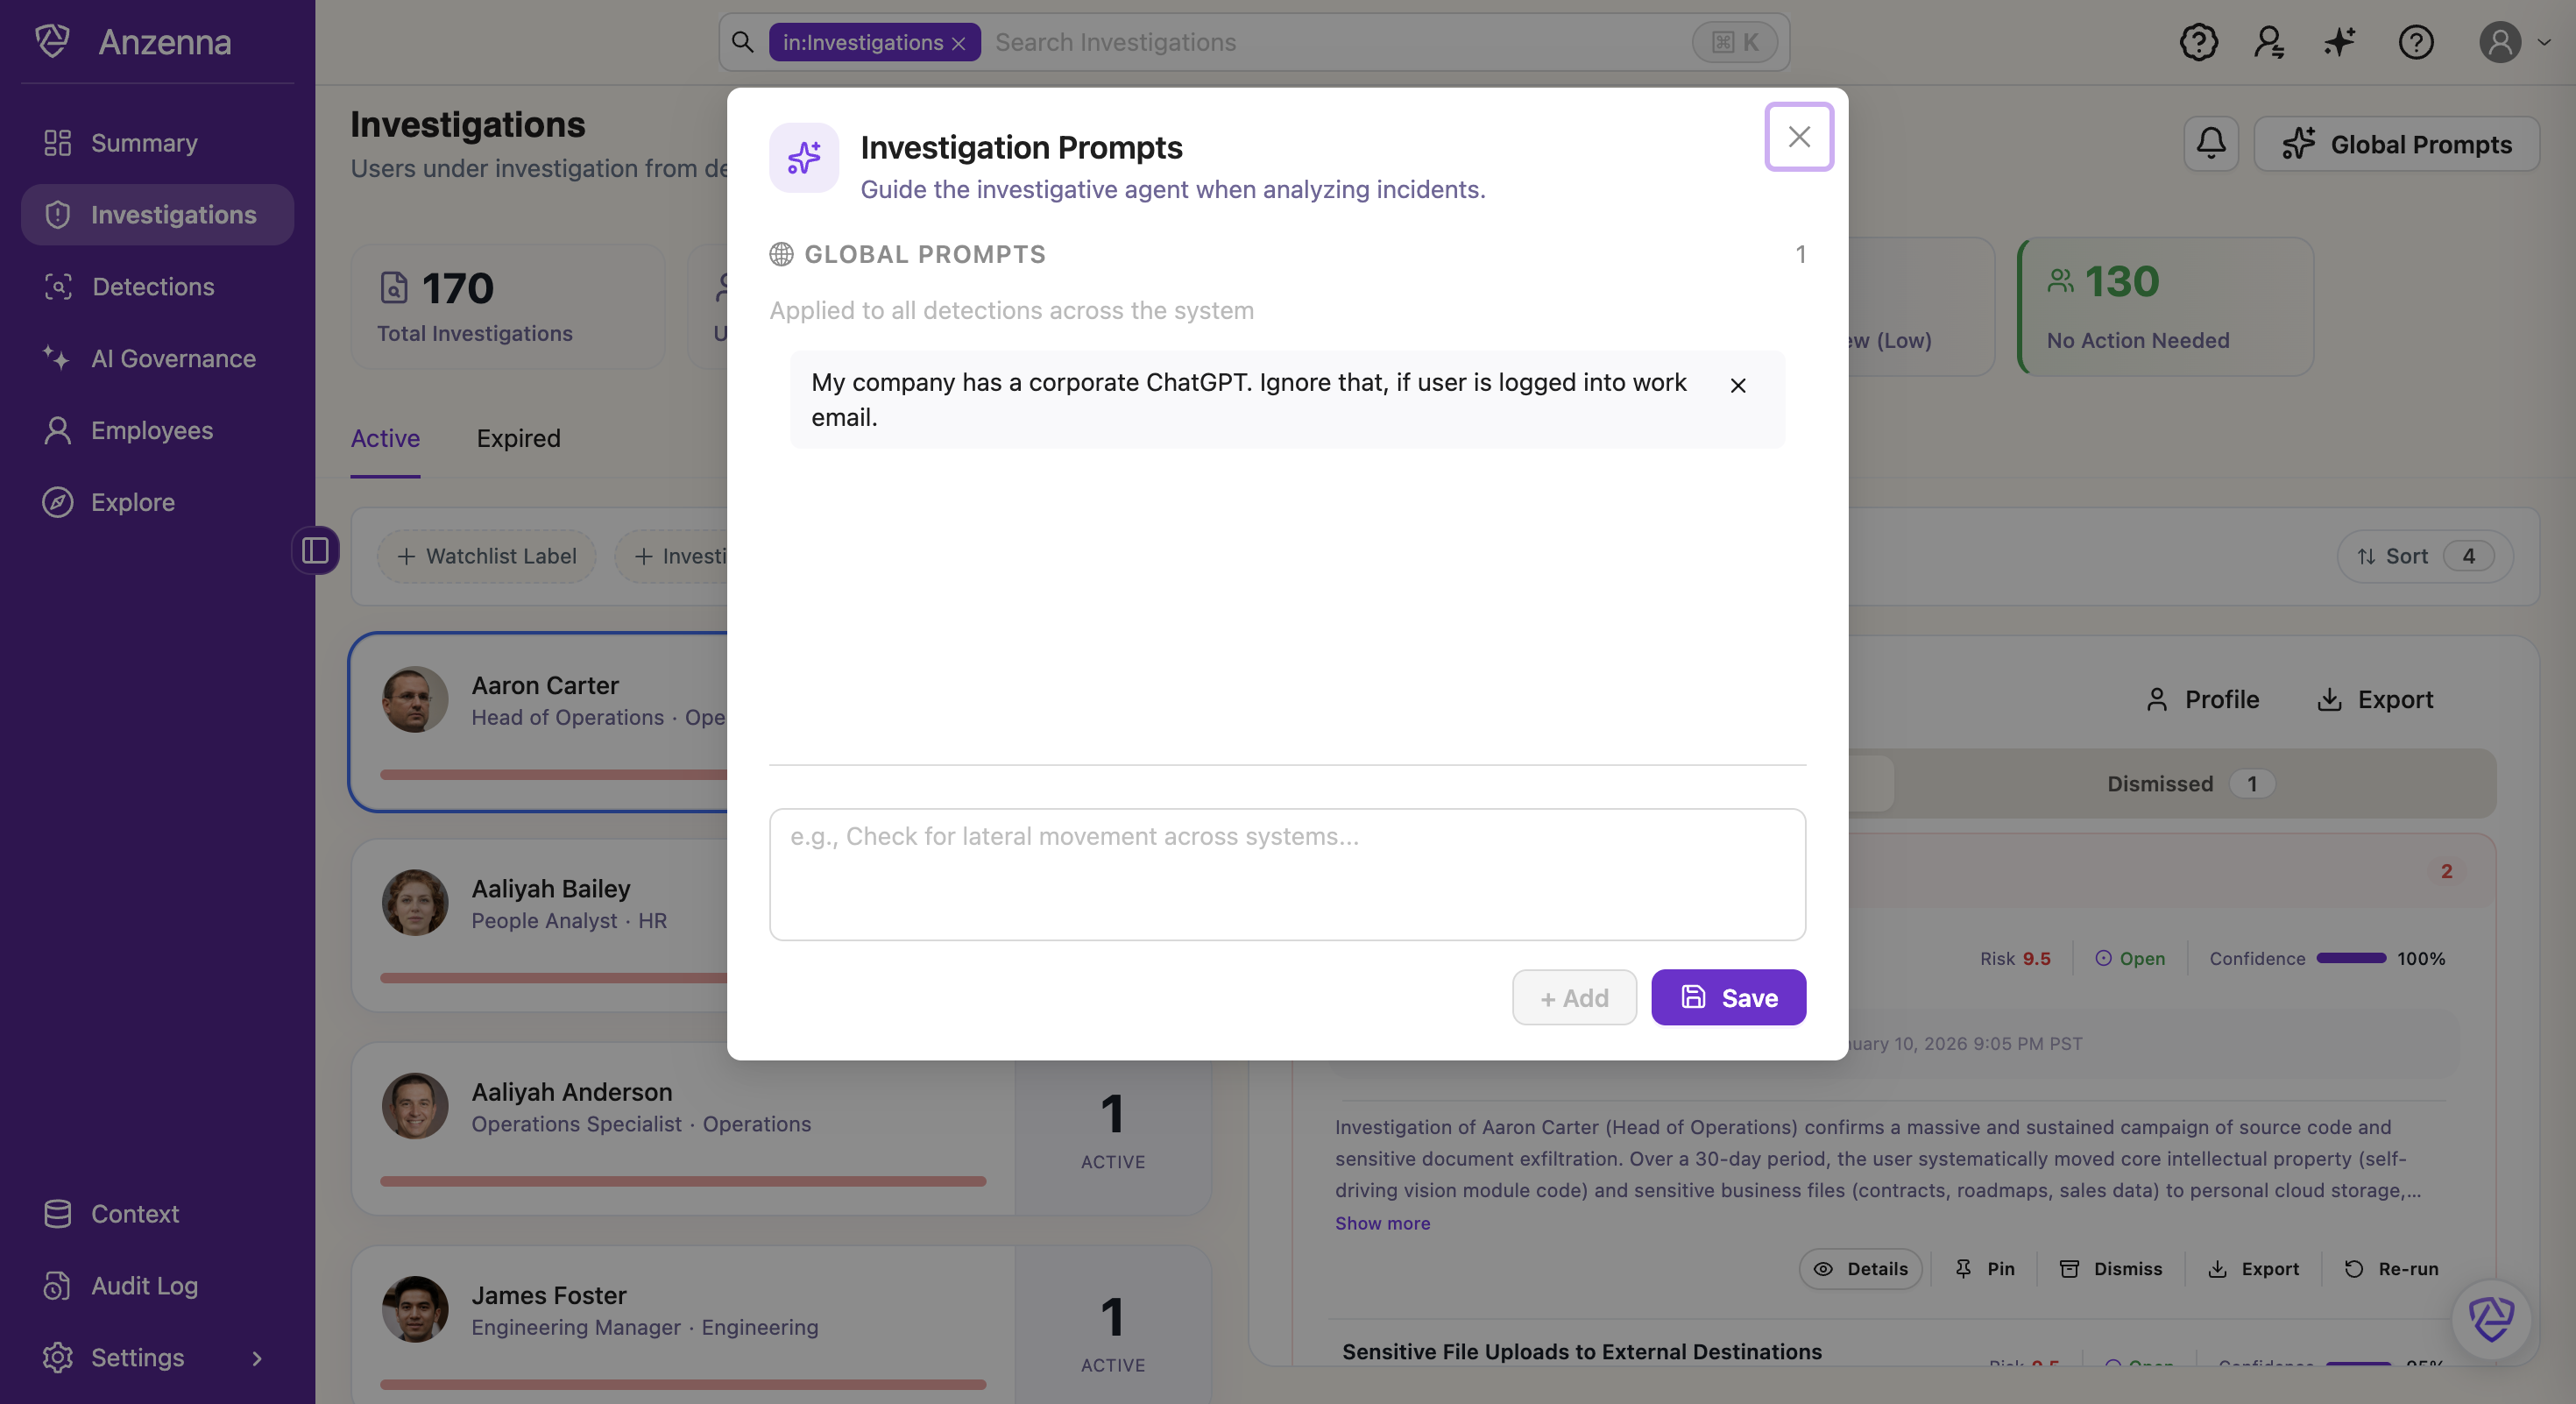
From the Investigations page — global prompts
Click Global Prompts in the top right of the Investigations page to open the global-prompts editor as a quick modal. This is the same global prompt list as on the Context page — useful when you want to tweak prompts without leaving the investigations workflow.
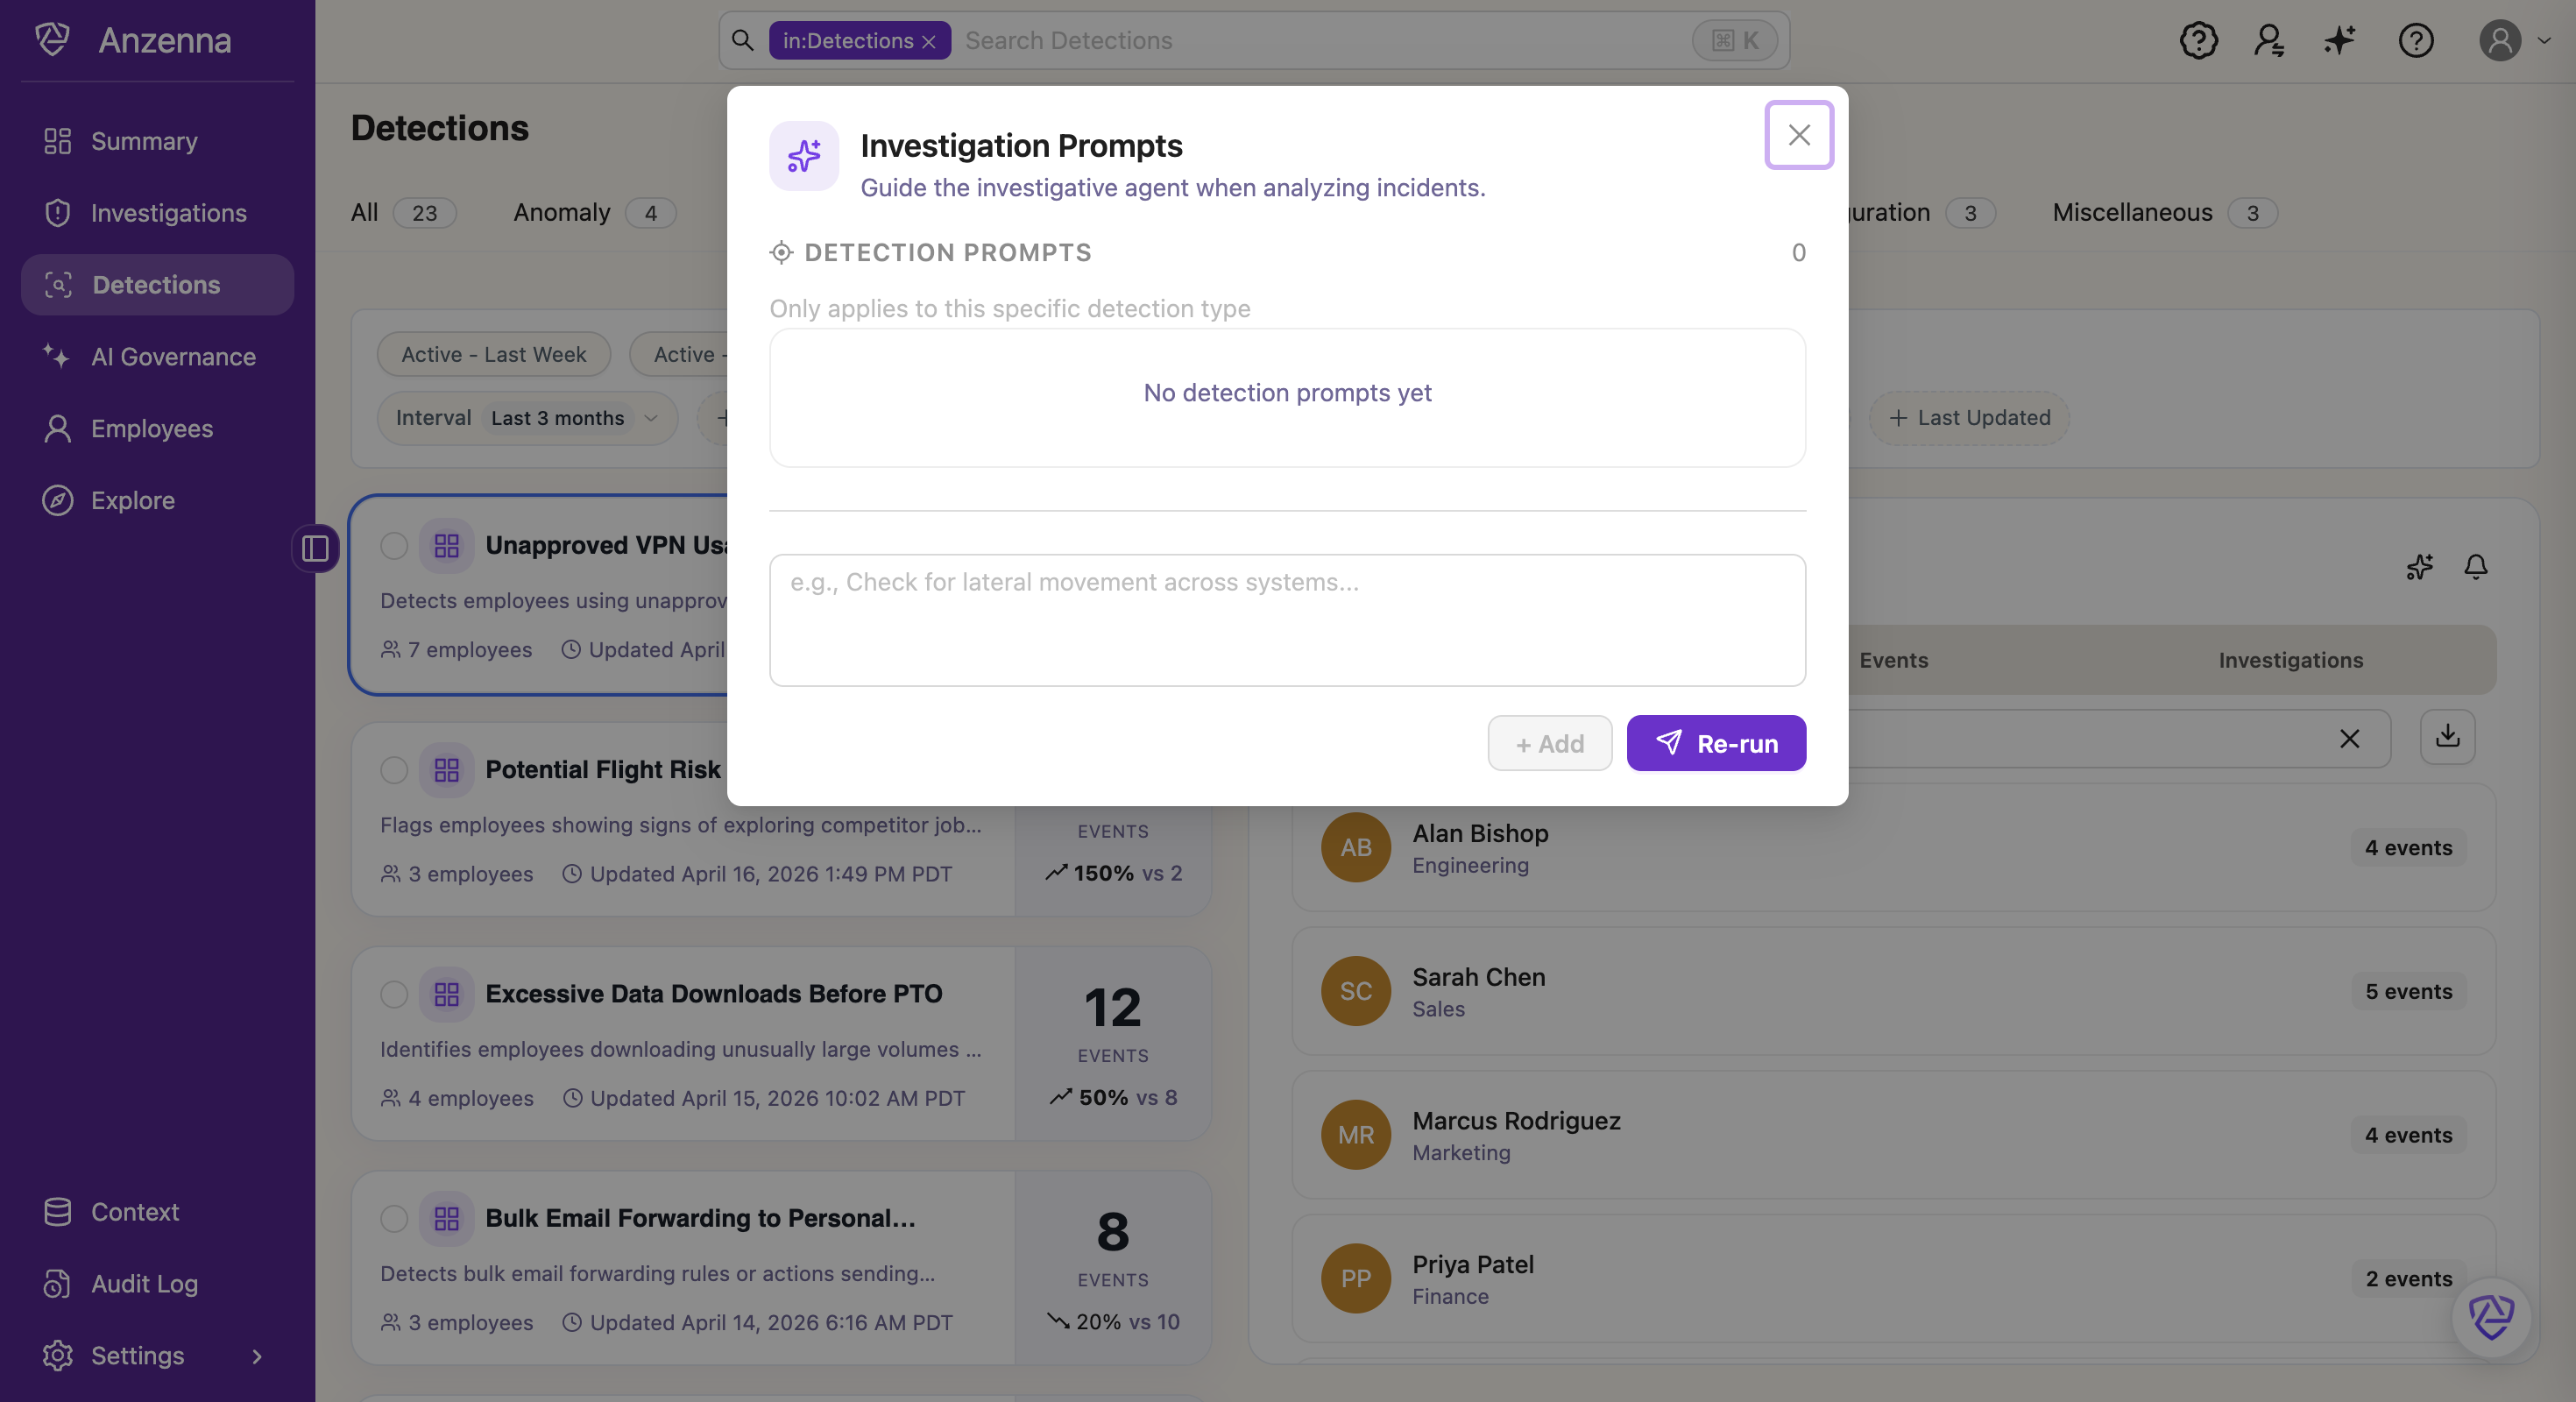
From a detection — detection prompts
Open a detection from the Detections page to edit prompts scoped to that detection only. The editor's Detection Prompts section is labeled "Only applies to this specific detection type". Detection prompts run in addition to the global prompts whenever the detection triggers an investigation, so use them for guidance that's specific to the activity that detection looks for.
From the Re-run flow — either scope
When you click Re-run on an investigation, the prompts editor opens with both Global Prompts and Detection Prompts available. You can adjust either (or both) before the re-run actually fires, so this is the right place to iterate when you're tuning prompts against a specific case.
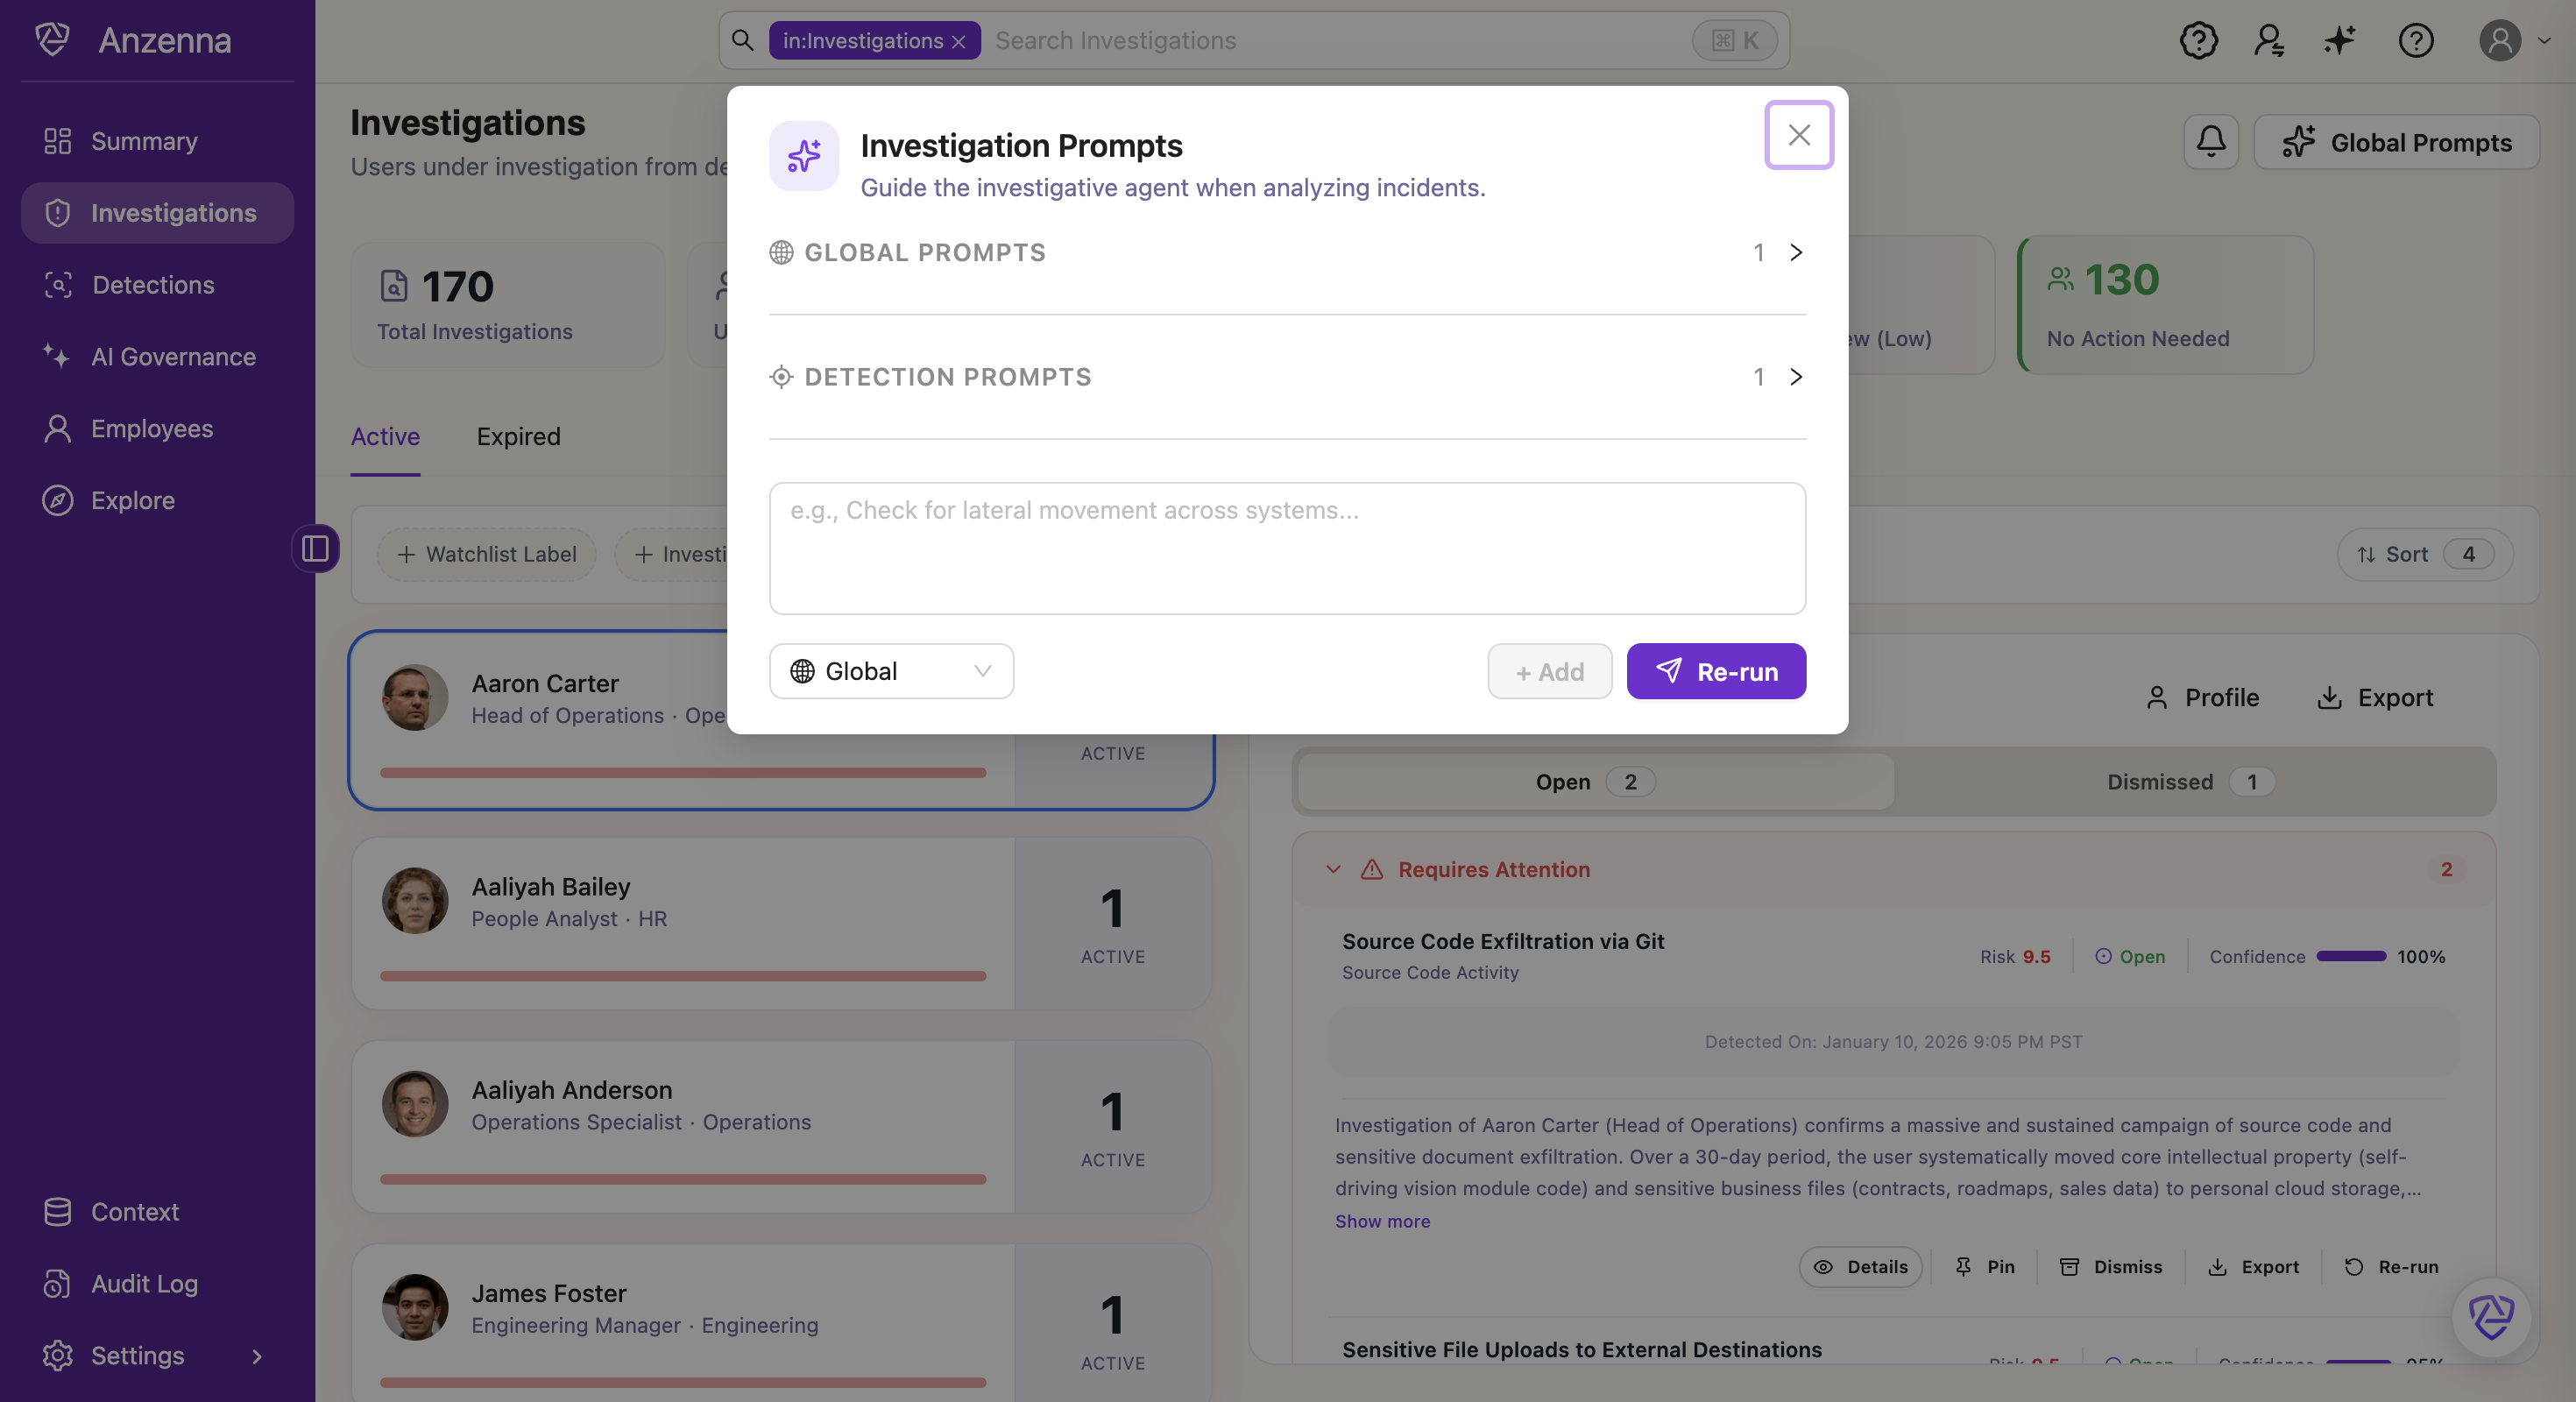
Click Re-run in the editor to apply your changes and immediately re-analyze the investigation with the updated prompts.
:::tip Writing good prompts
Be concrete about what to look for and what to flag. "Check whether the user accessed source-code repositories outside business hours" is more useful than "Look for suspicious activity." The agent already knows to do the general work — prompts add organization-specific context it can't derive on its own.
:::
Risk scoring
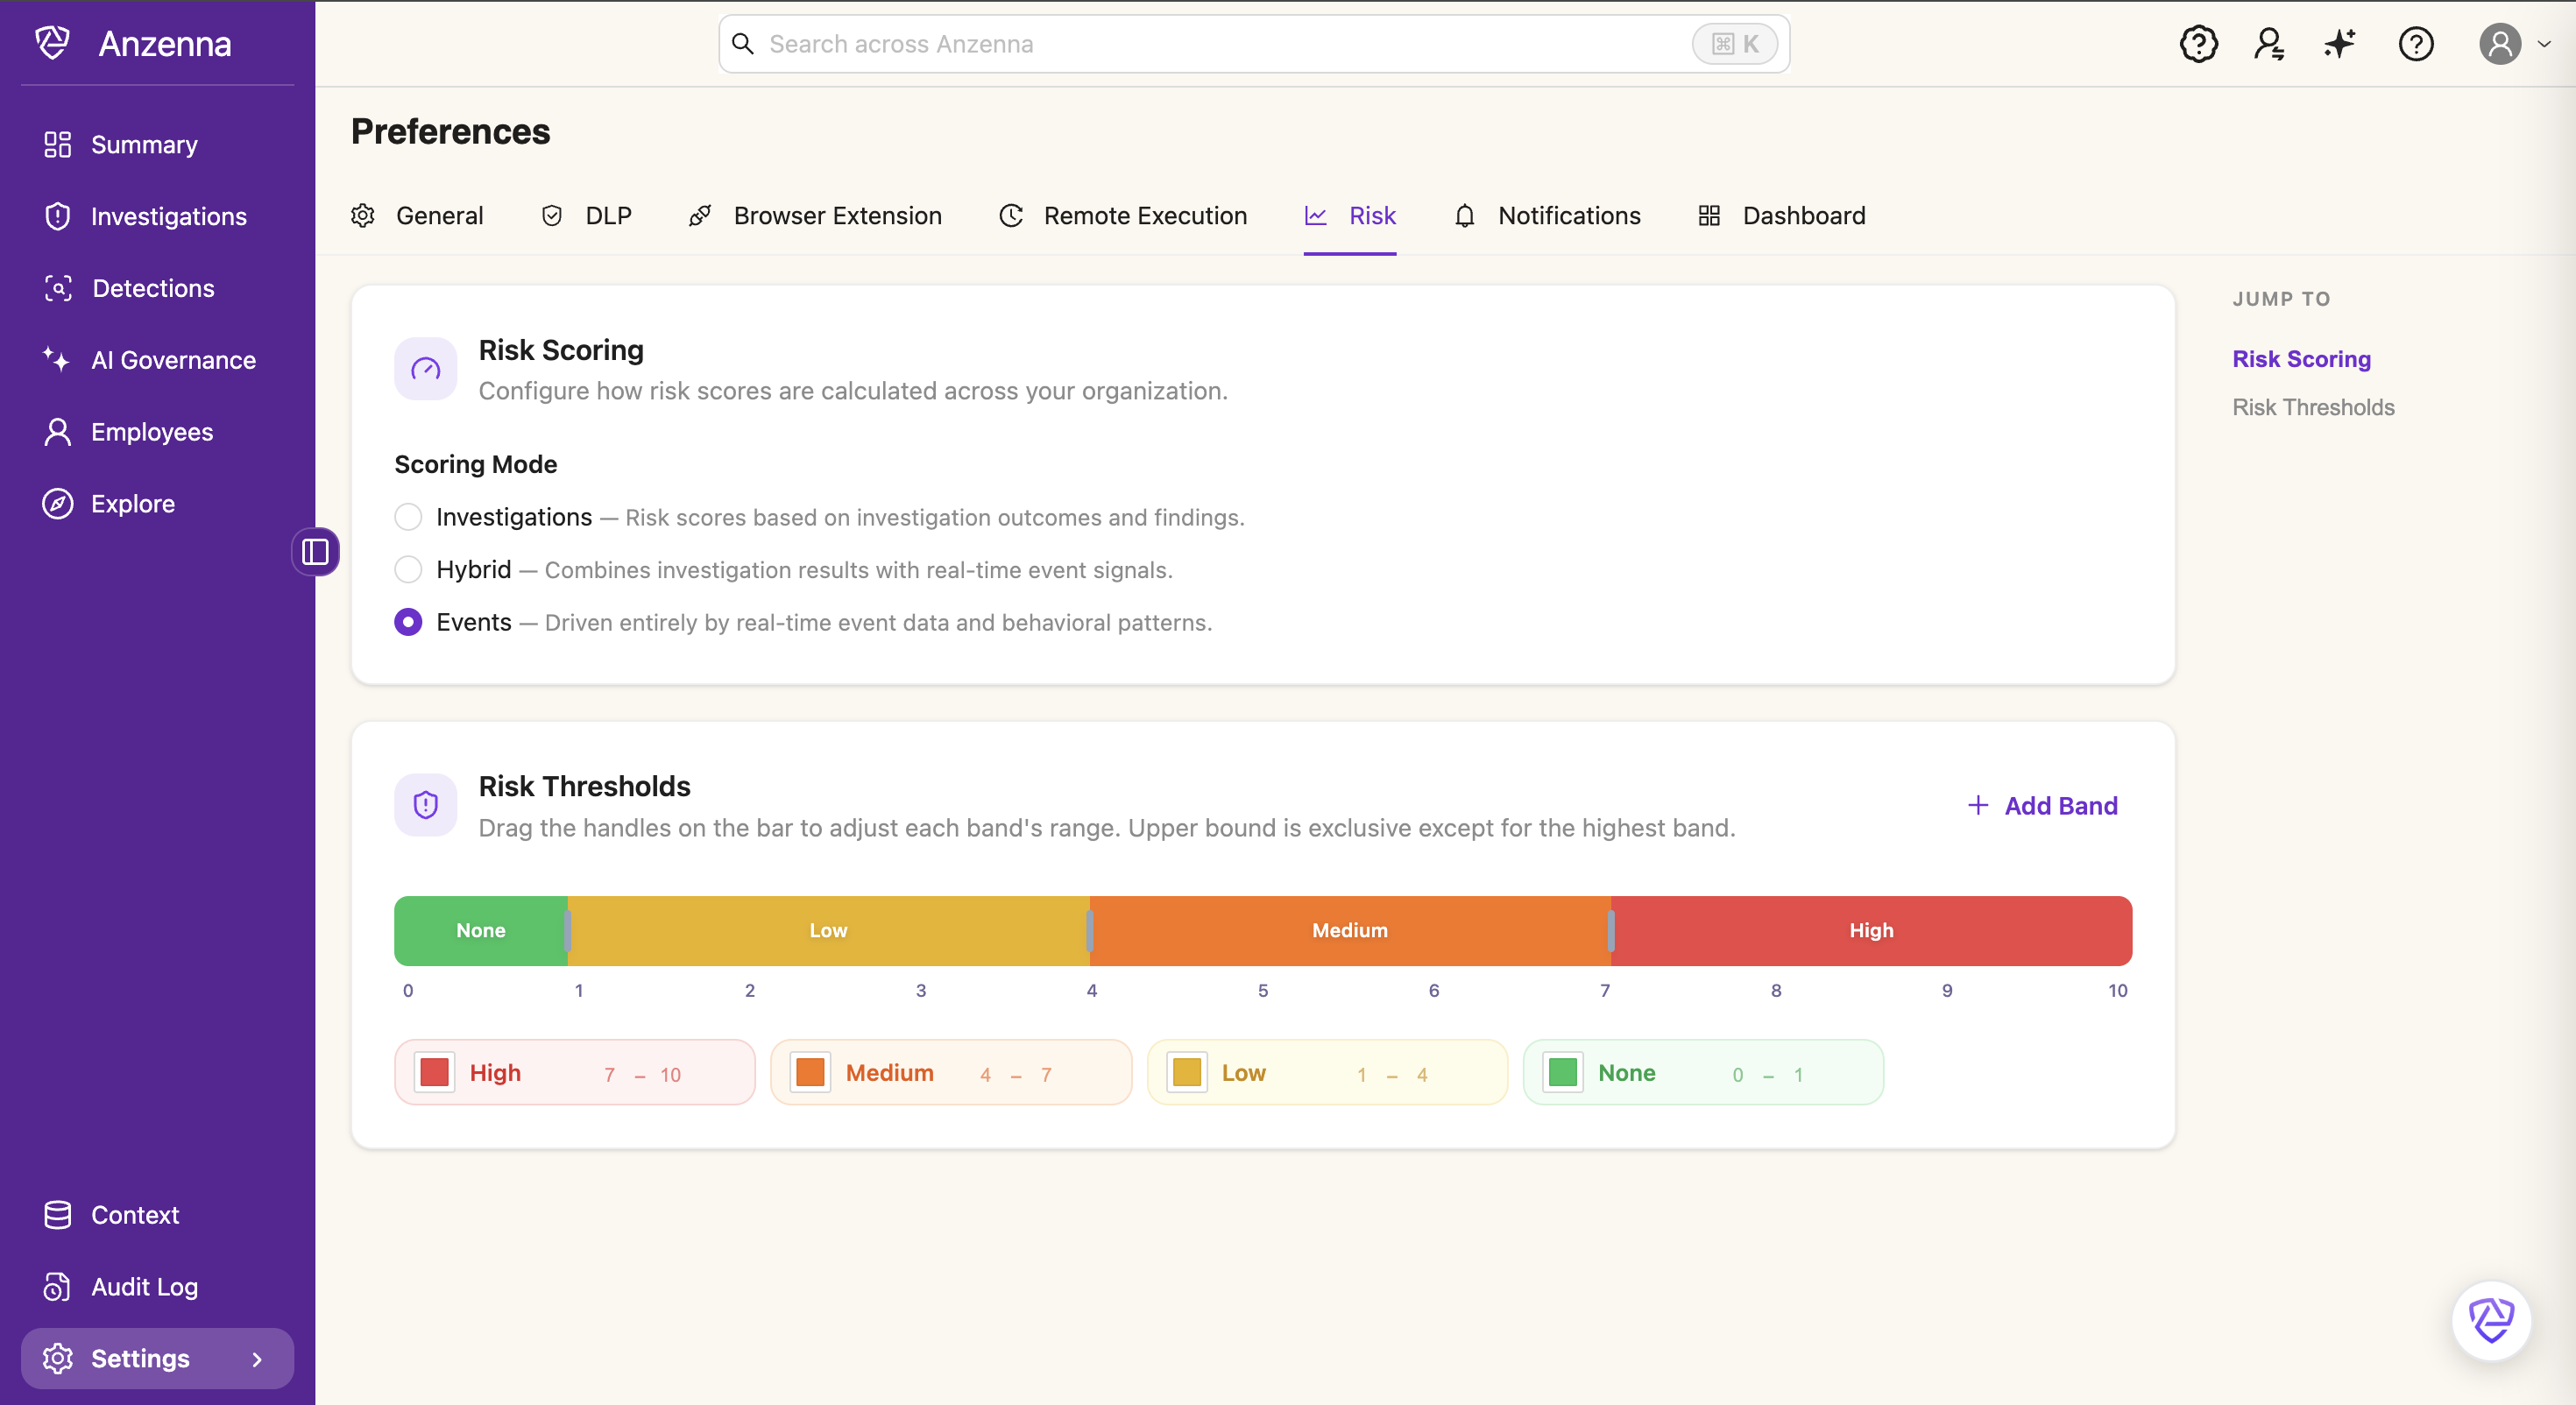
Every user has a risk score (the badge next to their name on the Investigations page, e.g. John Smith 6.9). How that score is calculated is controlled by admins under Settings > Preferences > Risk.
Scoring mode
Three modes are available, picked once and applied tenant-wide:
- Investigations — A user's score is the average of all their active investigation risk scores. Pure agent-driven scoring.
- Hybrid — Combines investigation results with real-time event signals.
- Events — Driven entirely by real-time event data and behavioral patterns. Investigations do not contribute to the score in this mode.
Risk thresholds
The same page lets you set the score ranges that map to the None, Low, Medium, and High bands on the 0–10 scale. Drag the handles on the bar to adjust each band's range — upper bounds are exclusive except for the highest band — or click + Add Band to introduce a new tier.
Frequently asked questions
Why don't I see an investigation for a detection that just fired?
Investigations are enqueued asynchronously and can take anywhere from a few minutes to several days to complete, depending on agent load and the number of events in scope. If a detection has fired but no investigation has appeared yet, it's still in the queue — check back later.
What's the difference between dismissing and the investigation expiring?
Dismissing is a deliberate action you take when you've reviewed the investigation and decided no follow-up is needed. The investigation moves to the Dismissed sub-tab on the user's detail panel. Expiring happens automatically after 30 days, whether or not you ever looked at it, and moves the investigation to the Expired tab.
When should I re-run an investigation?
Re-run when you've added or changed prompts, when new related events have come in since the original analysis, or when you suspect the agent missed something. Re-running uses the latest prompts and the most recent event data.
Need help? Contact Anzenna Support for assistance.