Setup SAML 2.0 with Okta
This guide walks you through configuring SAML 2.0 single sign-on (SSO) between Okta and Anzenna, enabling secure authentication across both platforms.
Prerequisites
- Admin access to your Okta dashboard
- Admin access to your Anzenna account
- Your organization's Anzenna Domain ID
Step-by-Step Instructions
Step 1: Get Your Anzenna Domain ID
Navigate to Settings > Access > SAML
Toggle Enable SAML and locate the Domain ID
Copy this Domain ID - you'll need it for the Okta configuration
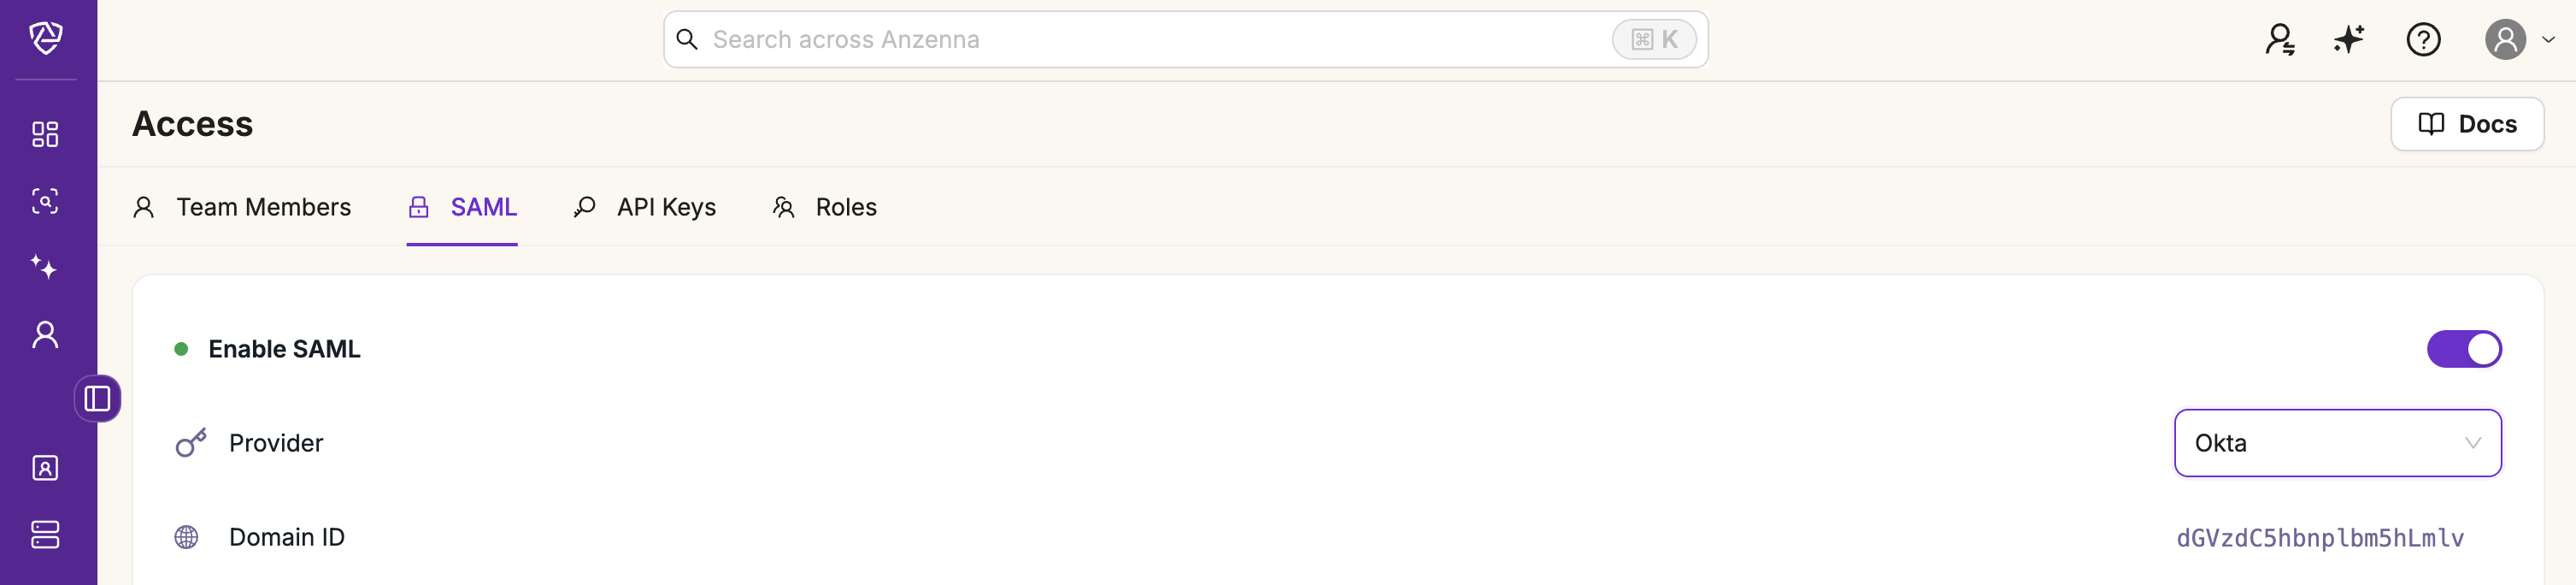
Keep this Domain ID handy in a text editor. You'll use it multiple times in the Okta configuration URLs.
Step 2: Configure Okta
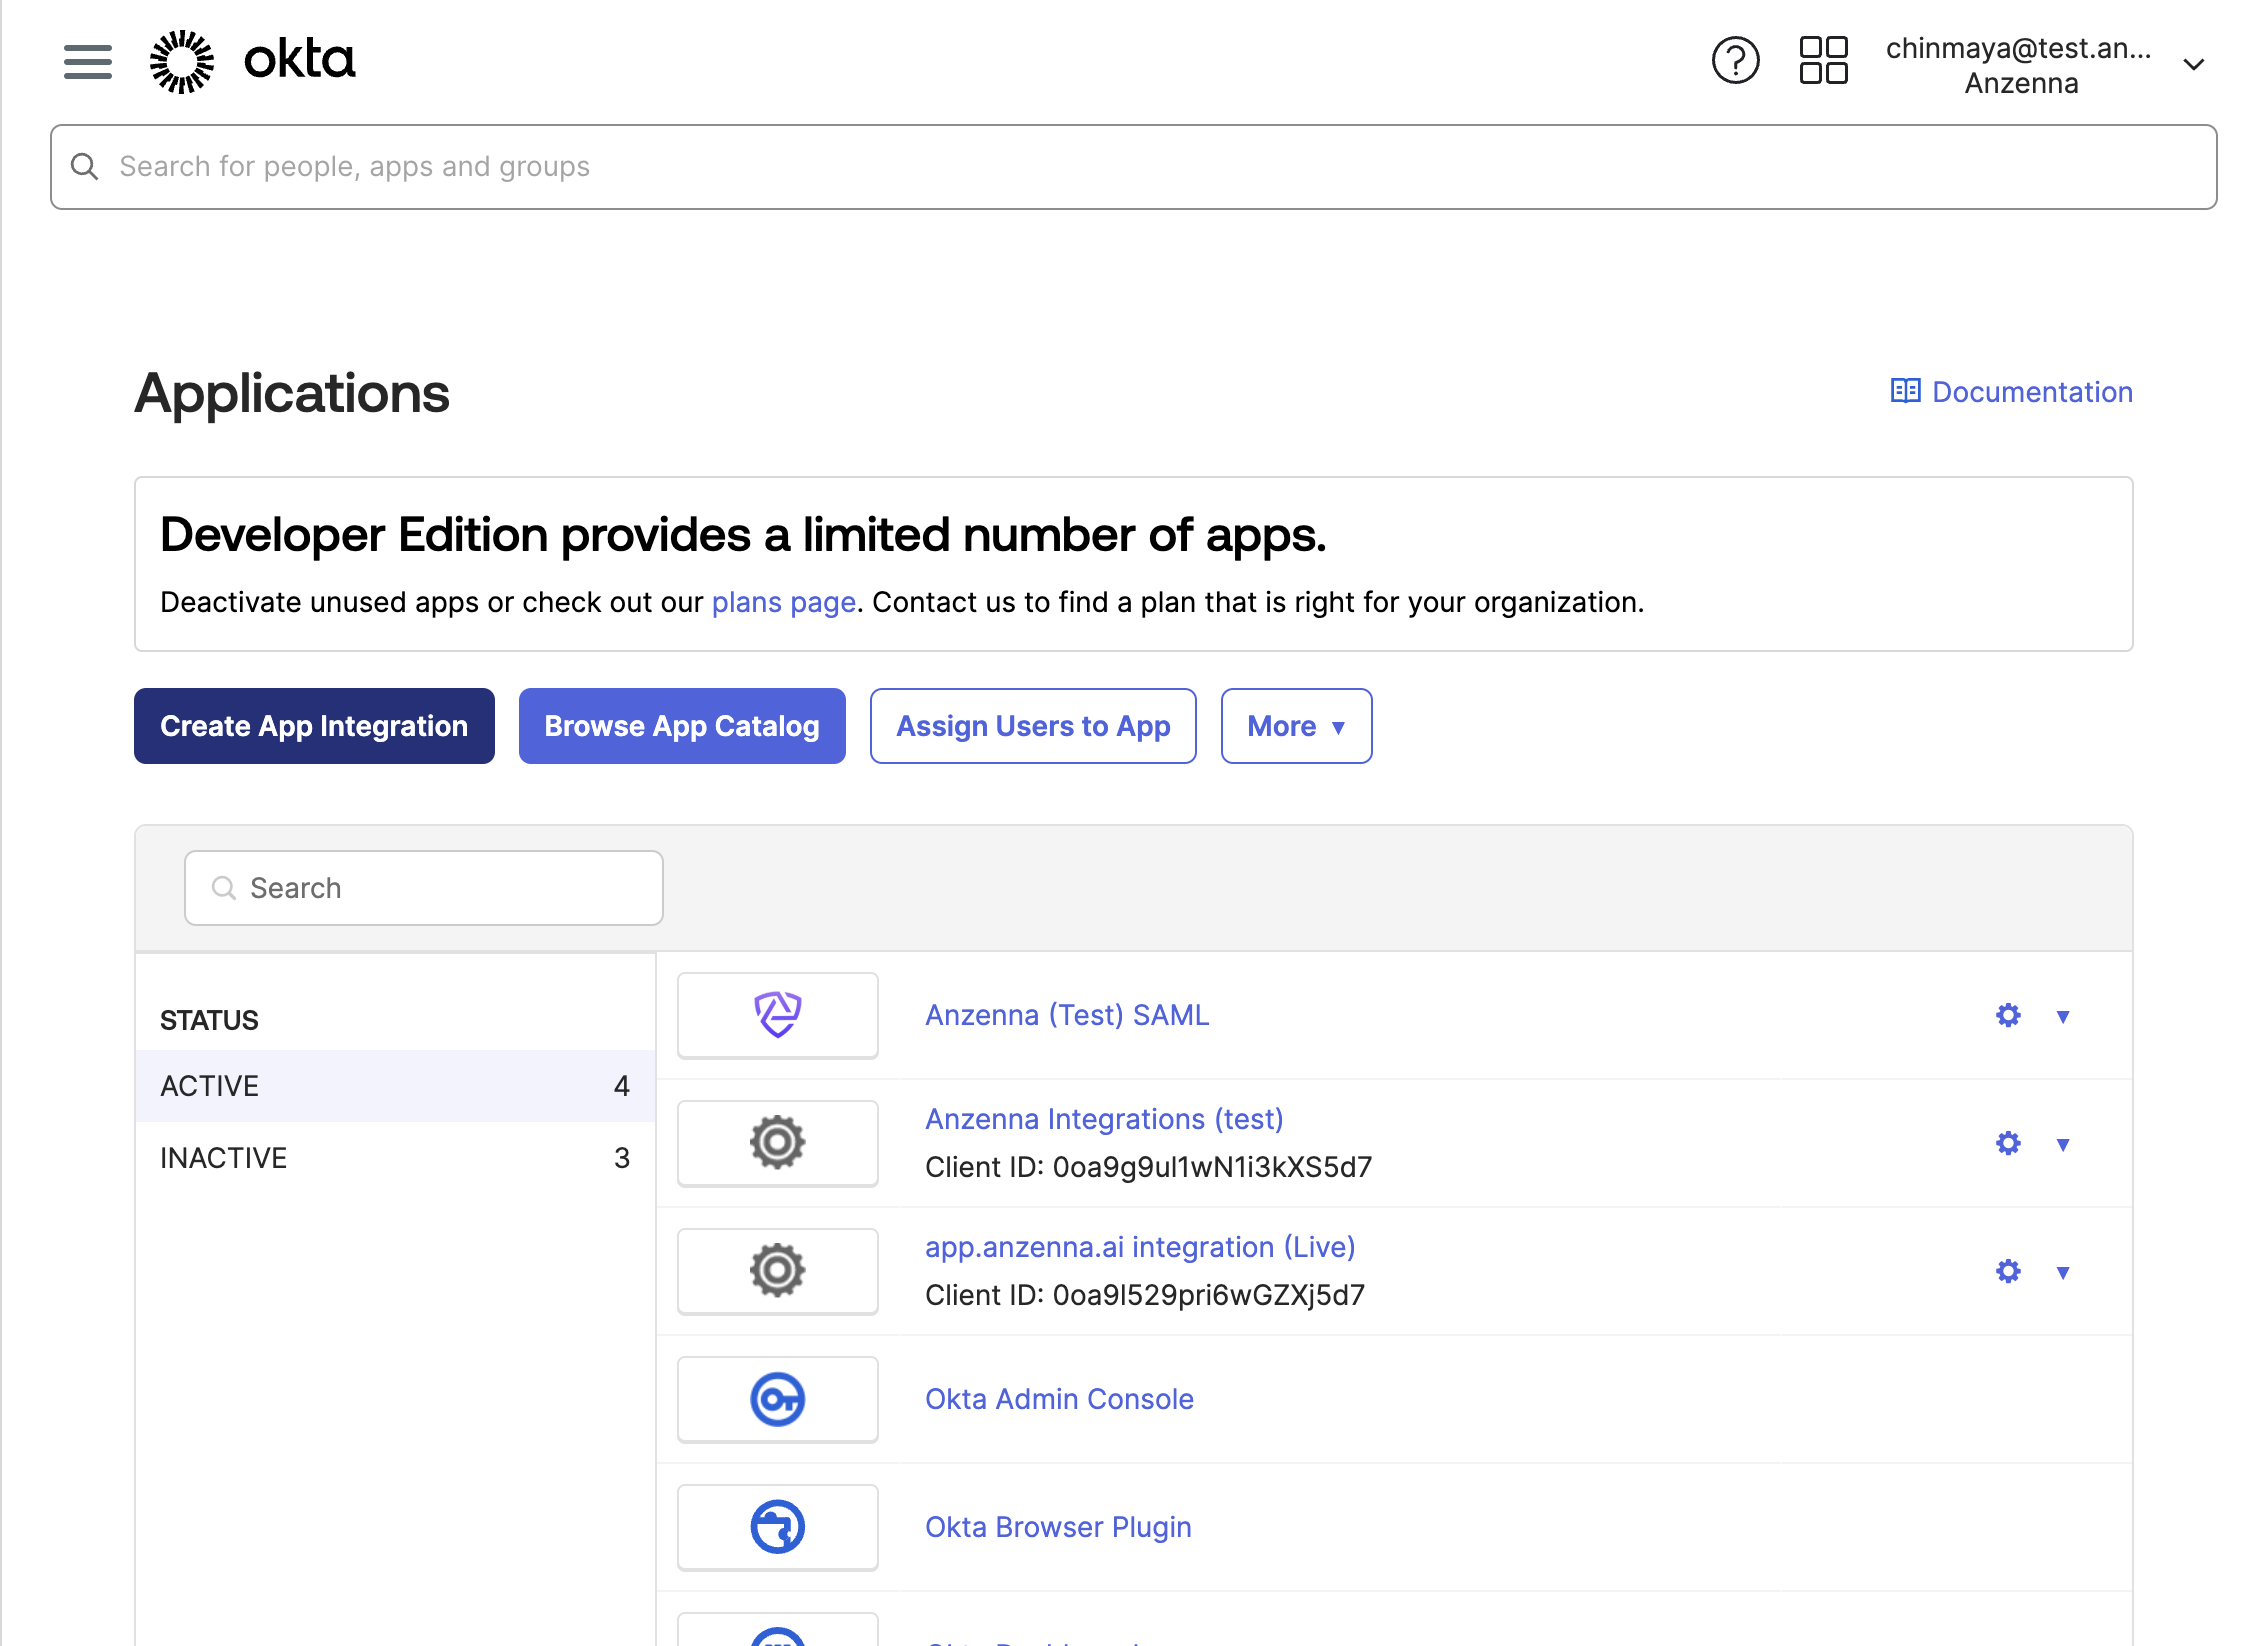
Create the App Integration
Open your Okta dashboard in a new browser tab
Click the hamburger menu icon (☰)
Select Applications from the navigation menu
Click Create App Integration
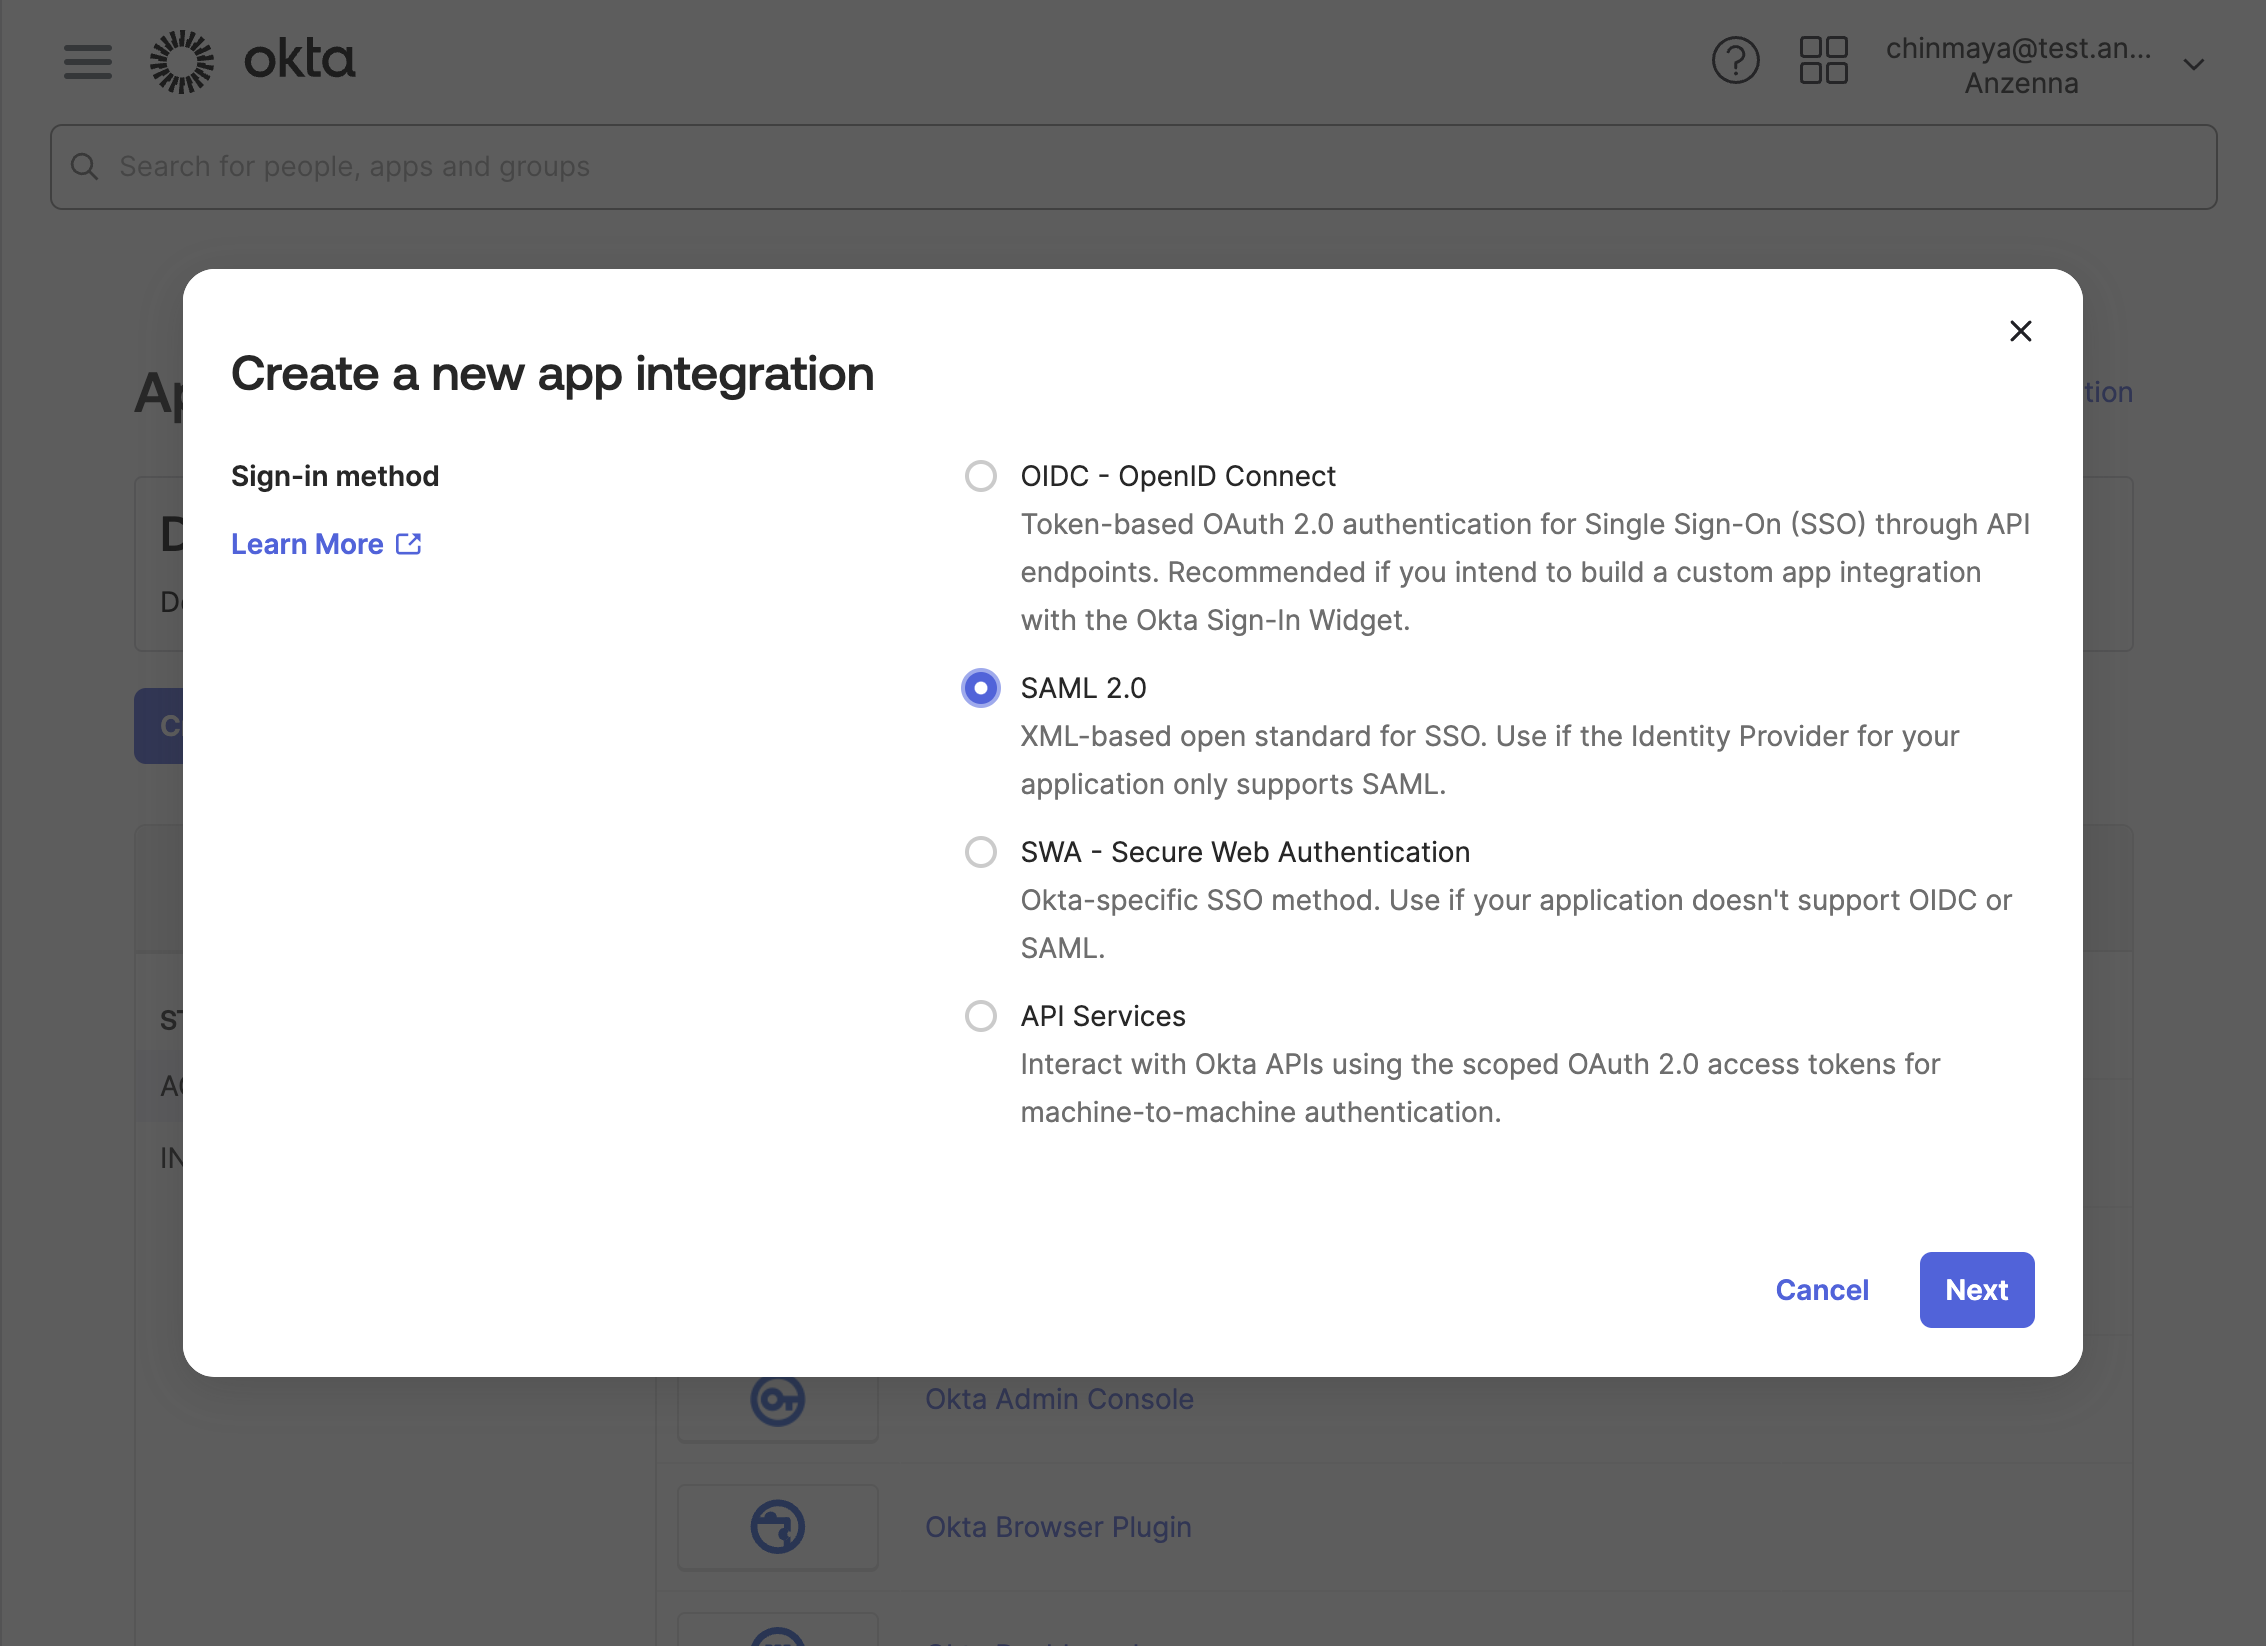
Select SAML 2.0 as your authentication protocol
Configure General Settings
Enter "Anzenna" as the app name
- (Optional) Upload an app logo
Configure SAML Settings
Configure the following URL fields by replacing
<domain-id> with your actual
Domain ID:
| Field | Value |
|---|---|
| Single sign-on URL | https://app.anzenna.ai/auth/saml/<domain-id>/acs |
| Audience URI (SP Entity ID) | https://app.anzenna.ai/auth/saml/<domain-id>/metadata |
| Default RelayState | https://app.anzenna.ai |
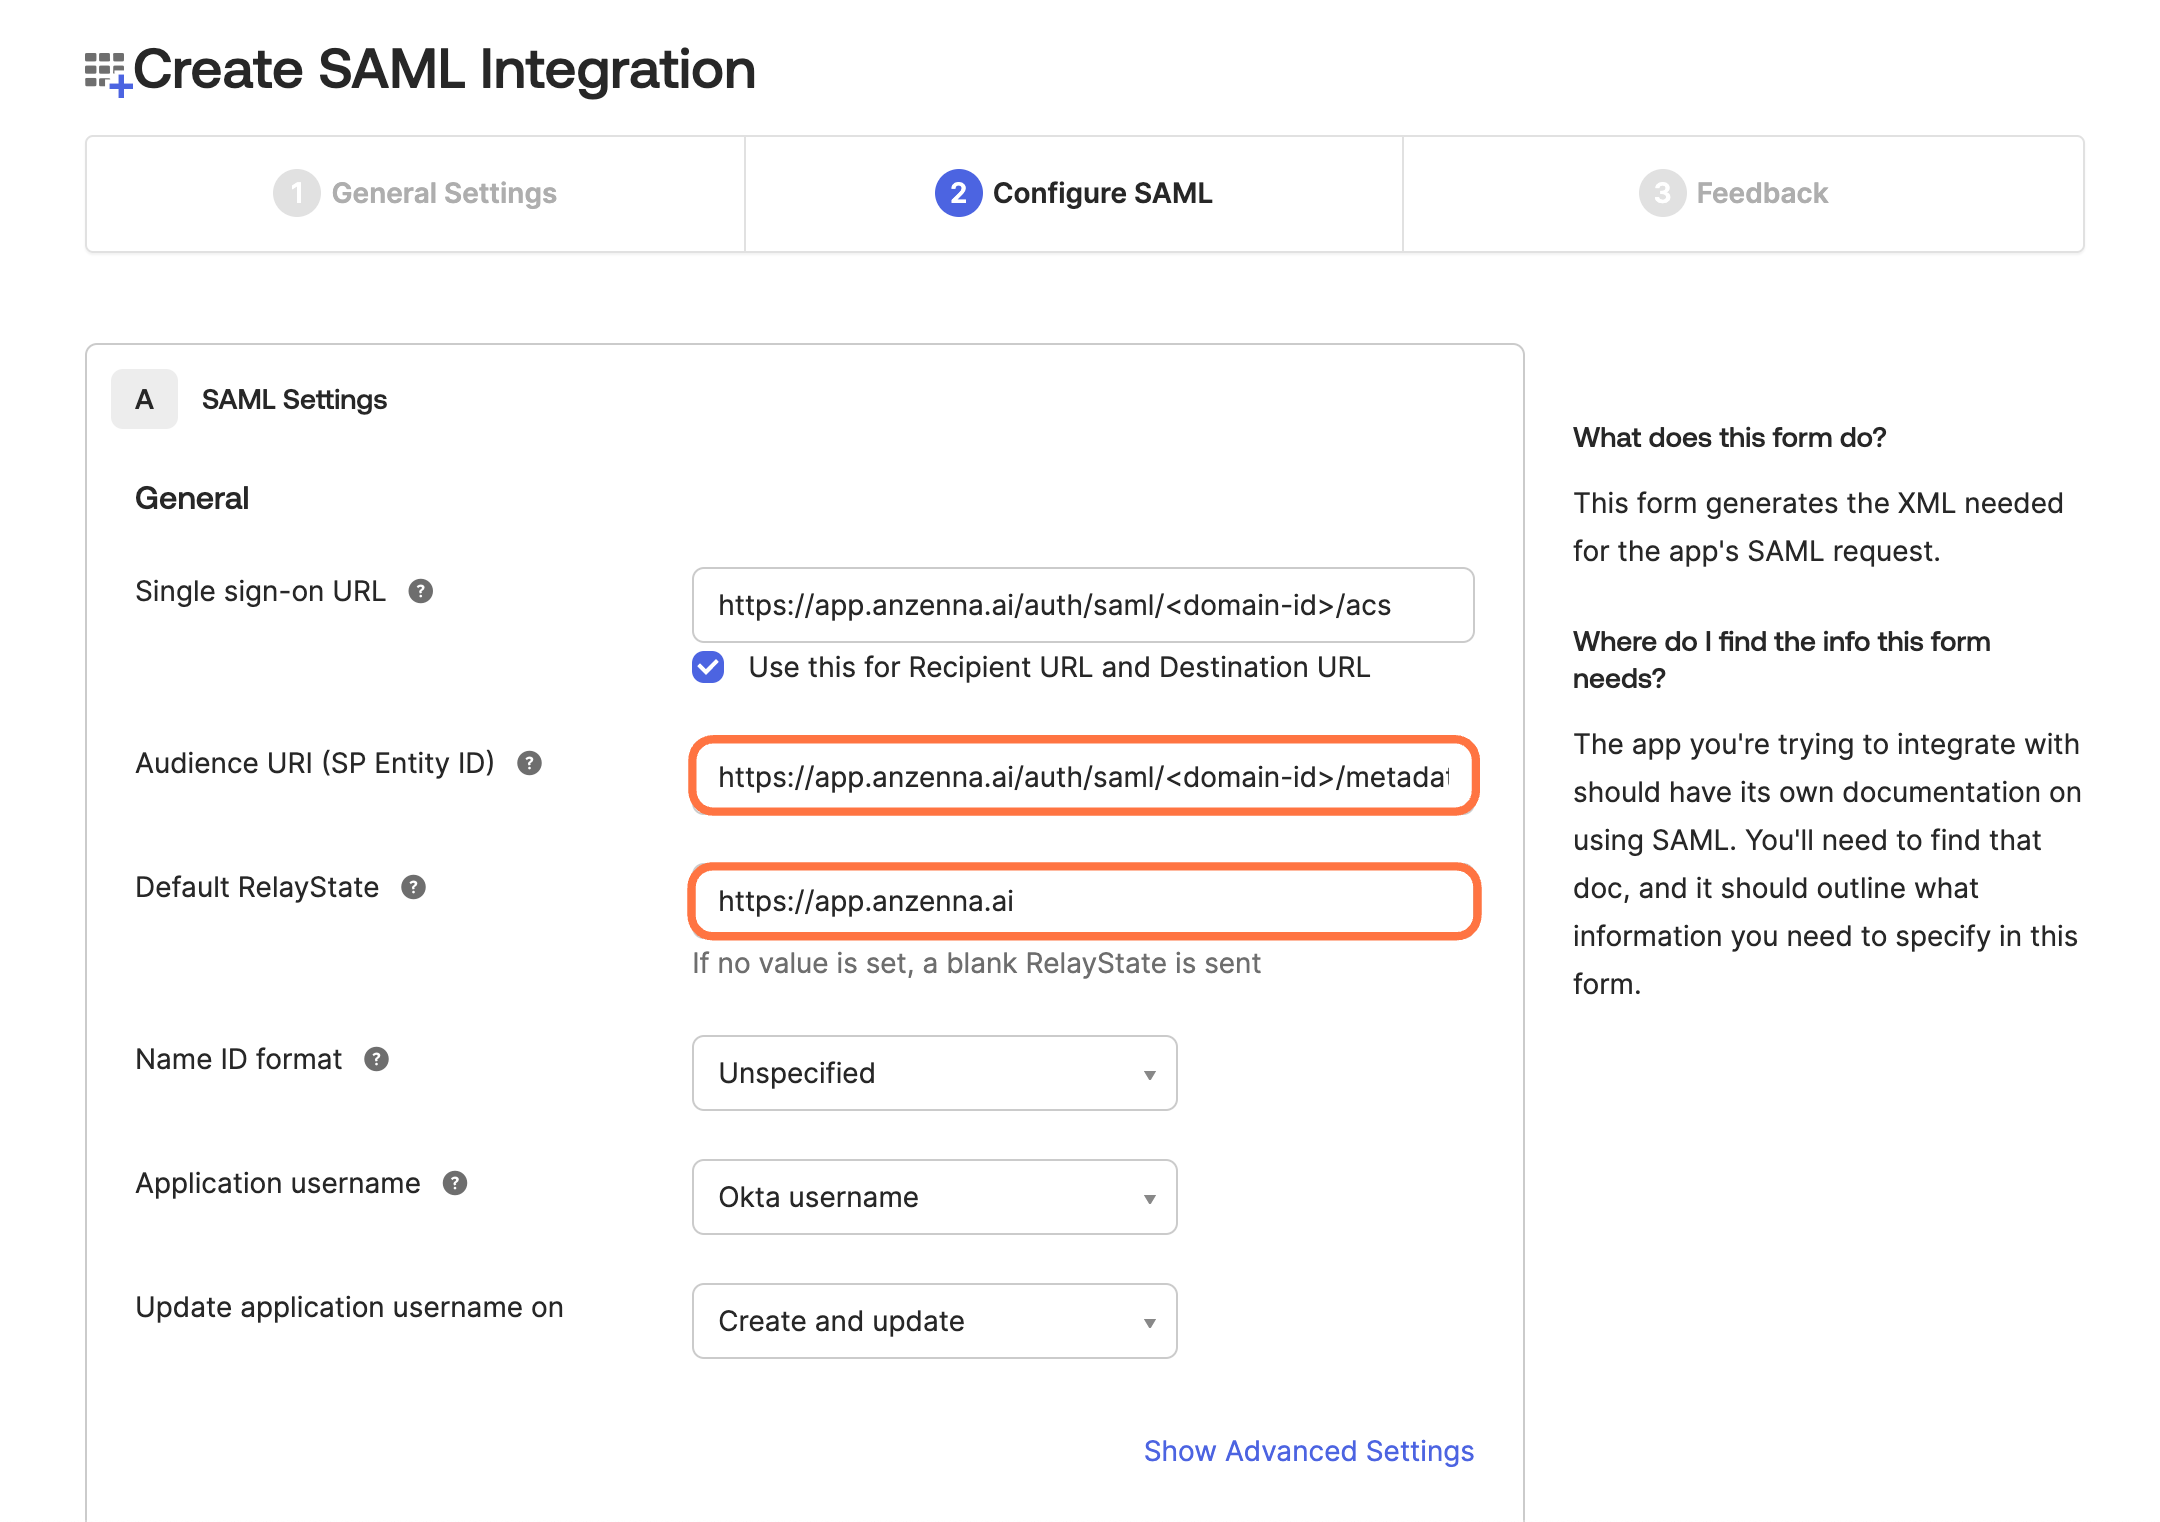
Make sure to replace
<domain-id> with your actual
Domain ID from Step 1. The URLs will not work with the placeholder text.
Add Attribute Statements
Add the following three attribute statements to map user information:
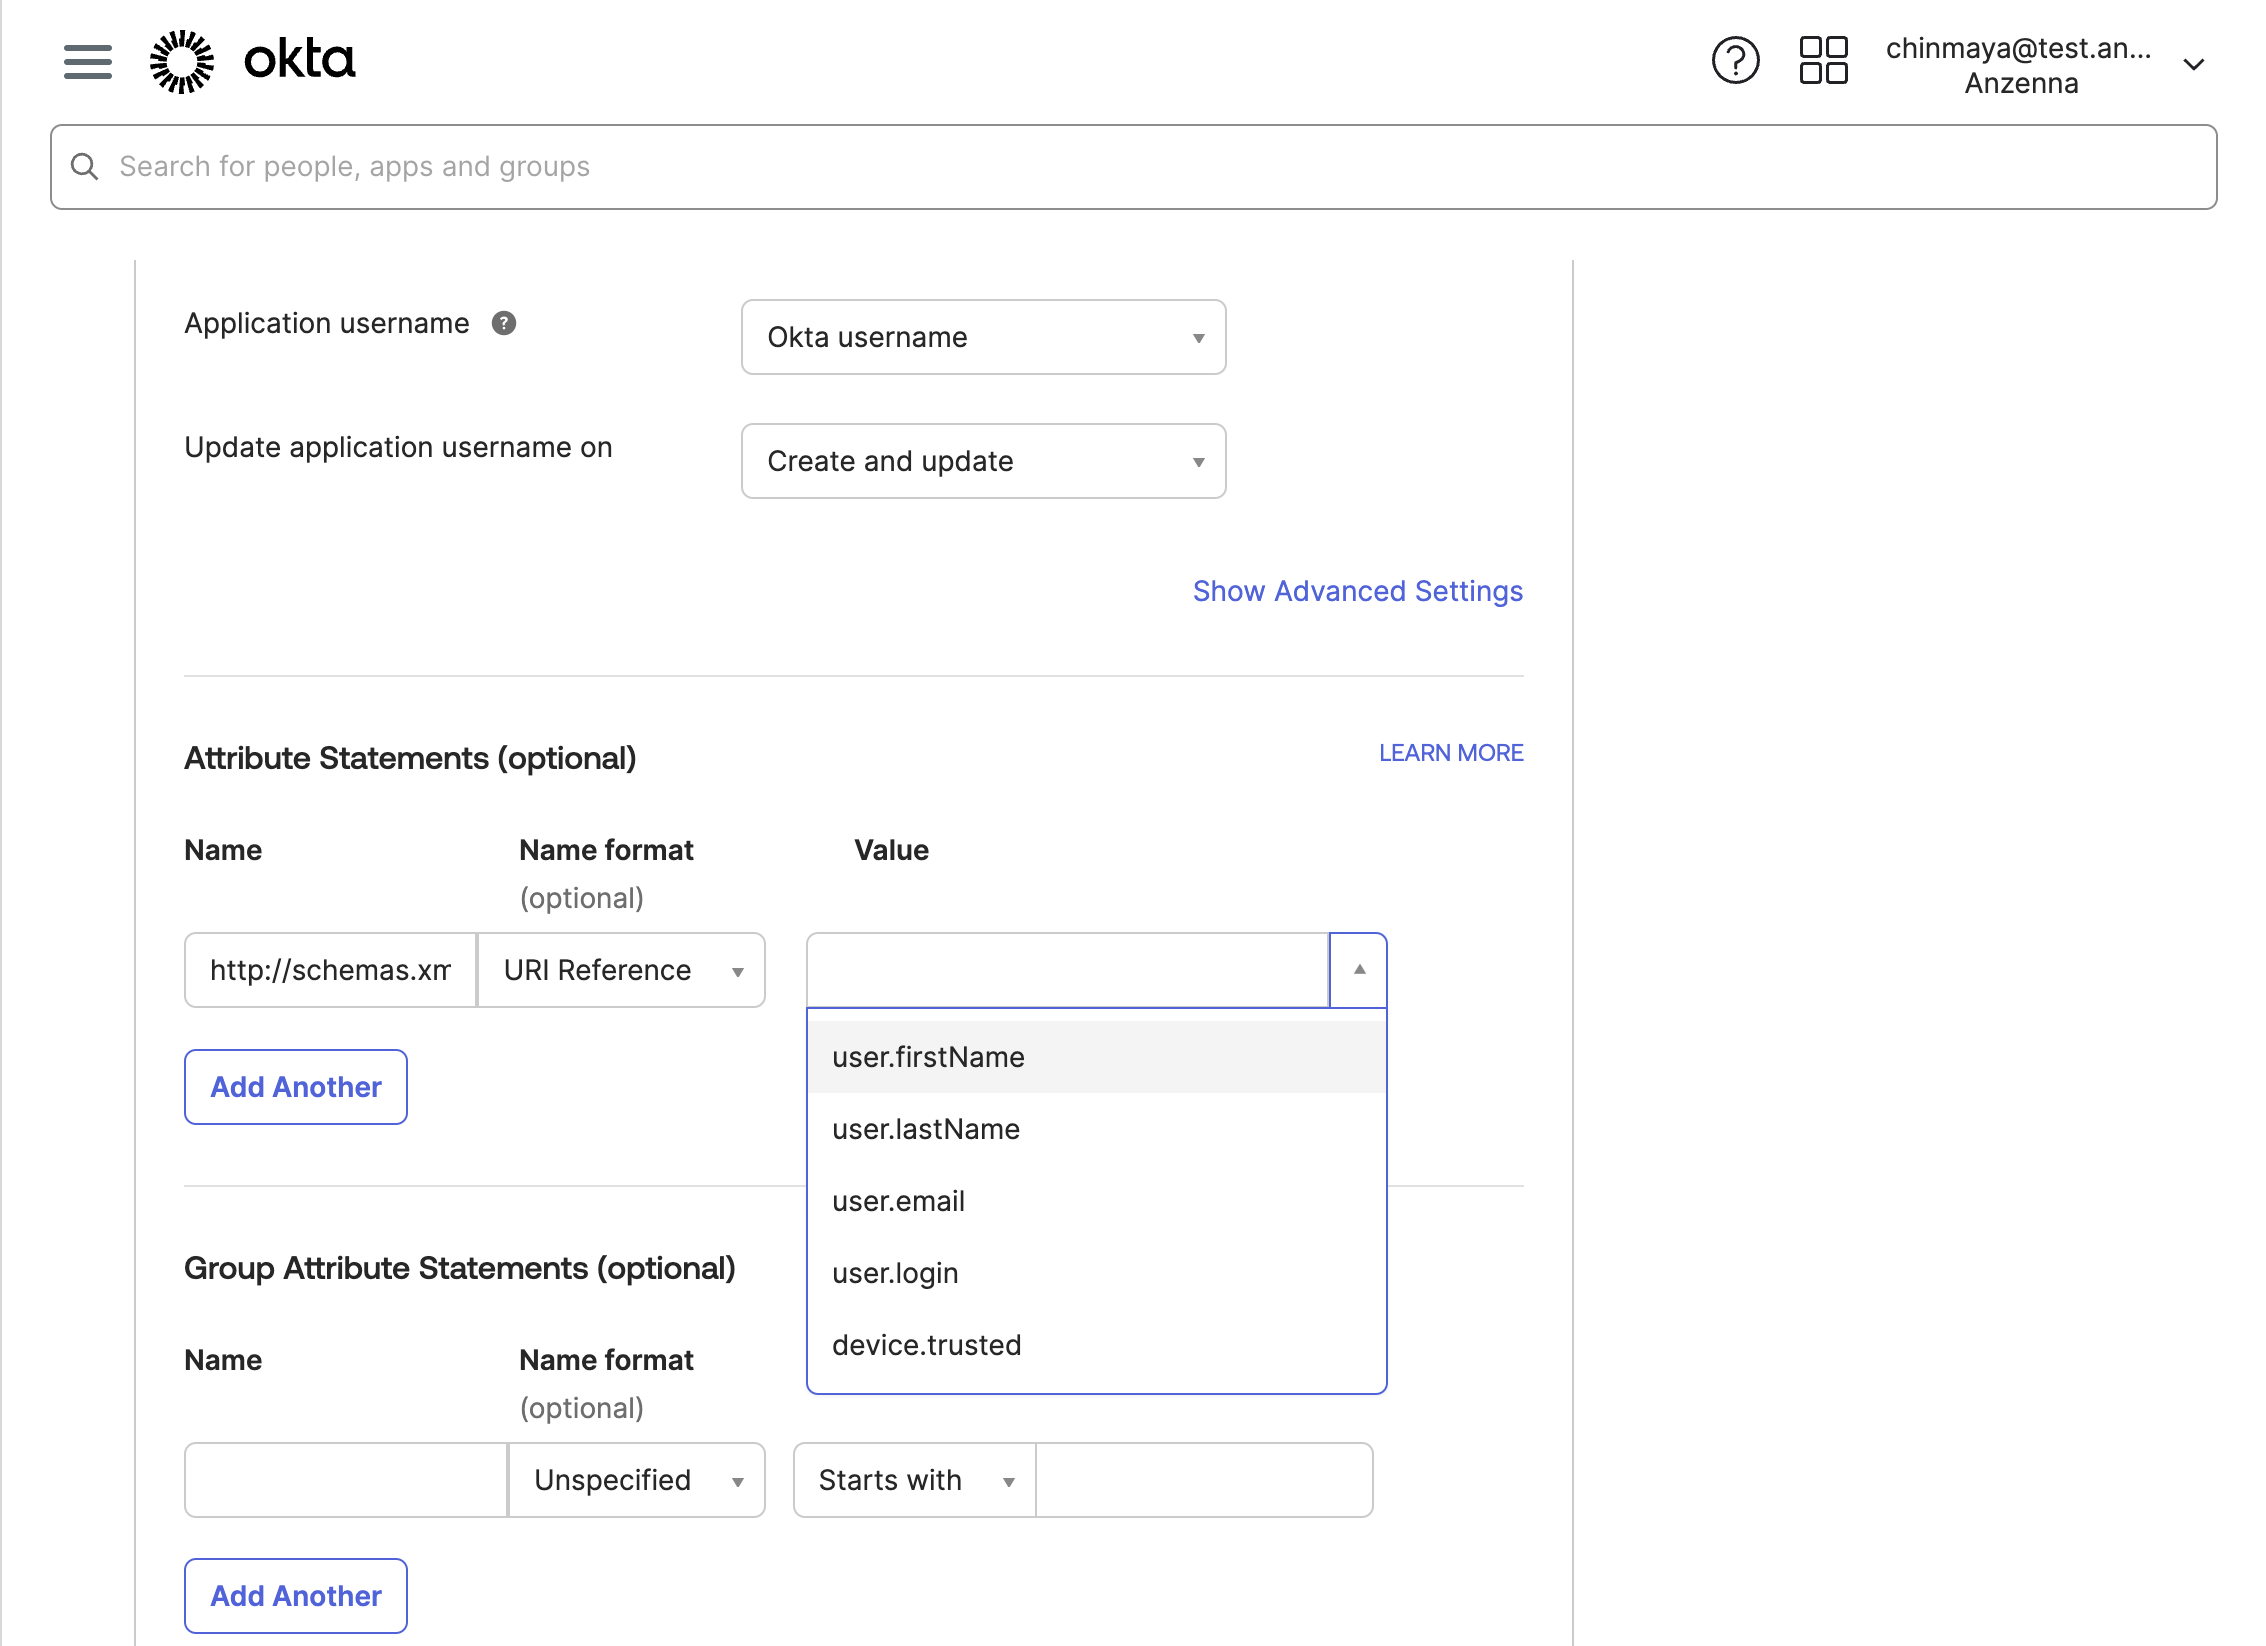
These mappings ensure that user profile information (first name, last name, and email) is passed from Okta to Anzenna during authentication.
Complete Okta Setup
(Optional) Select the appropriate feedback option for Okta
Click Finish to complete the Okta configuration
Step 3: Connect Okta to Anzenna
Get the Metadata URL from Okta
In your newly created Okta app, navigate to the Sign On tab
Scroll down to find the Metadata URL
Copy the Metadata URL - it should look like:
https://your-org.okta.com/app/...metadata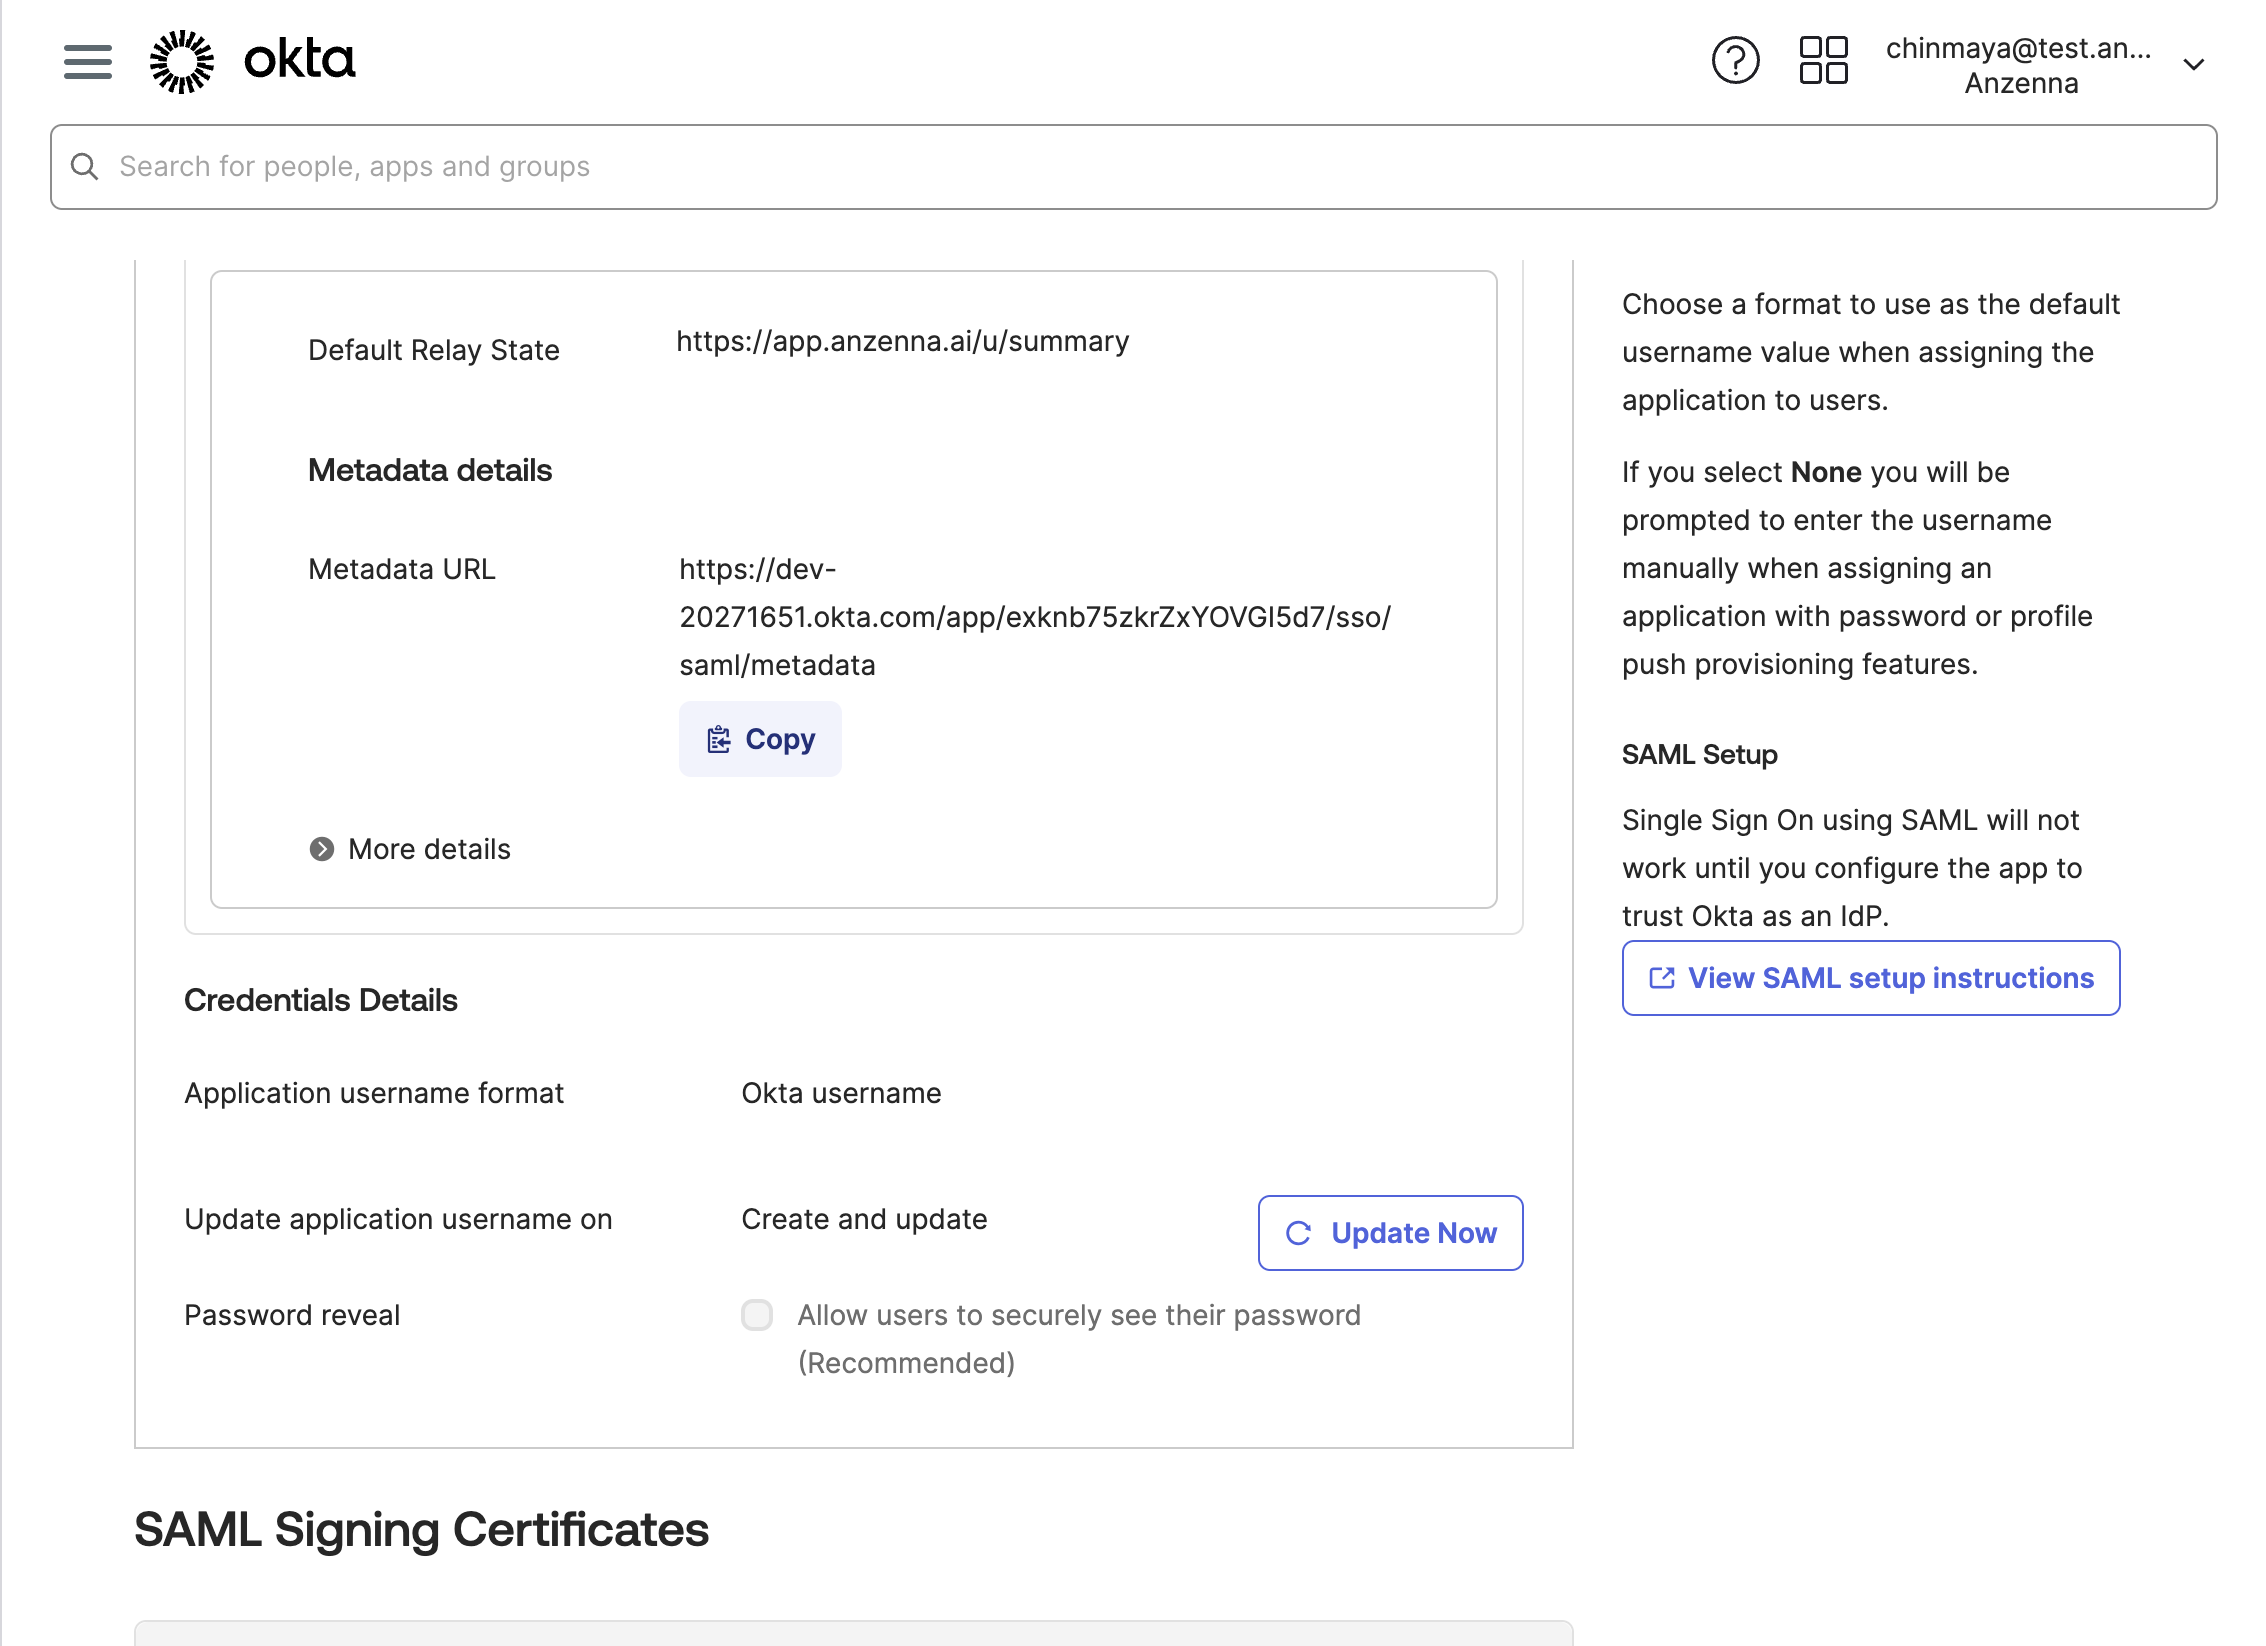
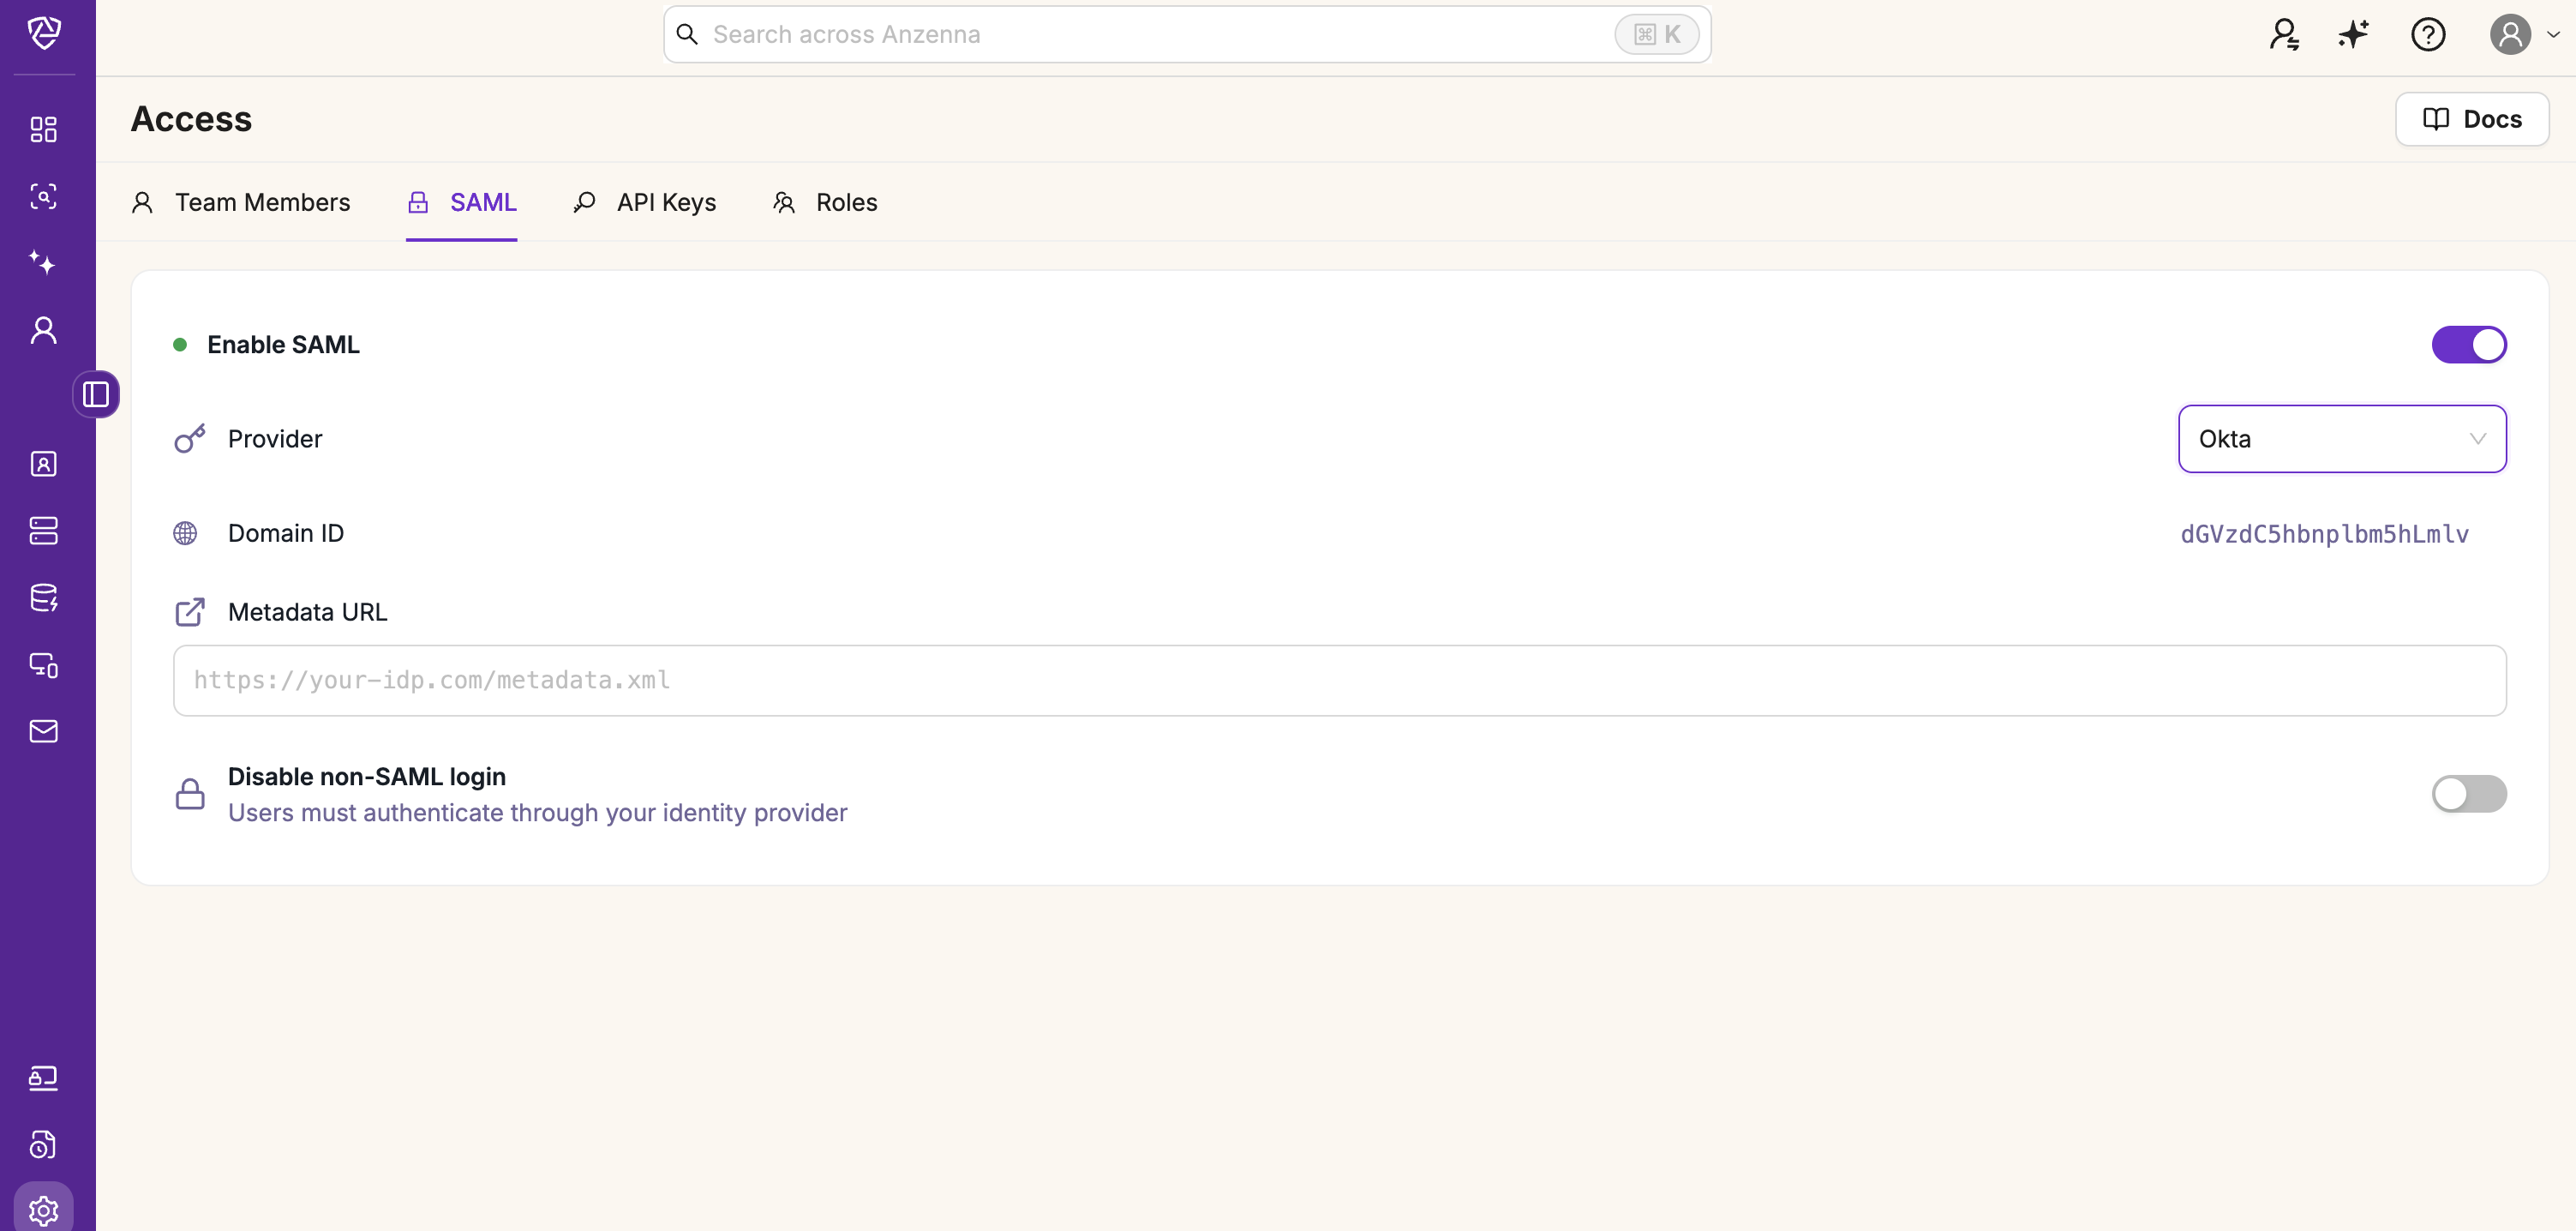
Configure SAML in Anzenna
Navigate to Settings > Access > SAML
Select Okta as the identity provider
Paste the IDP Metadata URL from Okta
Step 4: Test Your SAML Setup
Log out of Anzenna completely
Sign in again at
app.anzenna.ai/u/signin
using Enterprise SSO

For the first test, try logging in with a user account that exists in both Okta and Anzenna to verify the connection is working properly.