User Management
This guide shows you how to invite team members to your Anzenna workspace and assign appropriate roles and permissions.
Prerequisites
- Admin access to Anzenna
- Email address of user to be invited
- Understanding of role-based permissions
Understanding Roles
Before inviting users, it's important to understand the available roles and their permissions.
Role Management
- Detailed breakdown of all available roles
Start with the least privileged role needed. You can always upgrade permissions later.
Step-by-Step Instructions
1. Access User Management
Sign into Anzenna at
app.anzenna.ai
Click on Settings in the bottom left menu
Click on Access to view access-related options
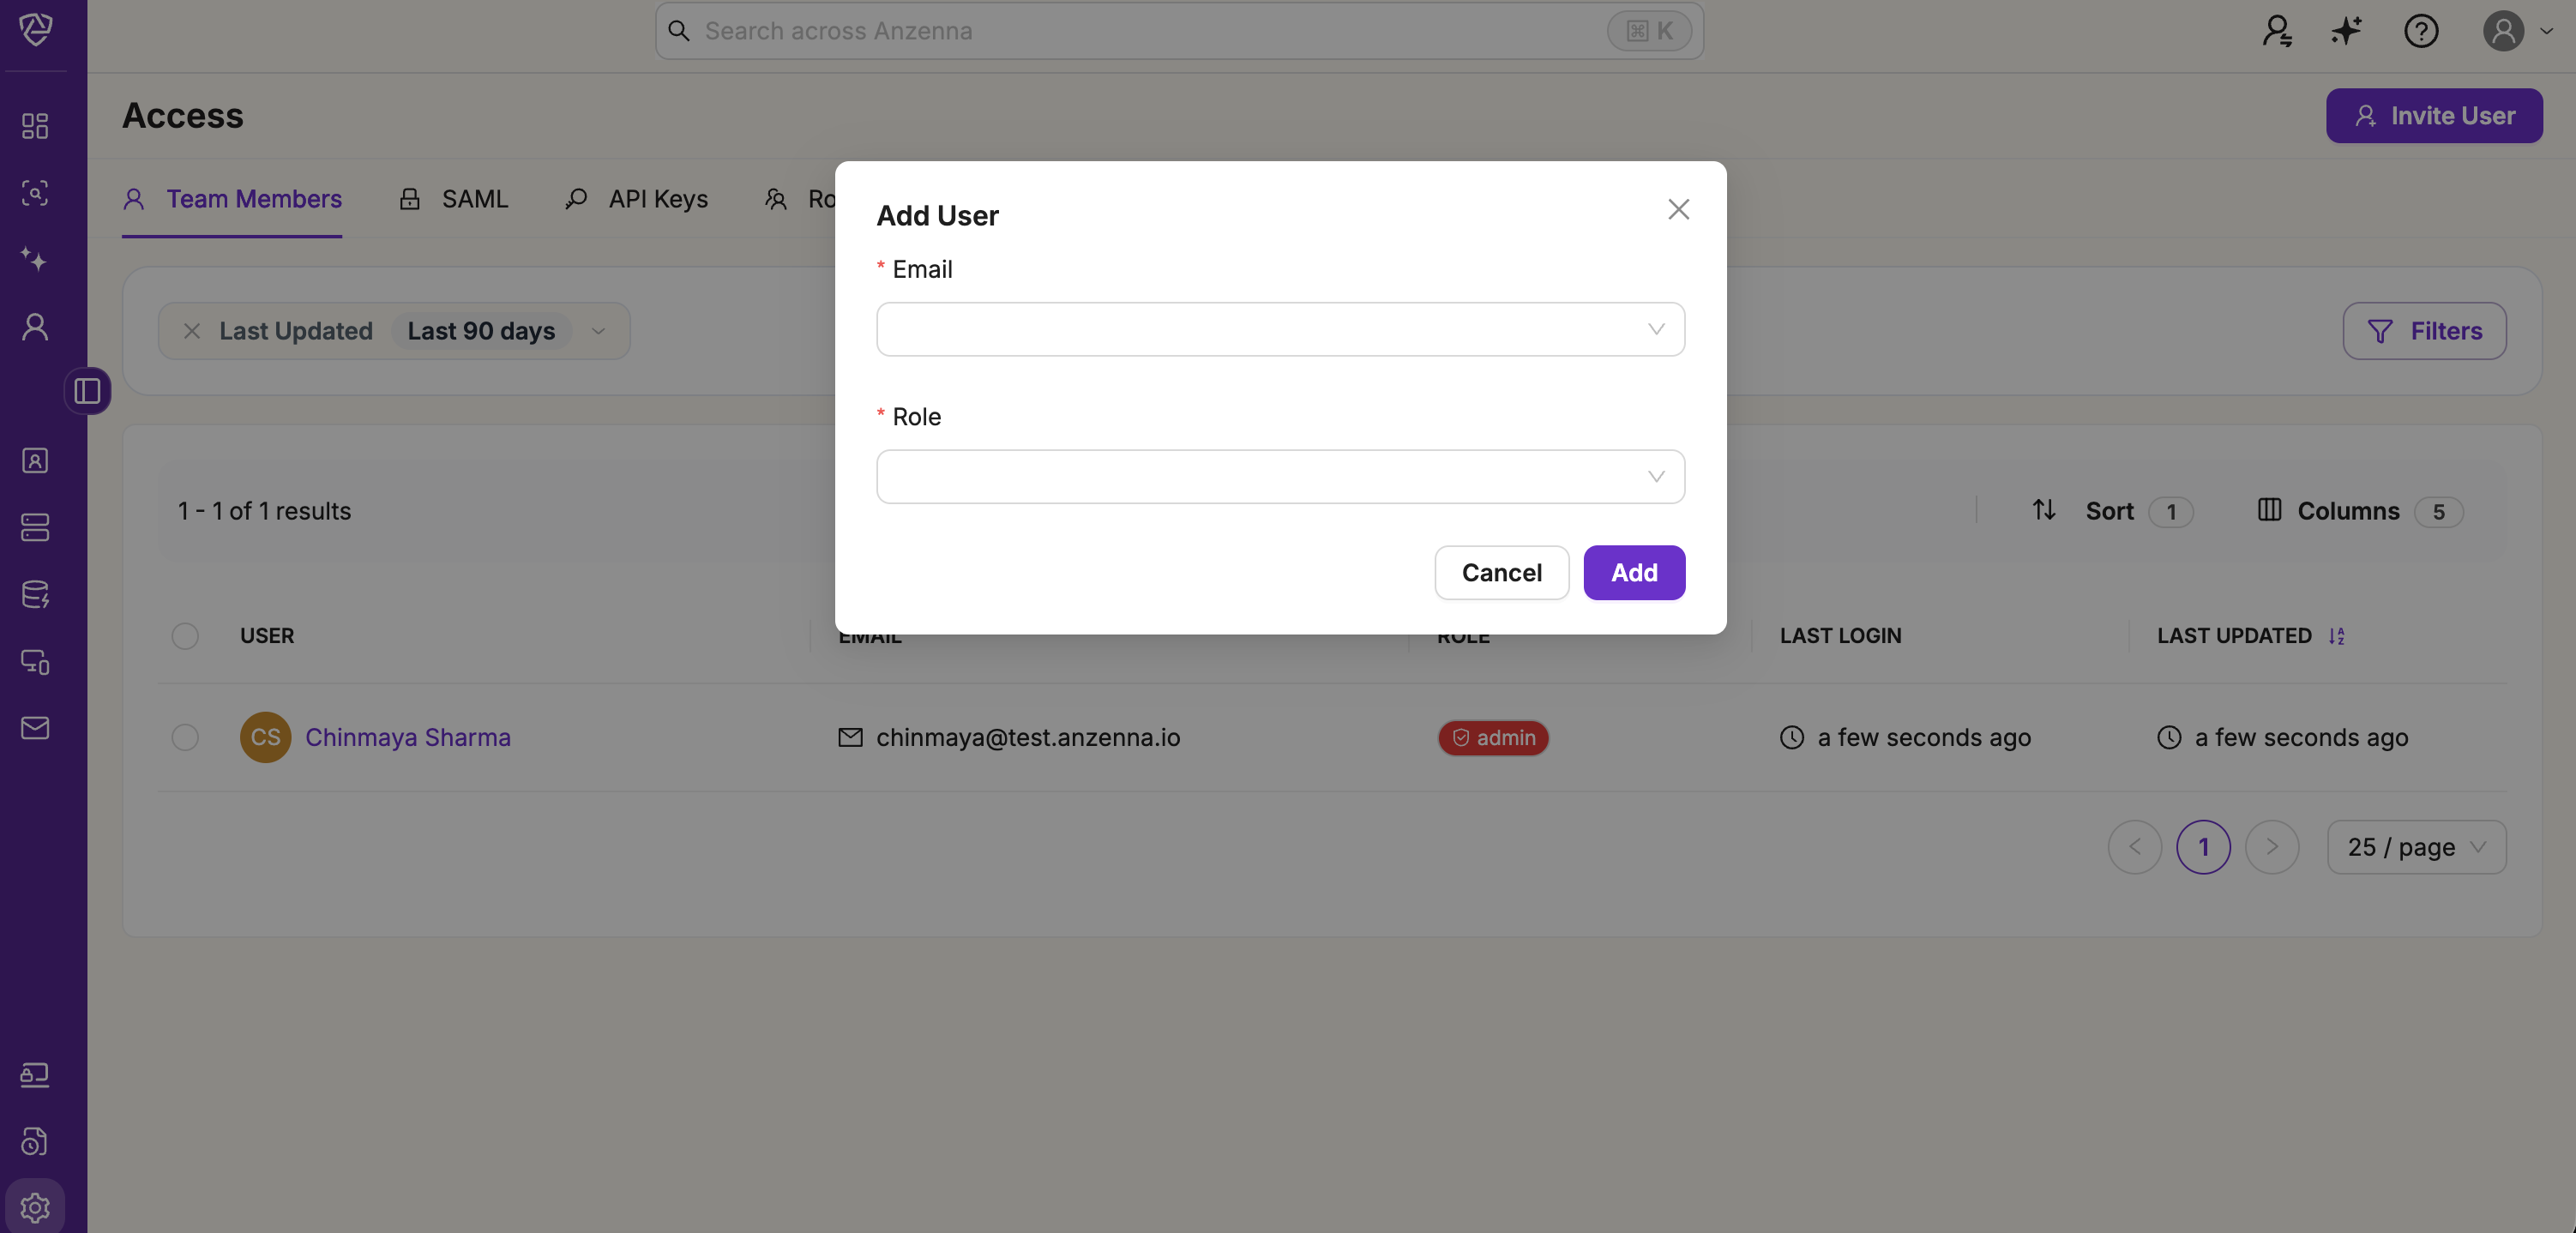
2. Initiate User Invitation
Click the Invite User button on the Access page
3. Enter User Details
Enter the email address of the user you wish to invite
Format:
user@company.com
Ensure the email address is correct. The invitation will be sent to this address and cannot be changed after sending.
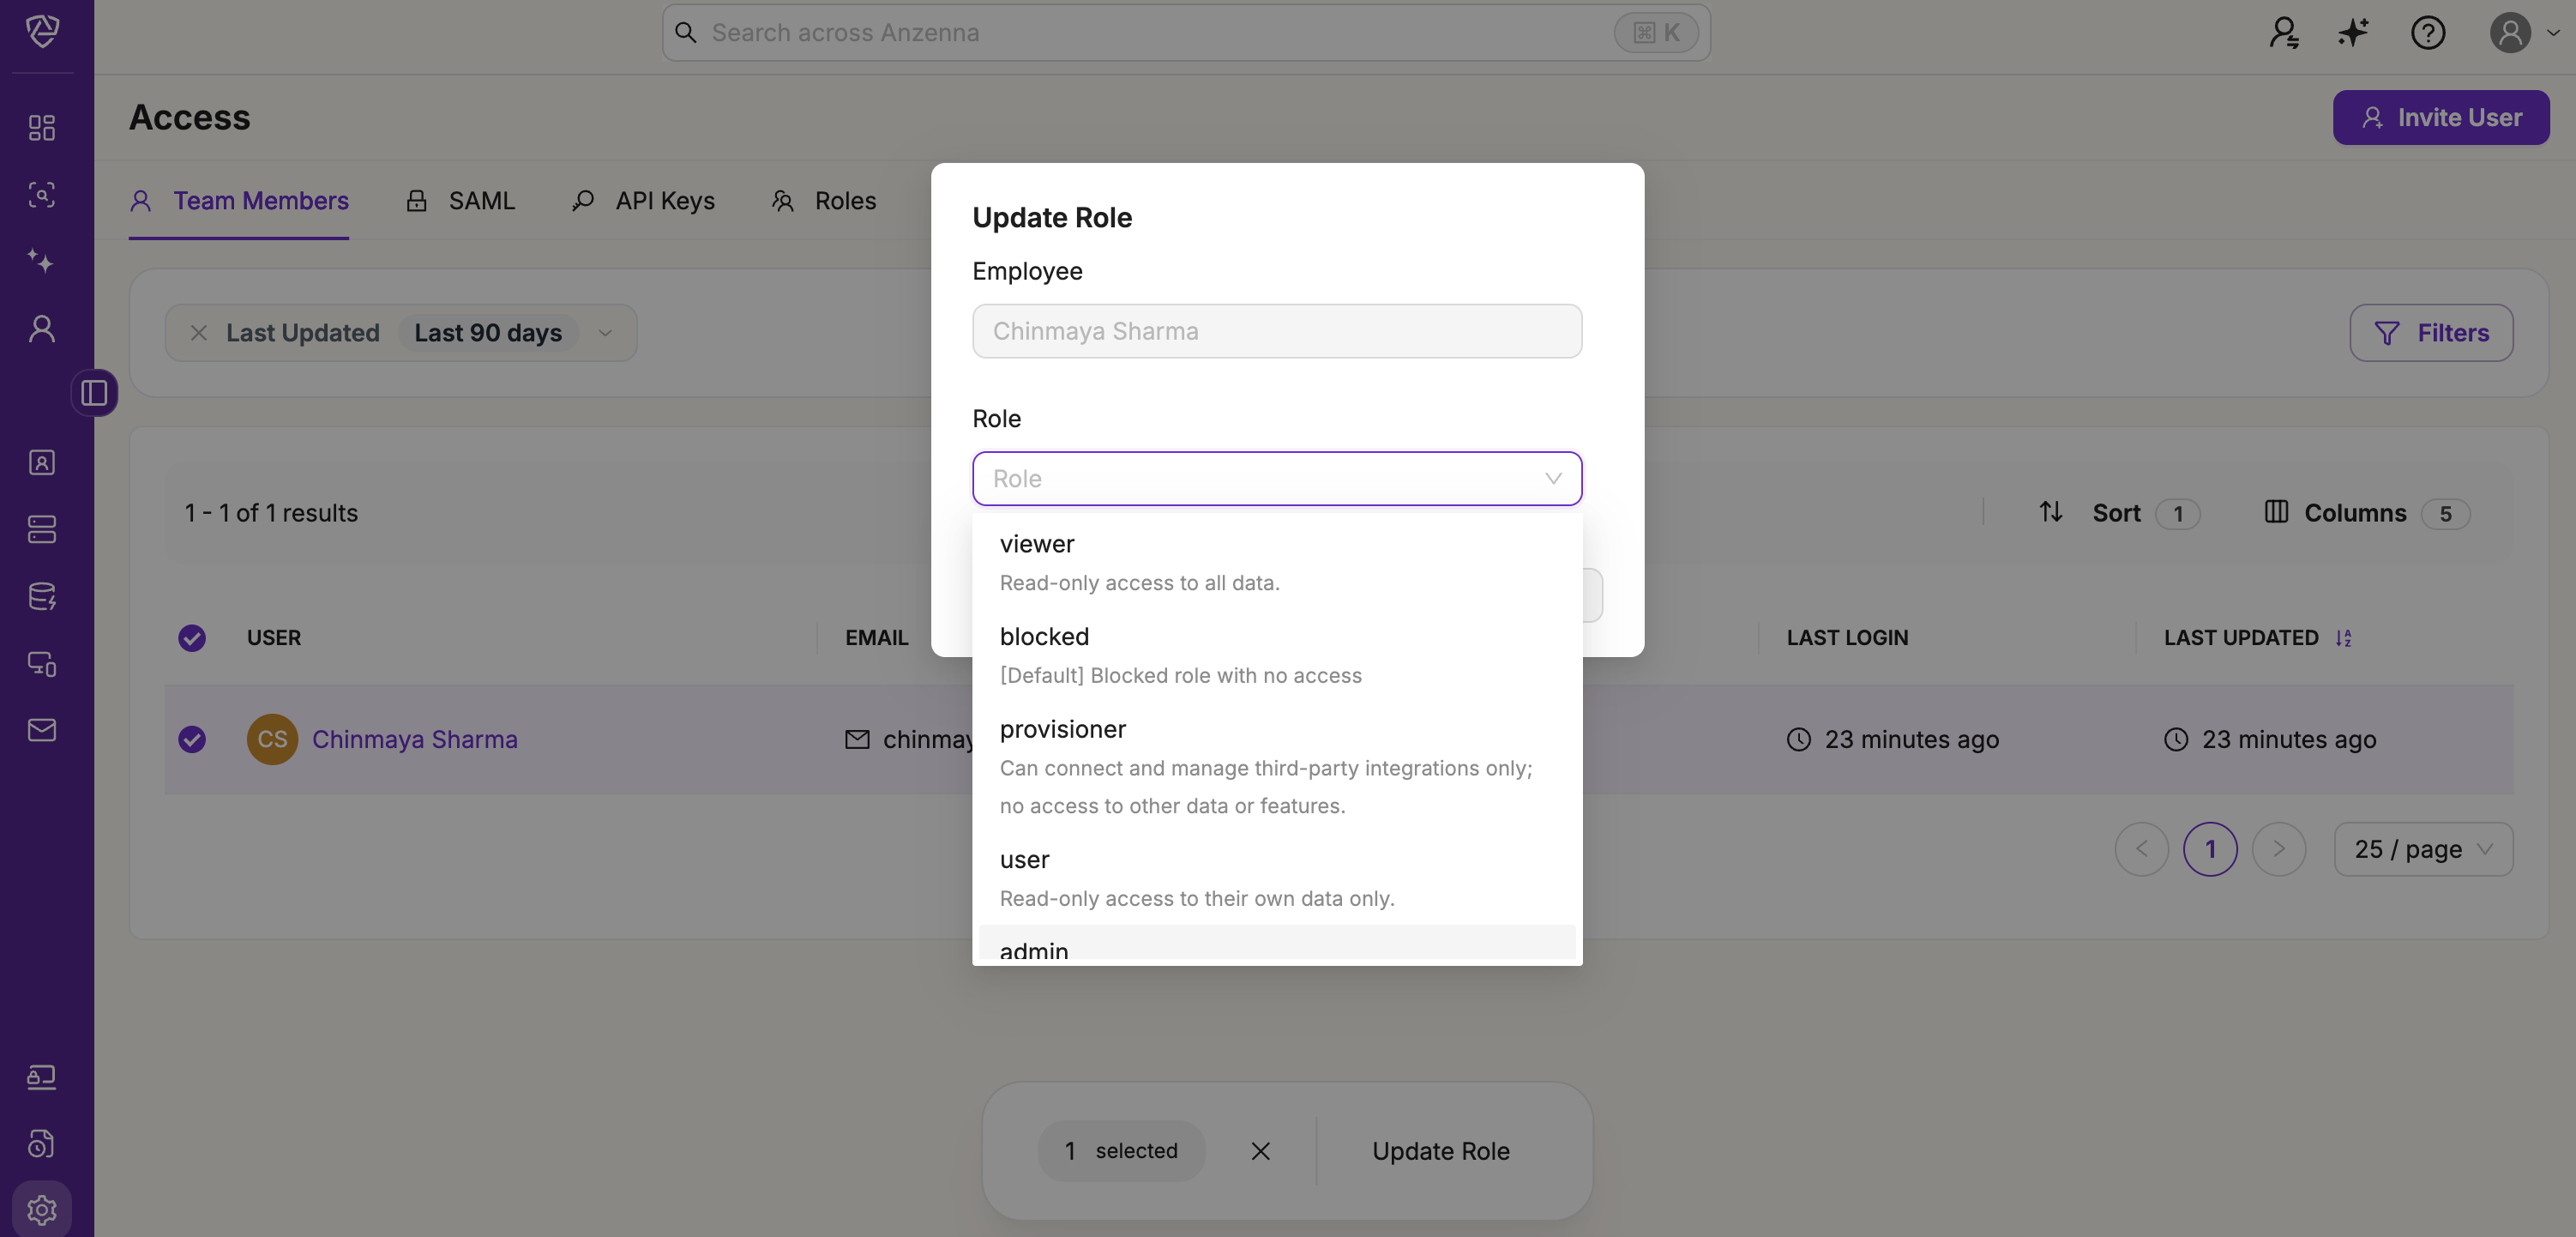
4. Assign Role
Select an appropriate role from the dropdown menu
- What data does this person need to access?
- Will they need to configure detections?
- Should they be able to modify settings?
- Do they need admin capabilities?
What Happens Next?
For the Invitee
- Receive an email invitation from Anzenna
For the Admin
- See the user status (Invited, Active)
- Resend invitations if needed
- Revoke pending invitations
- Modify user roles after they've joined
Manage Existing Users
Viewing All Users
Navigate to Settings > Access > Team Members
- Check status, role, and last active time
Update User Roles
Go to Settings > Access > Team Members
- Find the user and click the role dropdown
- Select the new role and confirm
Be cautious when adding or removing admin roles. Always maintain at least one admin user.