Connect Snowflake to Anzenna
This guide walks you through creating a Snowflake service account user with the appropriate permissions and connecting it to Anzenna using key-pair authentication.
Prerequisites
Snowflake ACCOUNTADMIN access. Creating the user requires SECURITYADMIN, but granting access to the
SNOWFLAKE.ACCOUNT_USAGEschema (where Anzenna reads login and query history) can only be done by ACCOUNTADMIN.- Access to the Anzenna platform
- Access to Snowflake SQL Worksheet
Step-by-Step Instructions
Part 1: Get the Public Key from Anzenna
In Anzenna, click on Integrations.

Click the enroll toggle button in the Snowflake card to begin setup.
Copy the public key shown in Anzenna. This will be used to establish the connection with Snowflake.
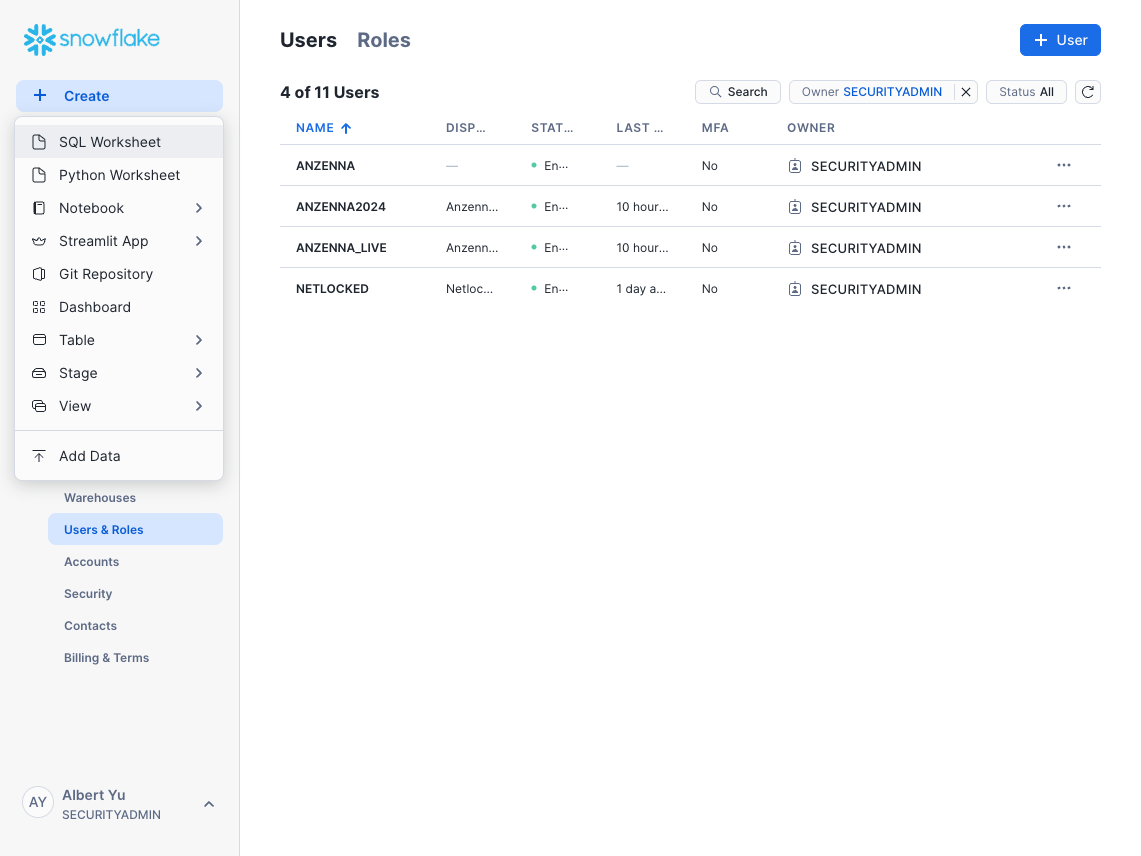
Part 2: Create the Anzenna User in Snowflake
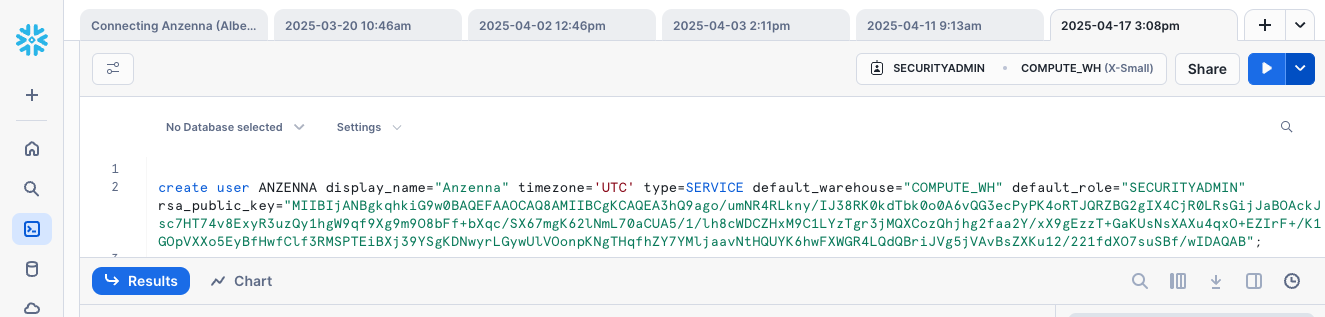
In your Snowflake console, click on SQL Worksheet.
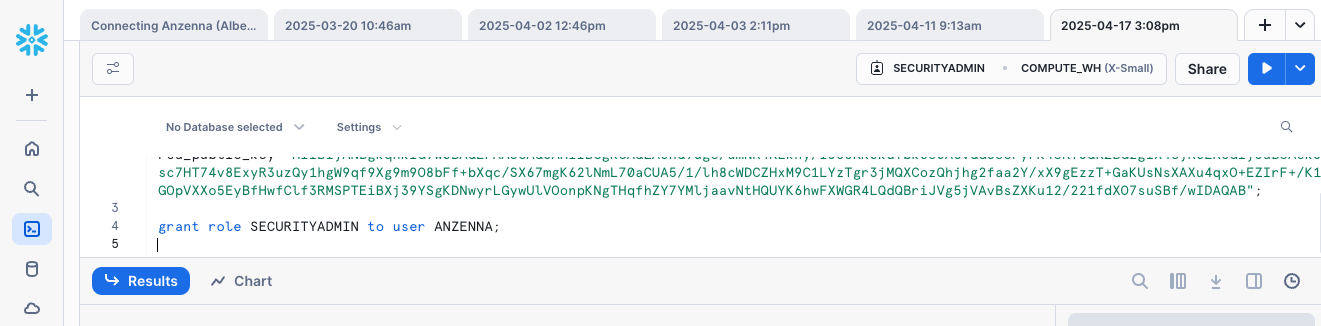
Paste the following SQL into the worksheet, replacing
<your-public-key>with the key you copied from Anzenna and<your-warehouse>with the name of any warehouse in your account:
create user ANZENNA display_name="Anzenna" timezone='UTC' type=SERVICE
default_warehouse="<your-warehouse>" default_role="SECURITYADMIN"
rsa_public_key="<your-public-key>"; grant role SECURITYADMIN to user
ANZENNA; grant imported privileges on database SNOWFLAKE to role
SECURITYADMIN; grant usage on warehouse <your-warehouse> to role
SECURITYADMIN;
Anzenna runs its queries on a warehouse (Snowflake's compute).
Any warehouse in your account works — the data Anzenna reads is the same
regardless of which one runs the query, so an X-Small is plenty. Replace both
<your-warehouse> placeholders with the same warehouse name.
Without a usable warehouse the connection will succeed, but every sync will
fail with You must specify the warehouse to use.
The grant imported privileges statement must be run as
ACCOUNTADMIN. It gives the SECURITYADMIN role read access to
the SNOWFLAKE.ACCOUNT_USAGE schema, which only ACCOUNTADMIN can
see by default. Without it the connection will succeed, but every Anzenna
sync will fail with Schema 'SNOWFLAKE.ACCOUNT_USAGE' does not exist or
not authorized.
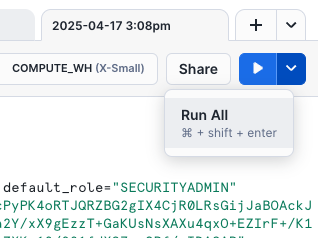
Click on More run options.
Click Run All. Use "Run All" rather than "Run" to ensure both the CREATE and GRANT statements execute.
Part 3: (Optional) Set a Network Policy
If your organization requires restricting API access by IP, you can set a network policy for the Anzenna service account.
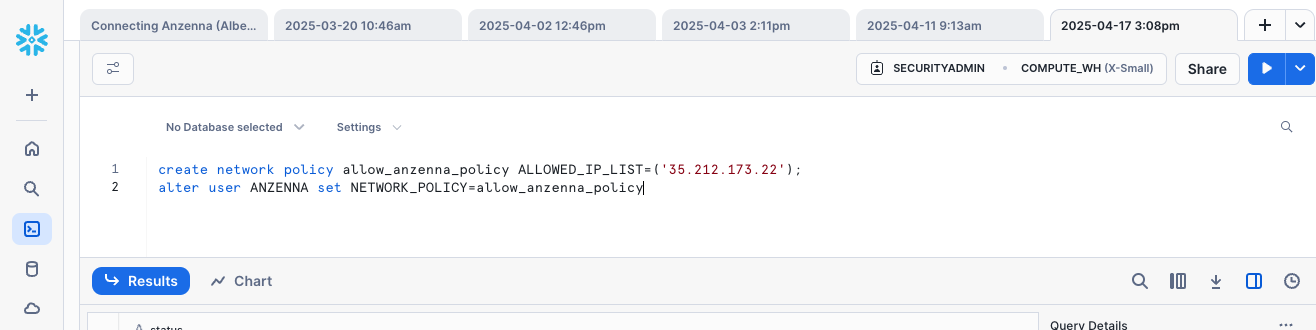
Paste the following network policy SQL into the worksheet:
create network policy allow_anzenna_policy
ALLOWED_IP_LIST=('35.212.173.22'); alter user ANZENNA set
NETWORK_POLICY=allow_anzenna_policy;
Click on More run options.

Click Run All.

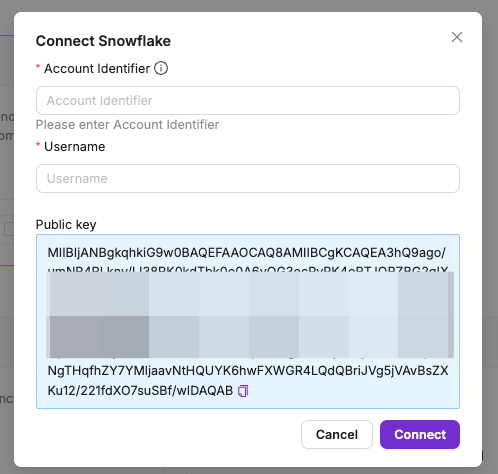
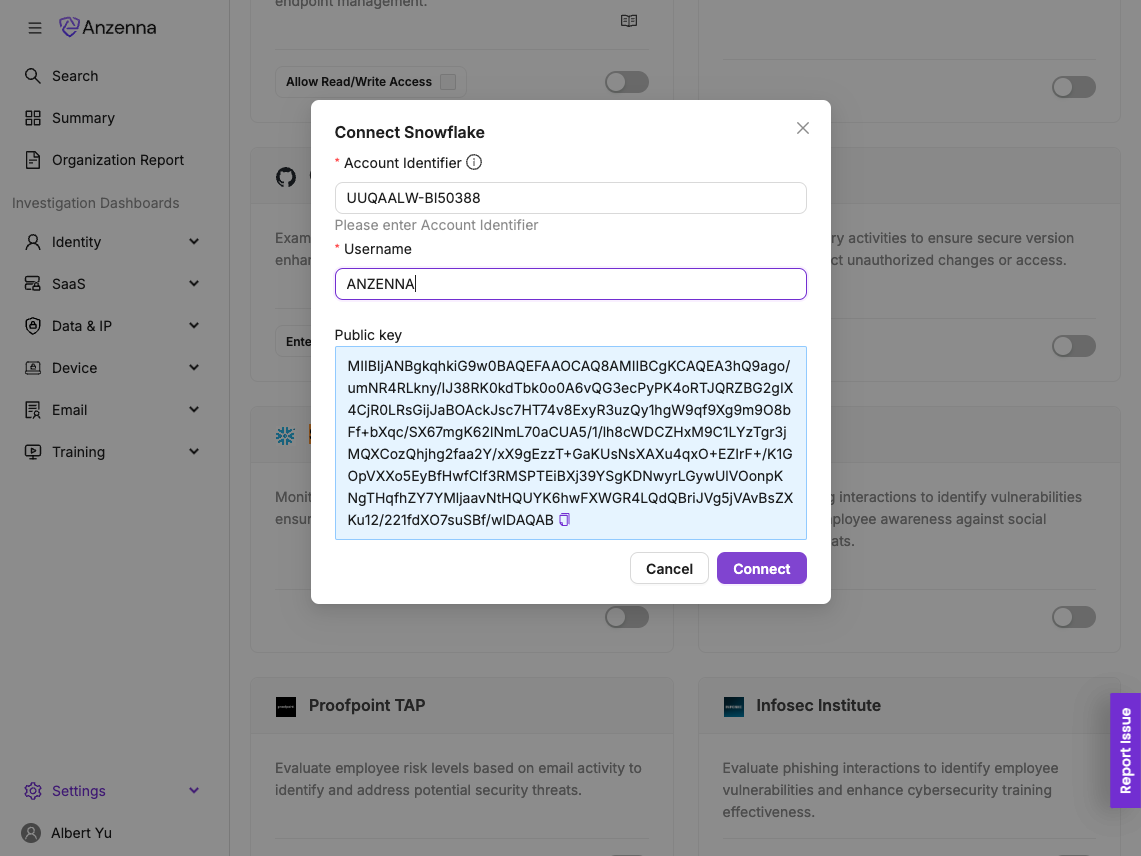
Part 4: Complete the Connection in Anzenna
Return to the Anzenna enrollment page and paste your Snowflake account identifier. The format is
<orgname>-<accountname>. See theSnowflake documentation
for more details.
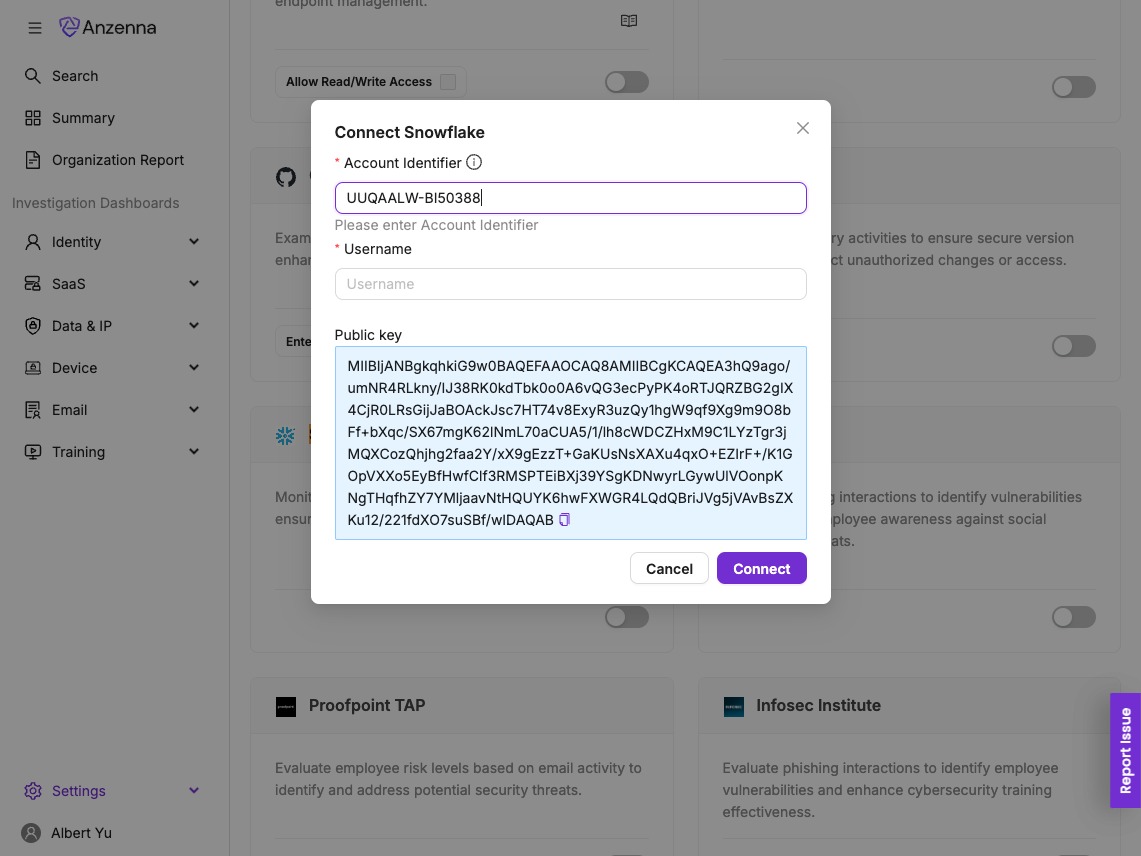
Type ANZENNA as the username.
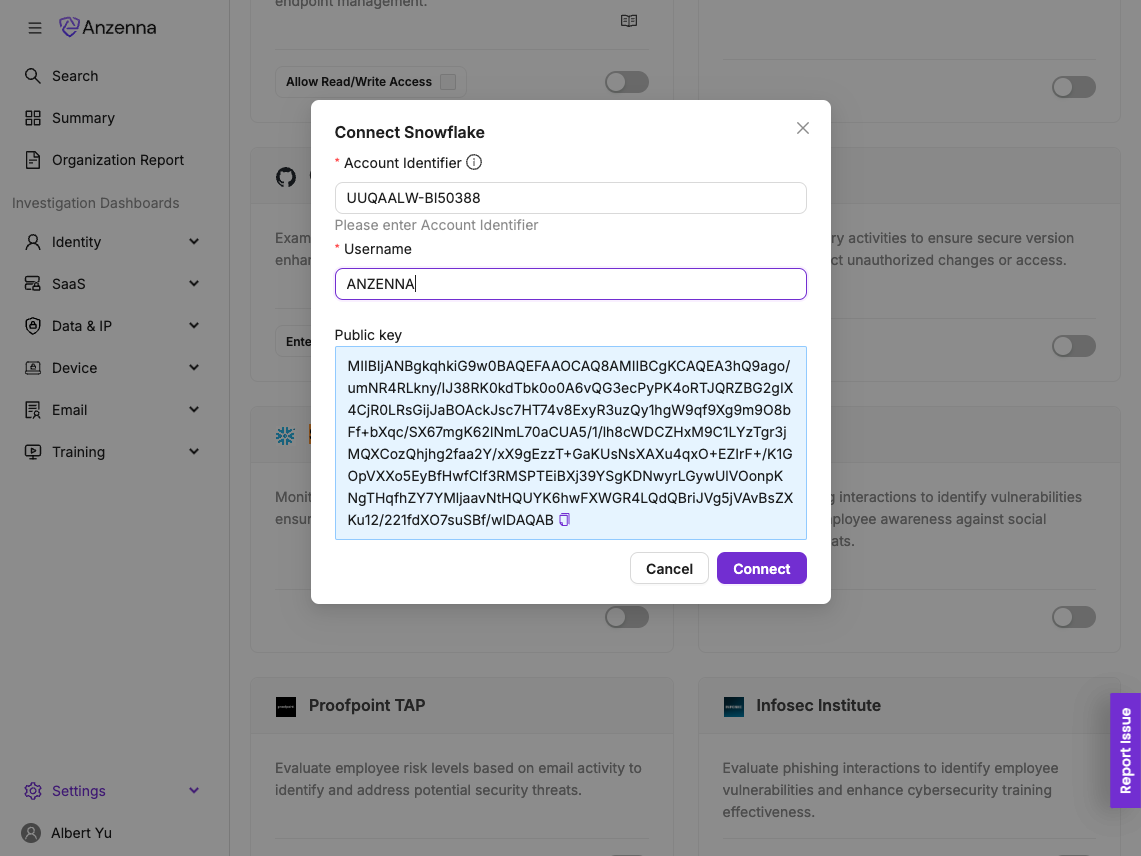
Click Connect.
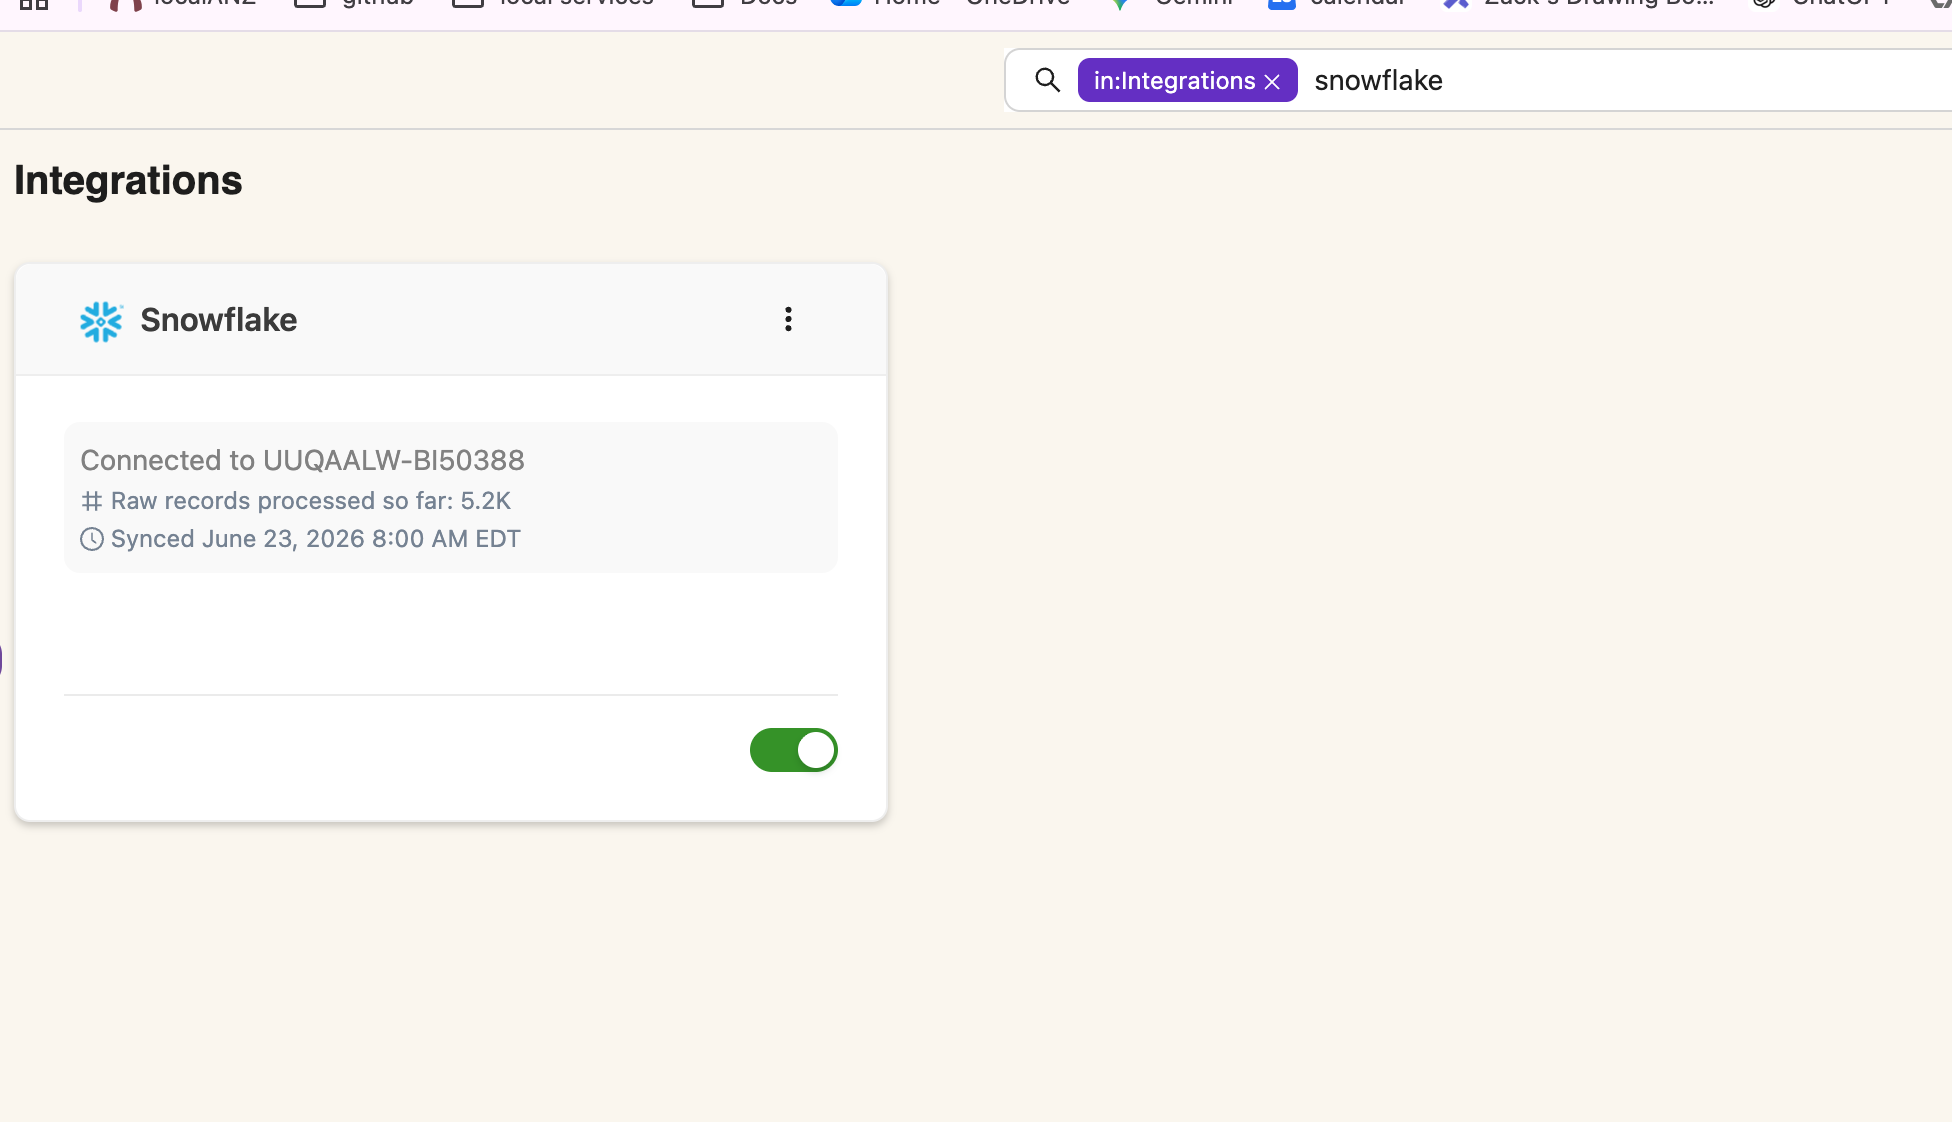
You should see your Snowflake instance marked as connected.
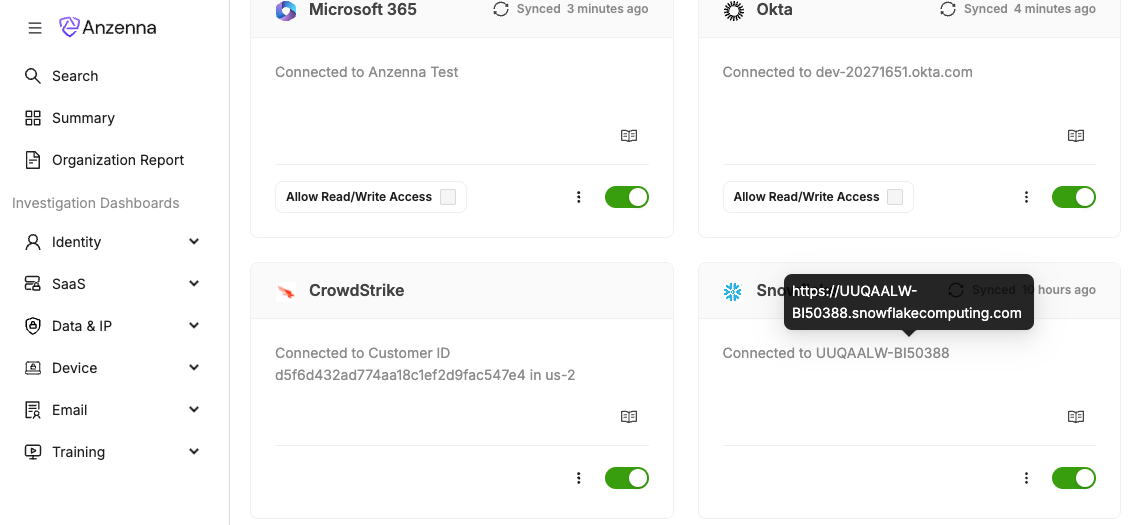
Snowflake is now connected to Anzenna. Anzenna will begin monitoring your Snowflake environment for security insights.