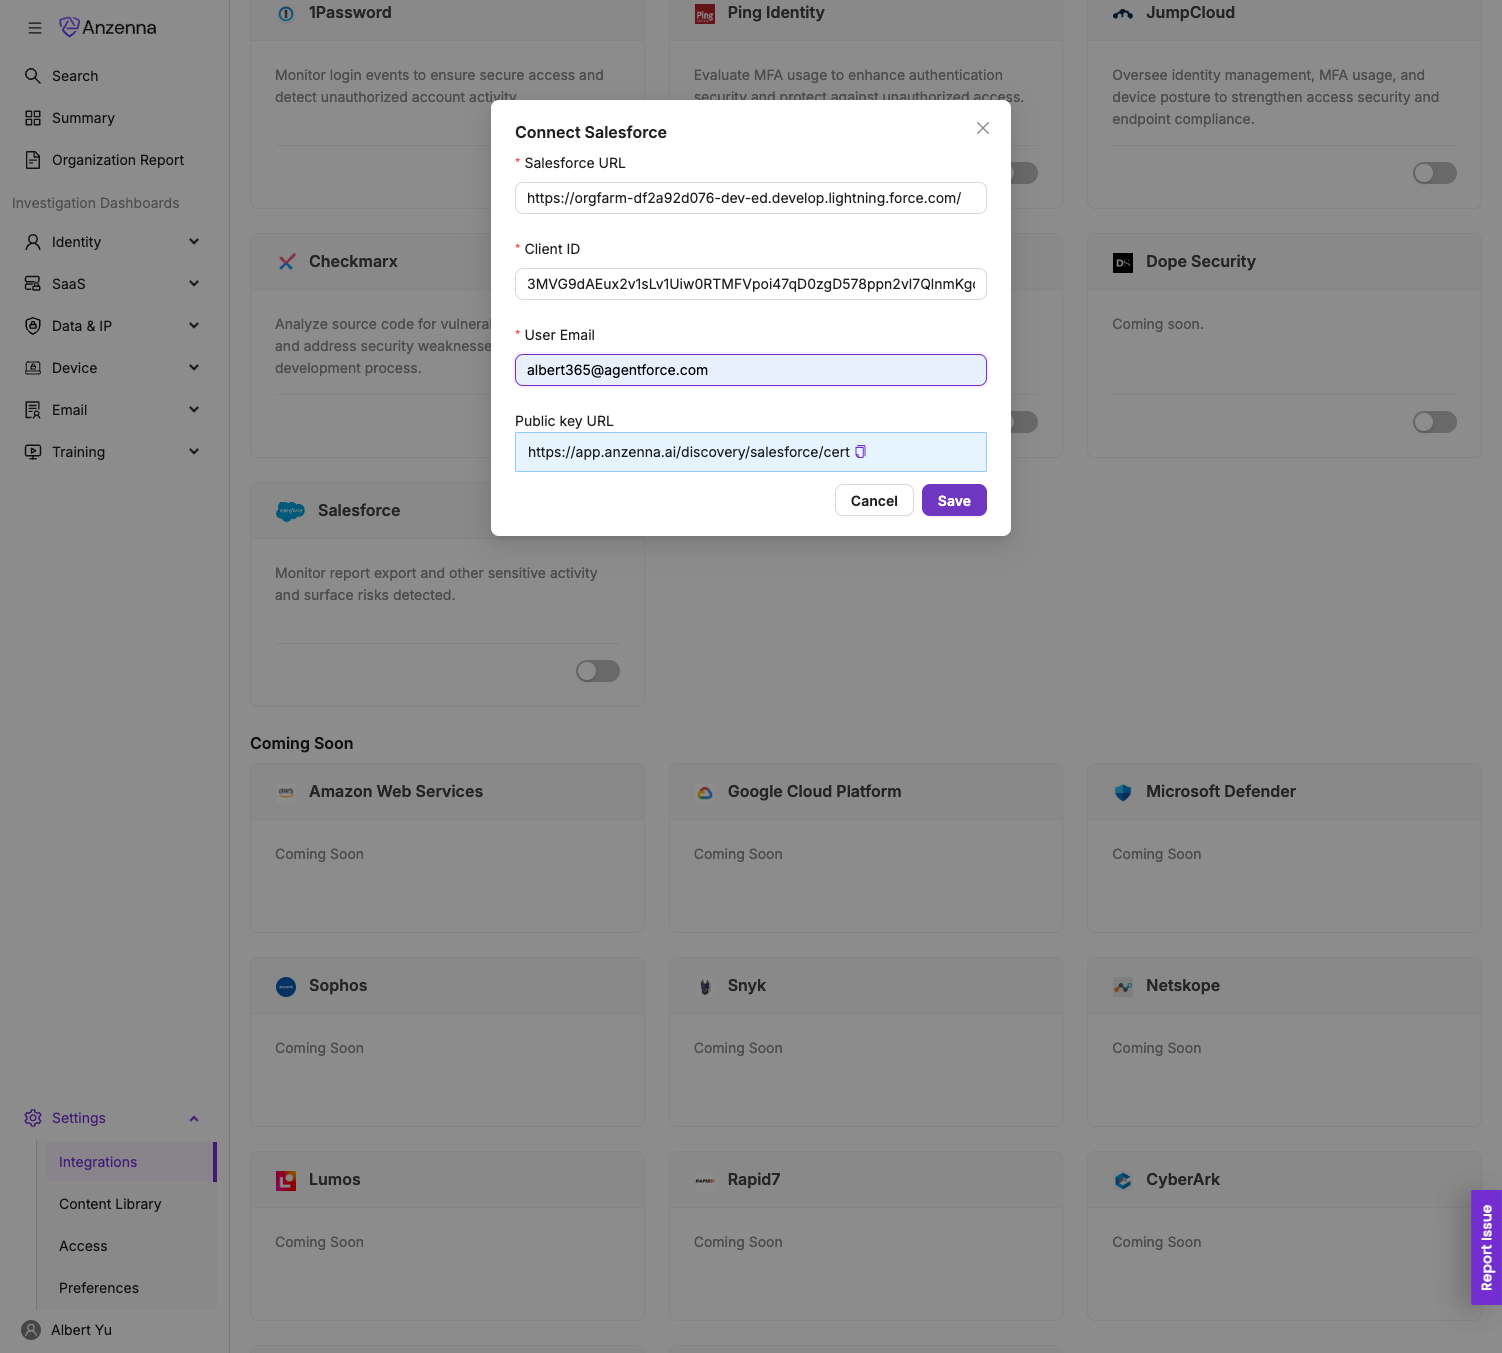
Connect Salesforce to Anzenna
This guide walks you through connecting your Salesforce instance to Anzenna. The integration enables Anzenna to collect Salesforce event logs for security monitoring, anomaly detection, and compliance visibility.
Prerequisites
- Salesforce System Administrator access
- Access to the Anzenna platform
Salesforce Shield or Event Monitoring add-on (required for event log access)
Step-by-Step Instructions
Part 1: Enable the Salesforce Integration in Anzenna
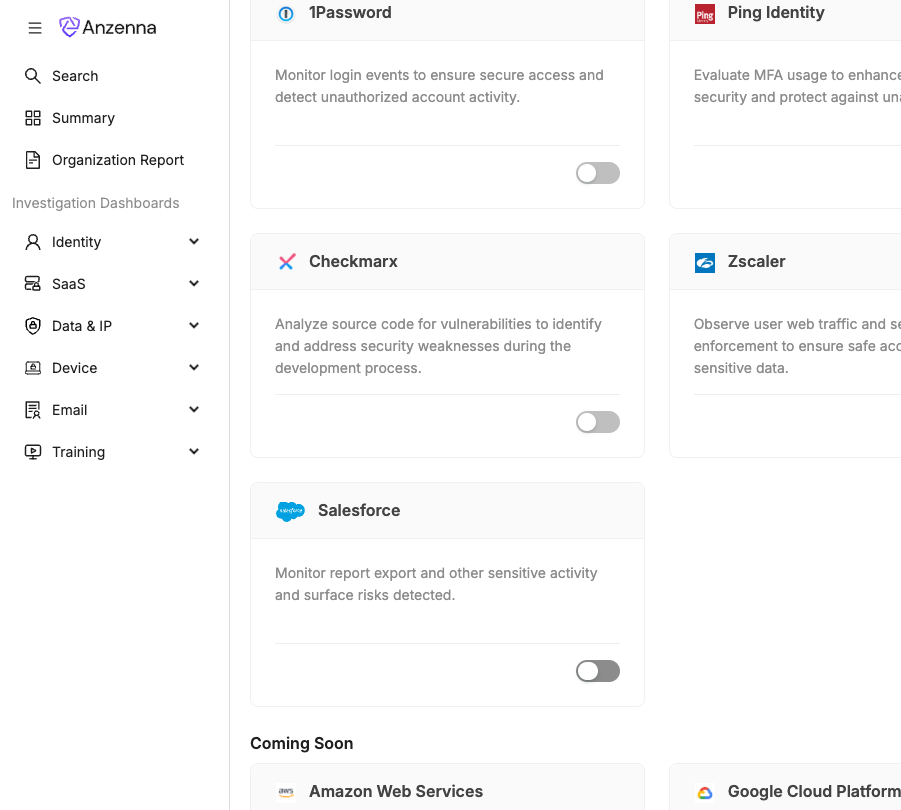
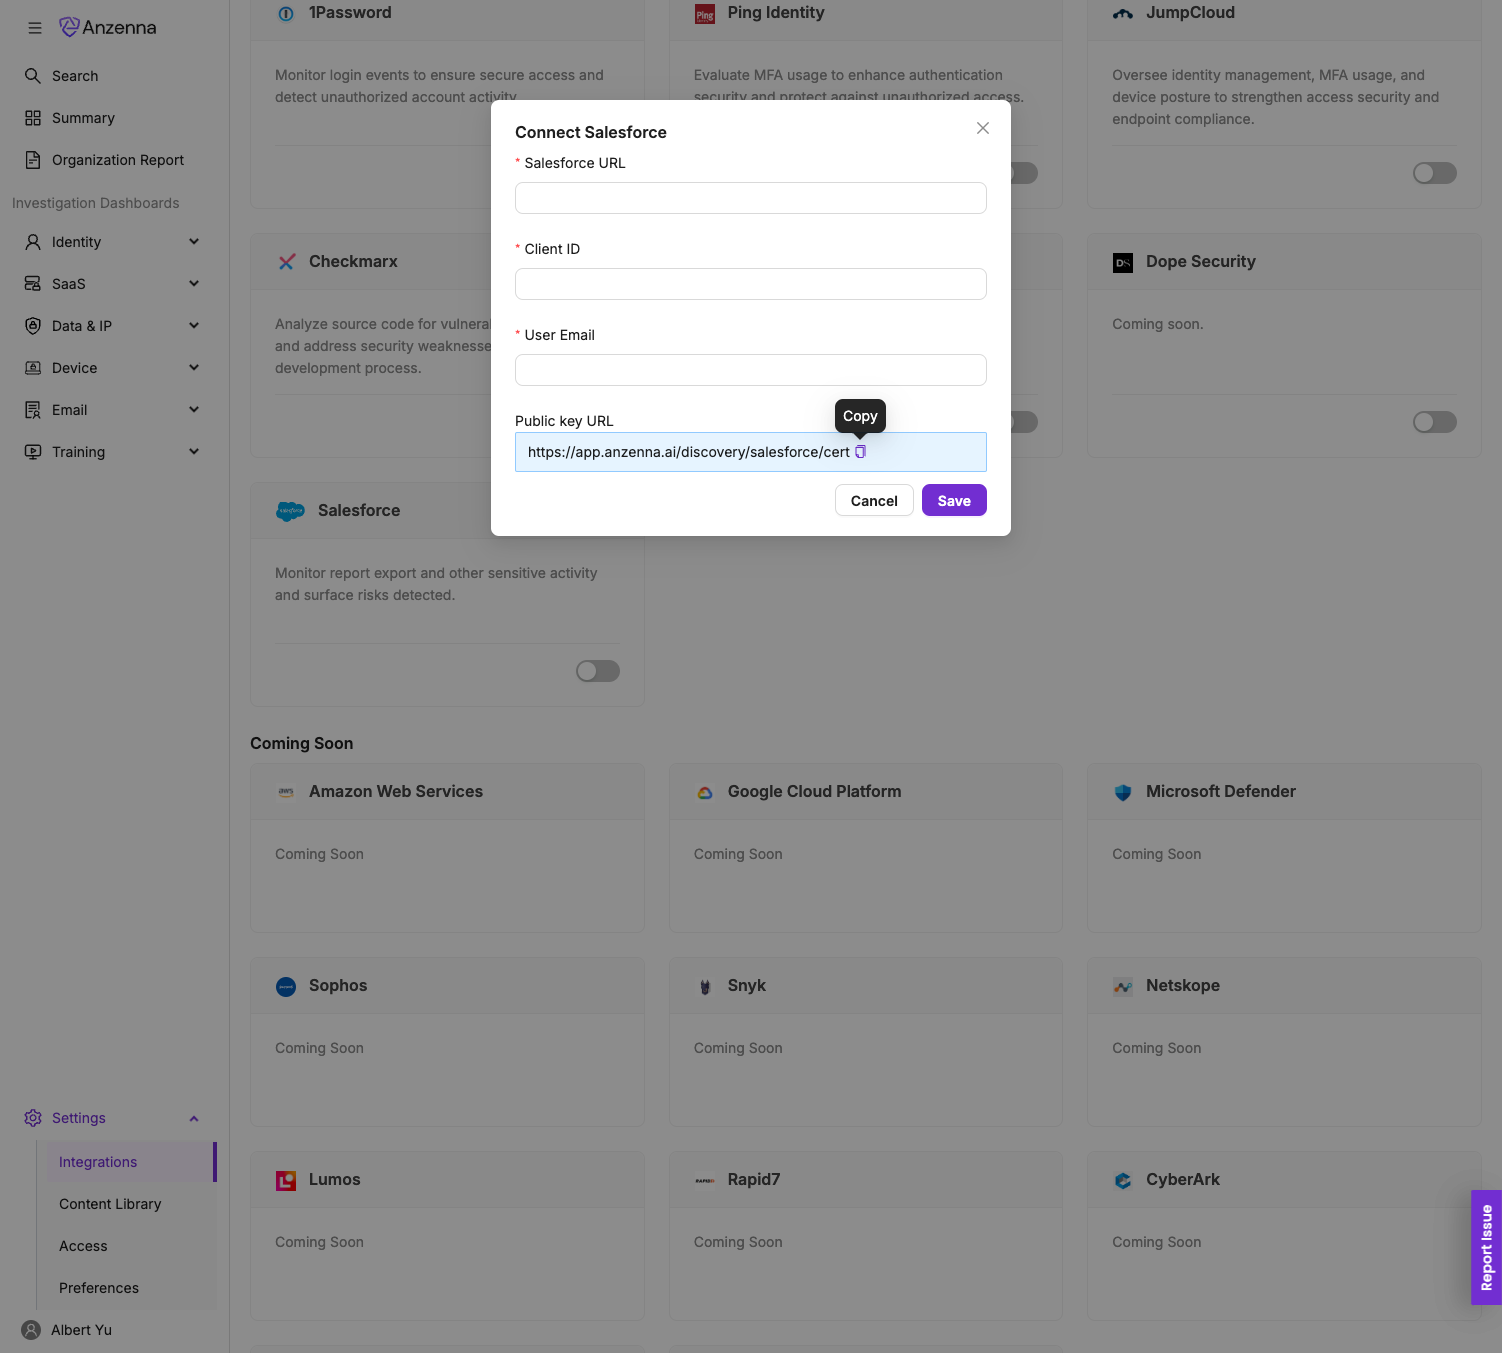
In Anzenna, toggle the integration card for Salesforce to on.
Copy the certificate URL shown in Anzenna, and paste it in a new browser window to trigger the public certificate download.
Part 2: Configure Event Monitoring in Salesforce
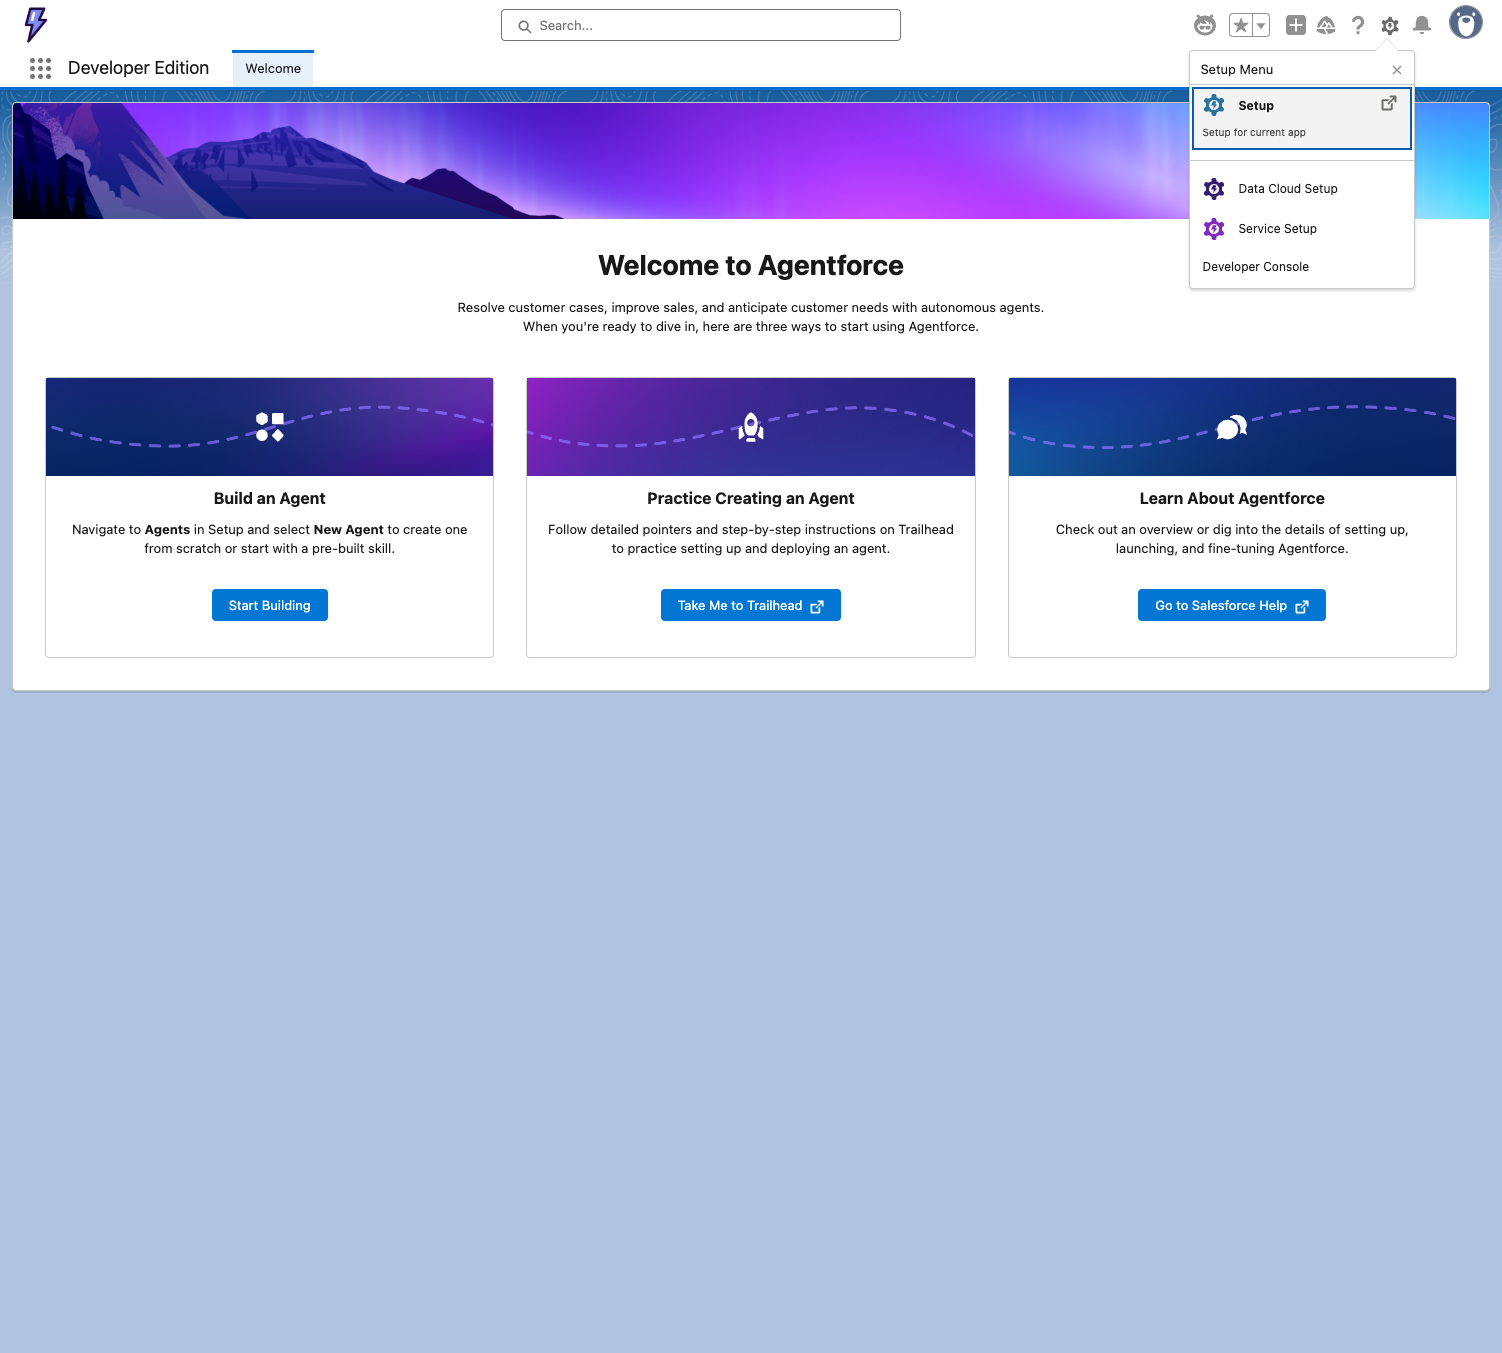
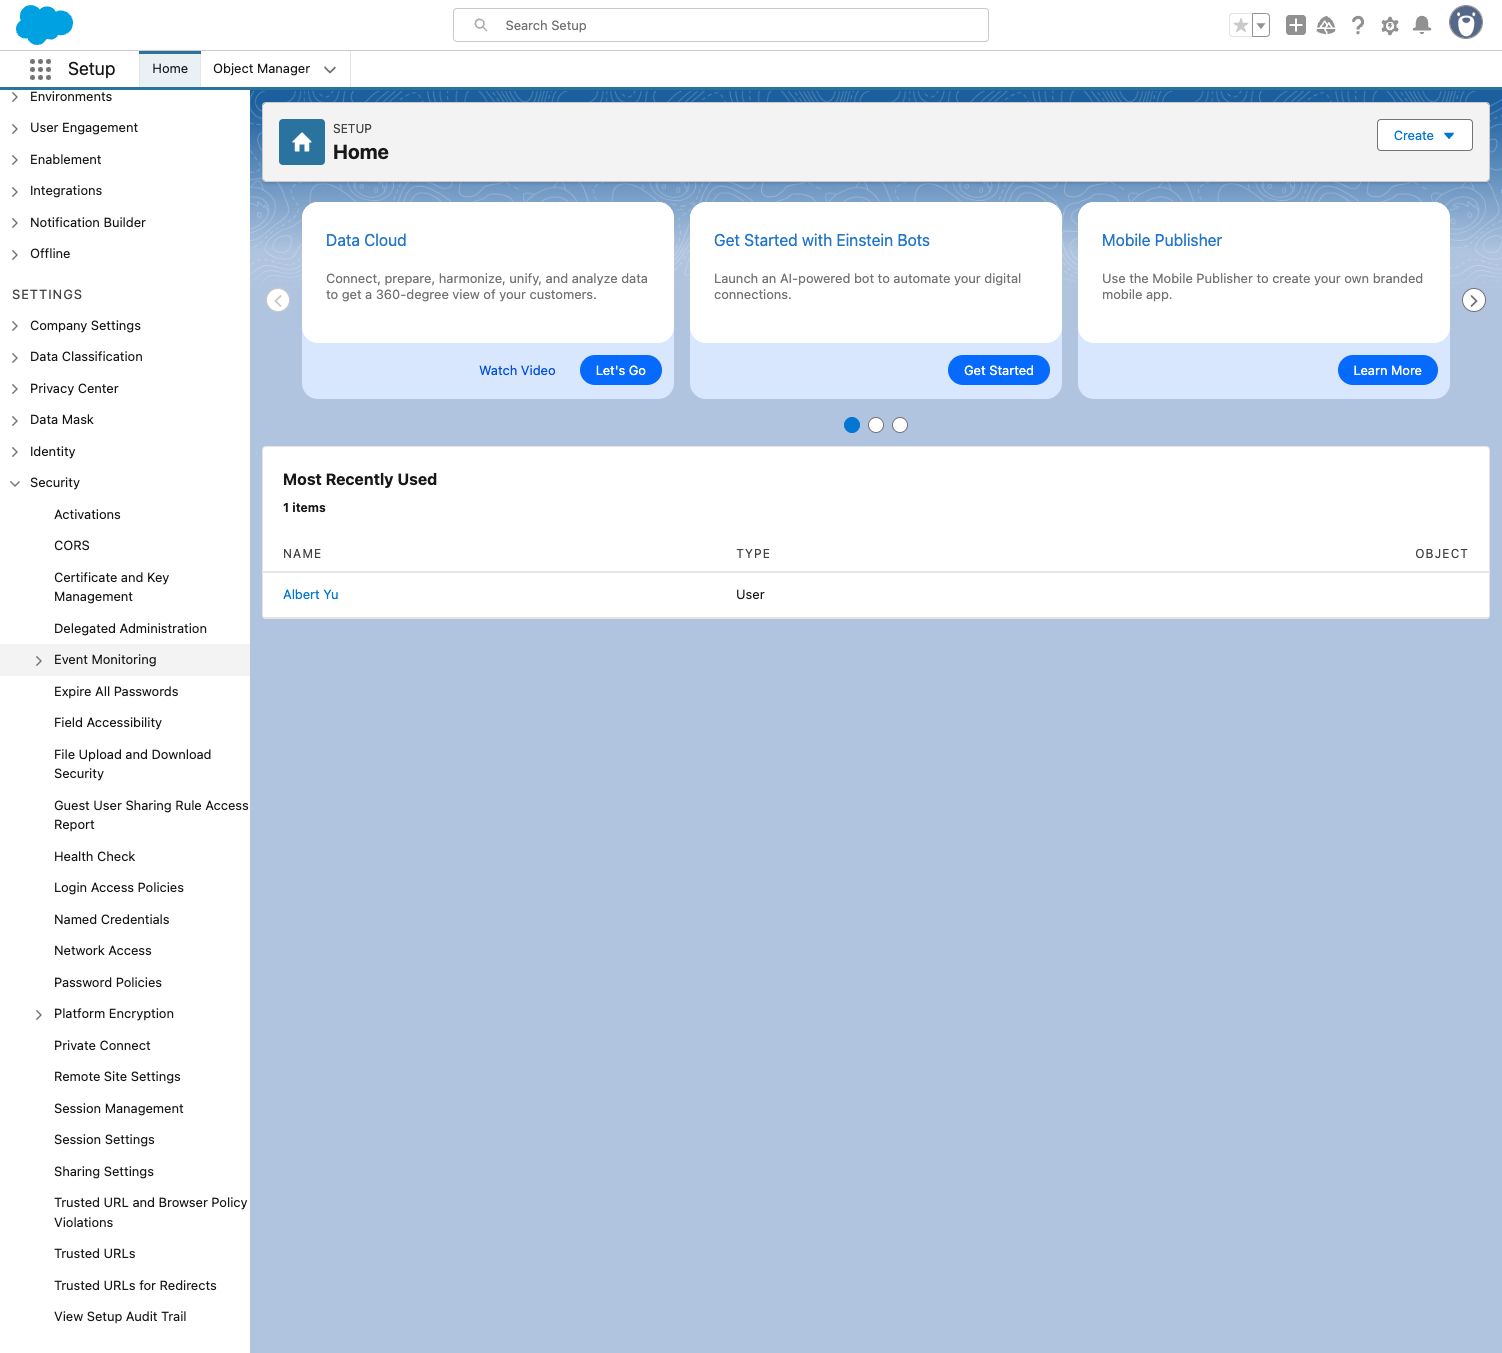
Go to your Salesforce instance and click Setup.
Click on Setup for current app.
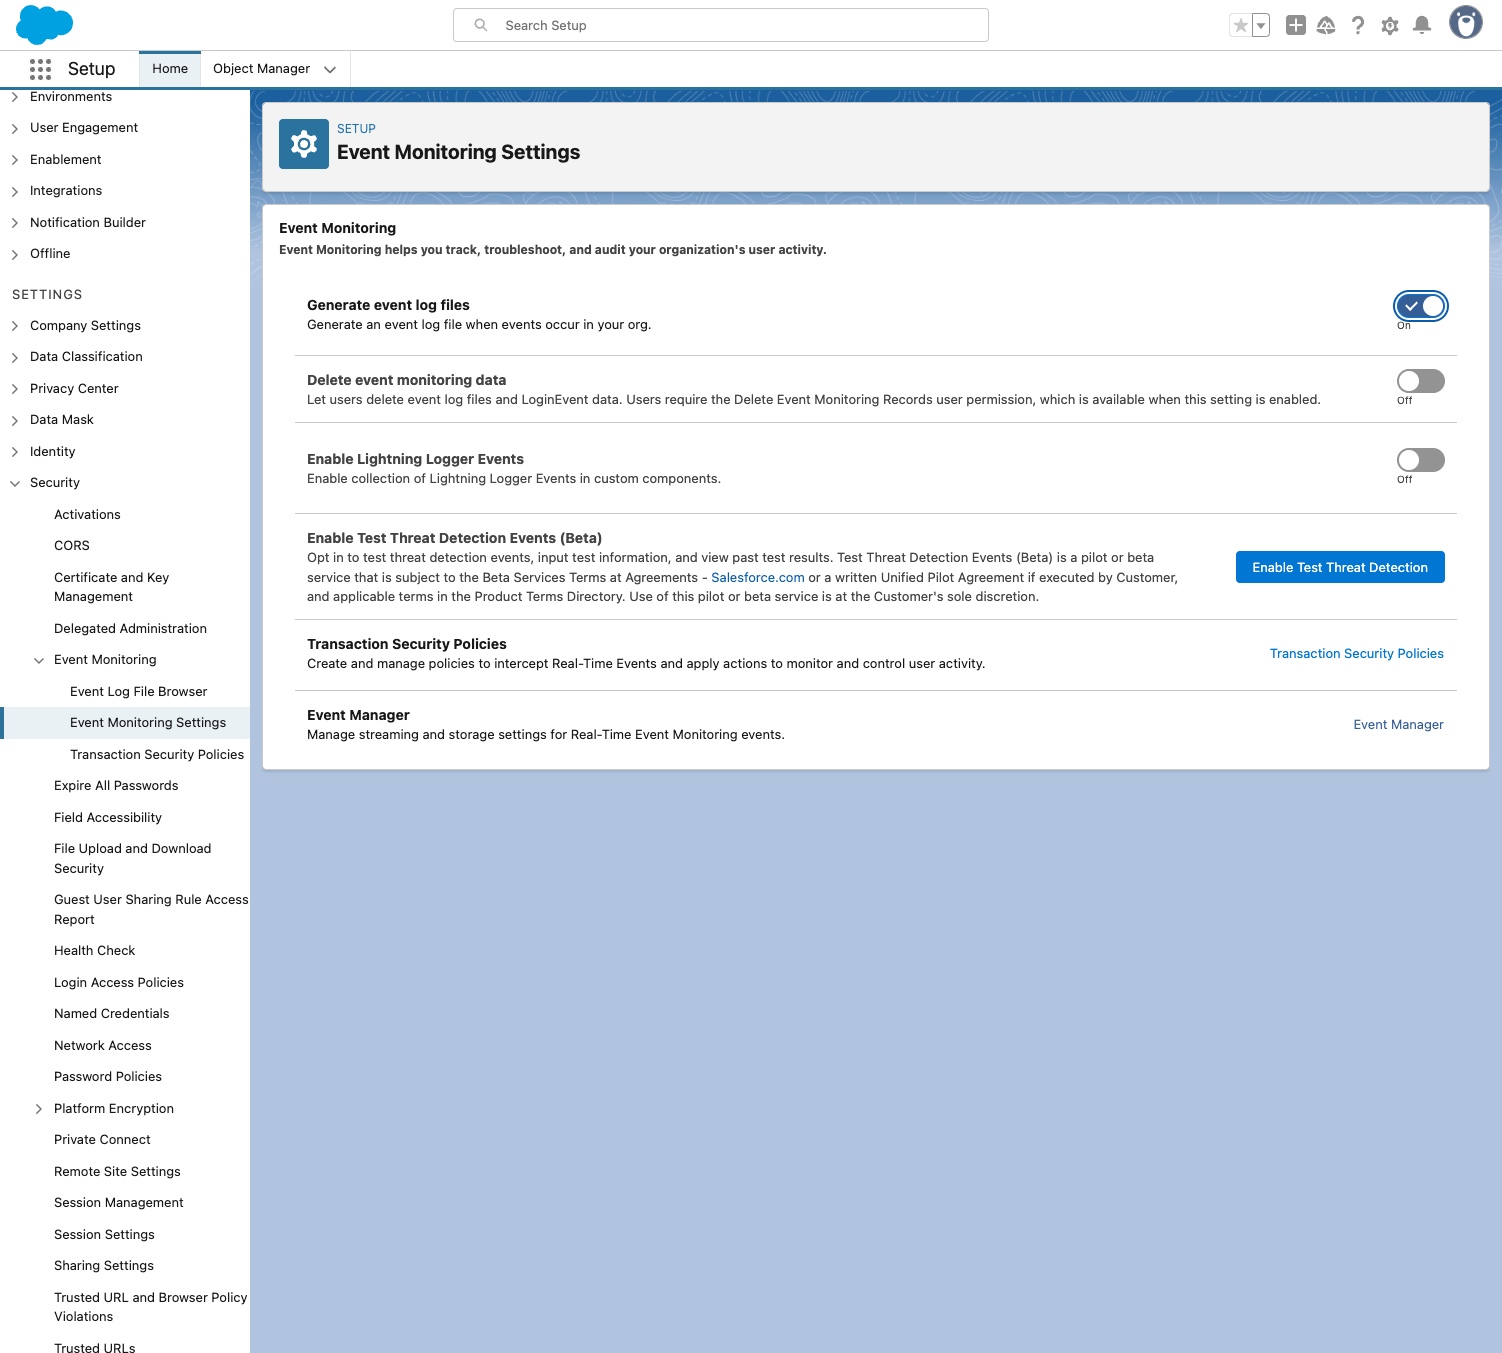
Click on Security in the left menu.
Click on Event Monitoring.
Click on Event Monitoring Settings.

Turn on Generate event log files.

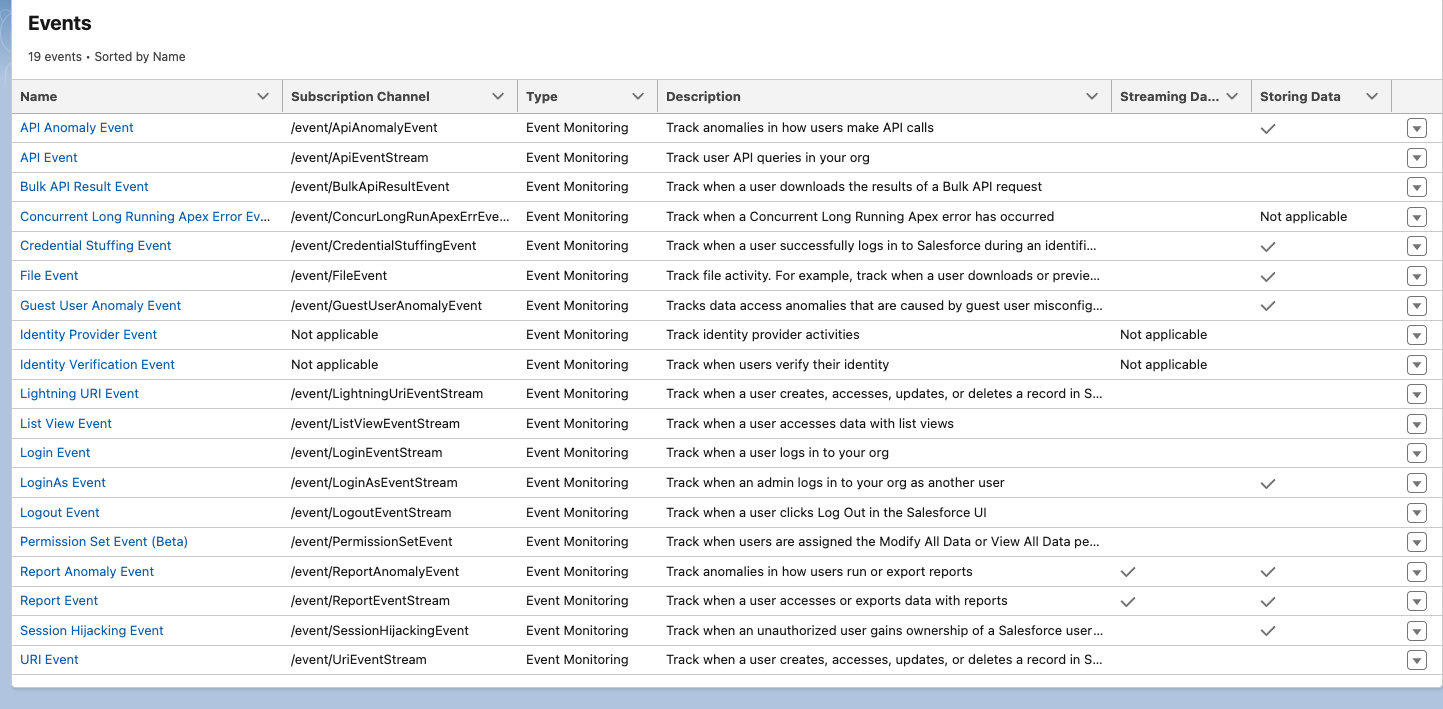
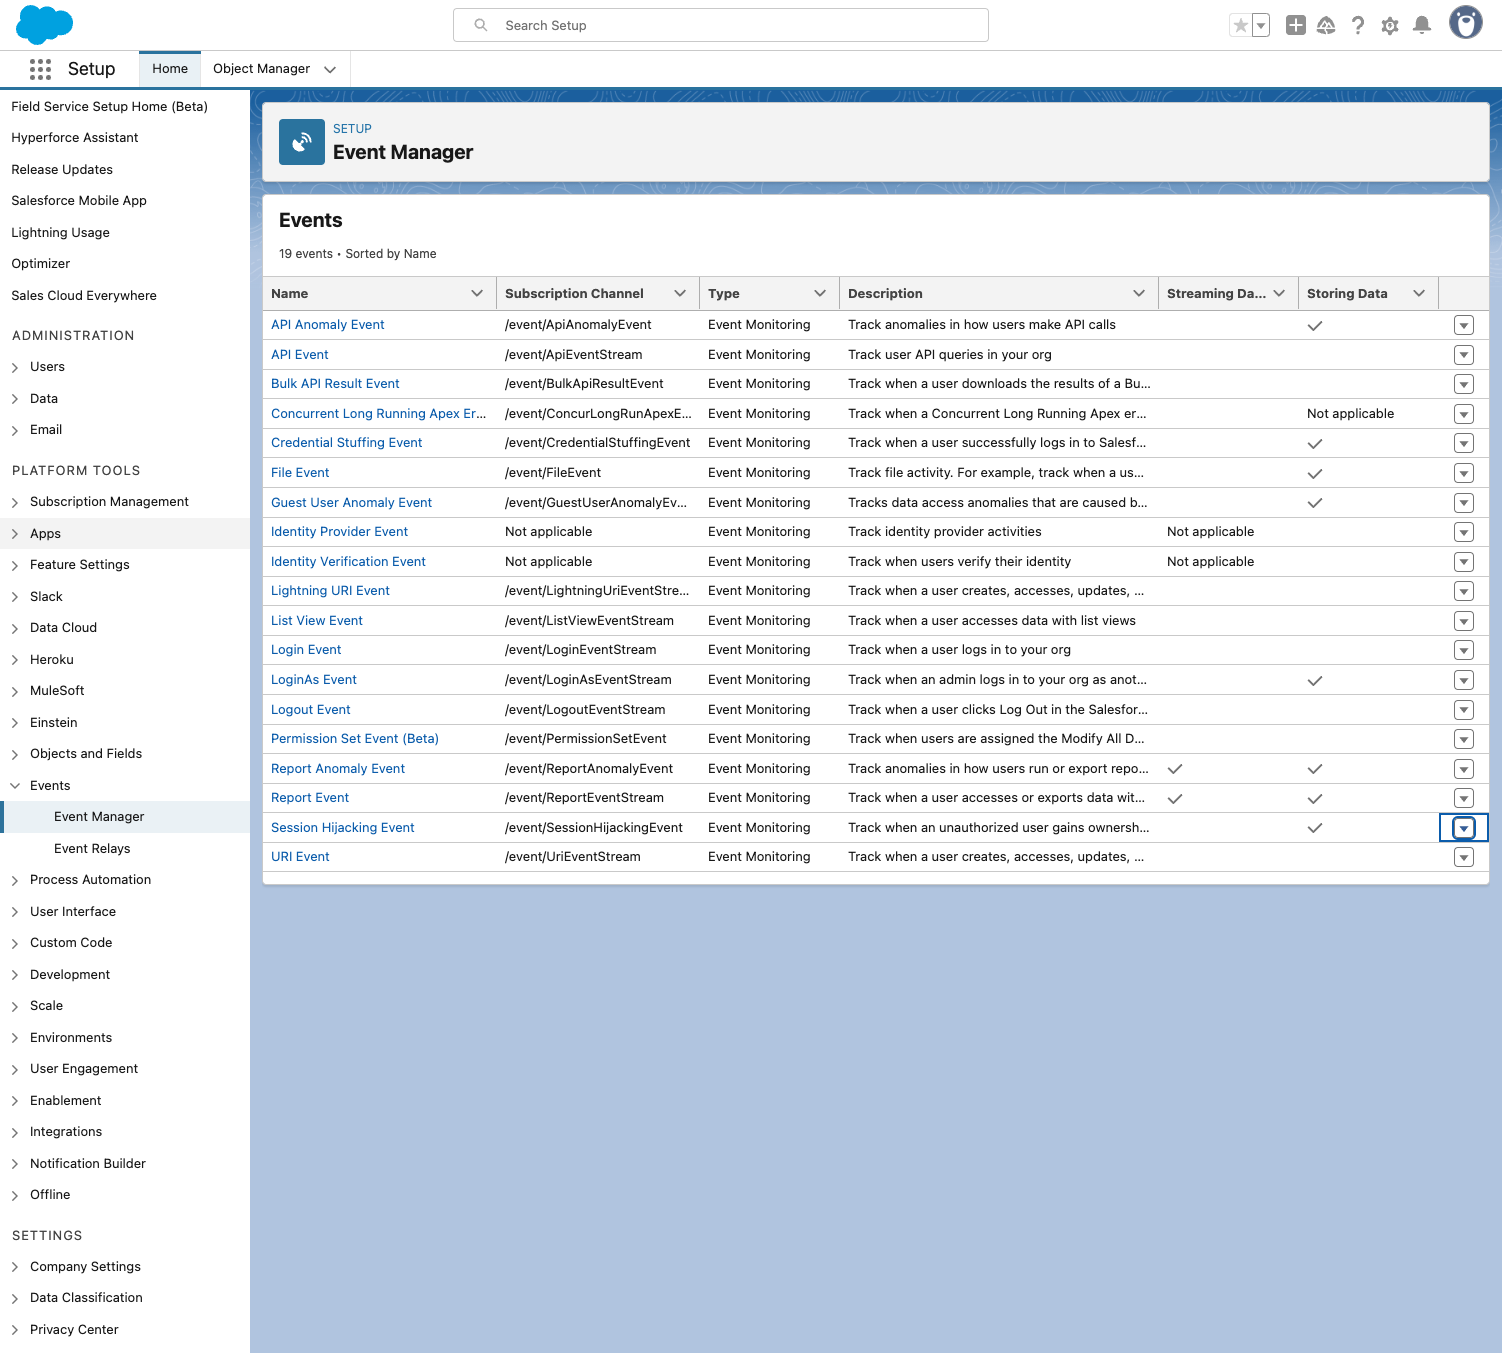
Click on Event Manager.
Click on Show actions in the row of "Report Event".
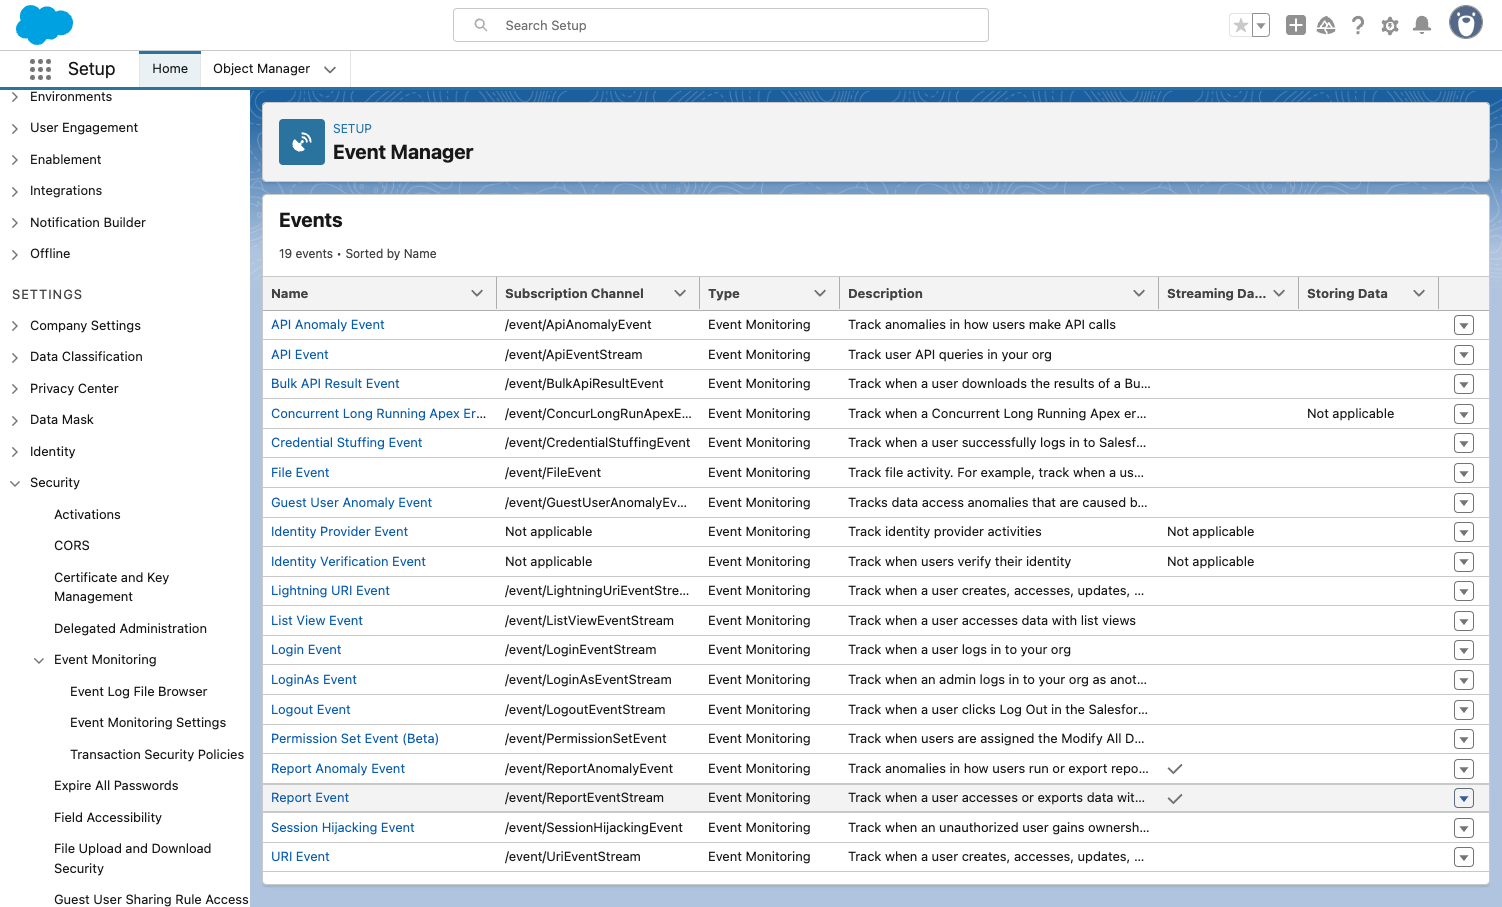
Click on Enable Storage.
Do the same for the following events (Show actions → Enable Storage for each):
- API Anomaly Event
- Credential Stuffing Event
- File Event
- Guest User Anomaly Event
- LoginAs Event
- Login Event
- Report Anomaly Event
- Session Hijacking Event
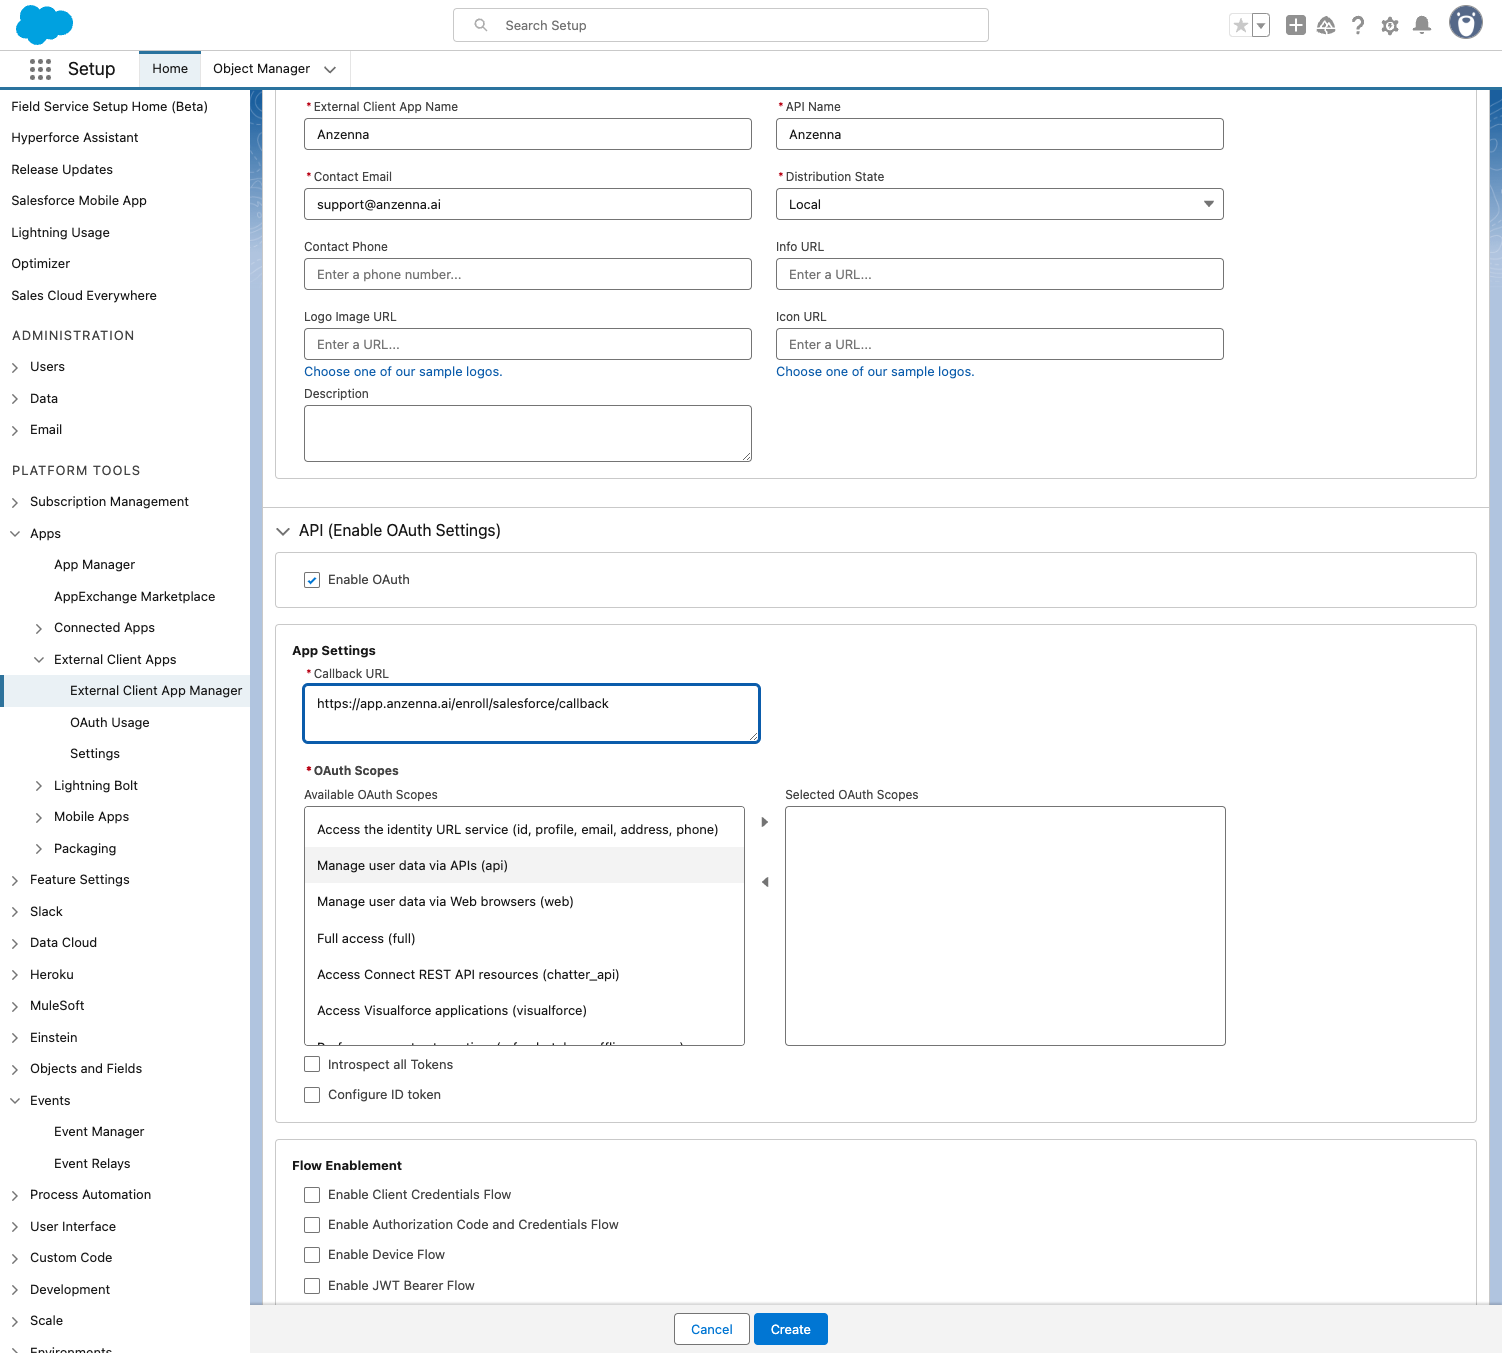
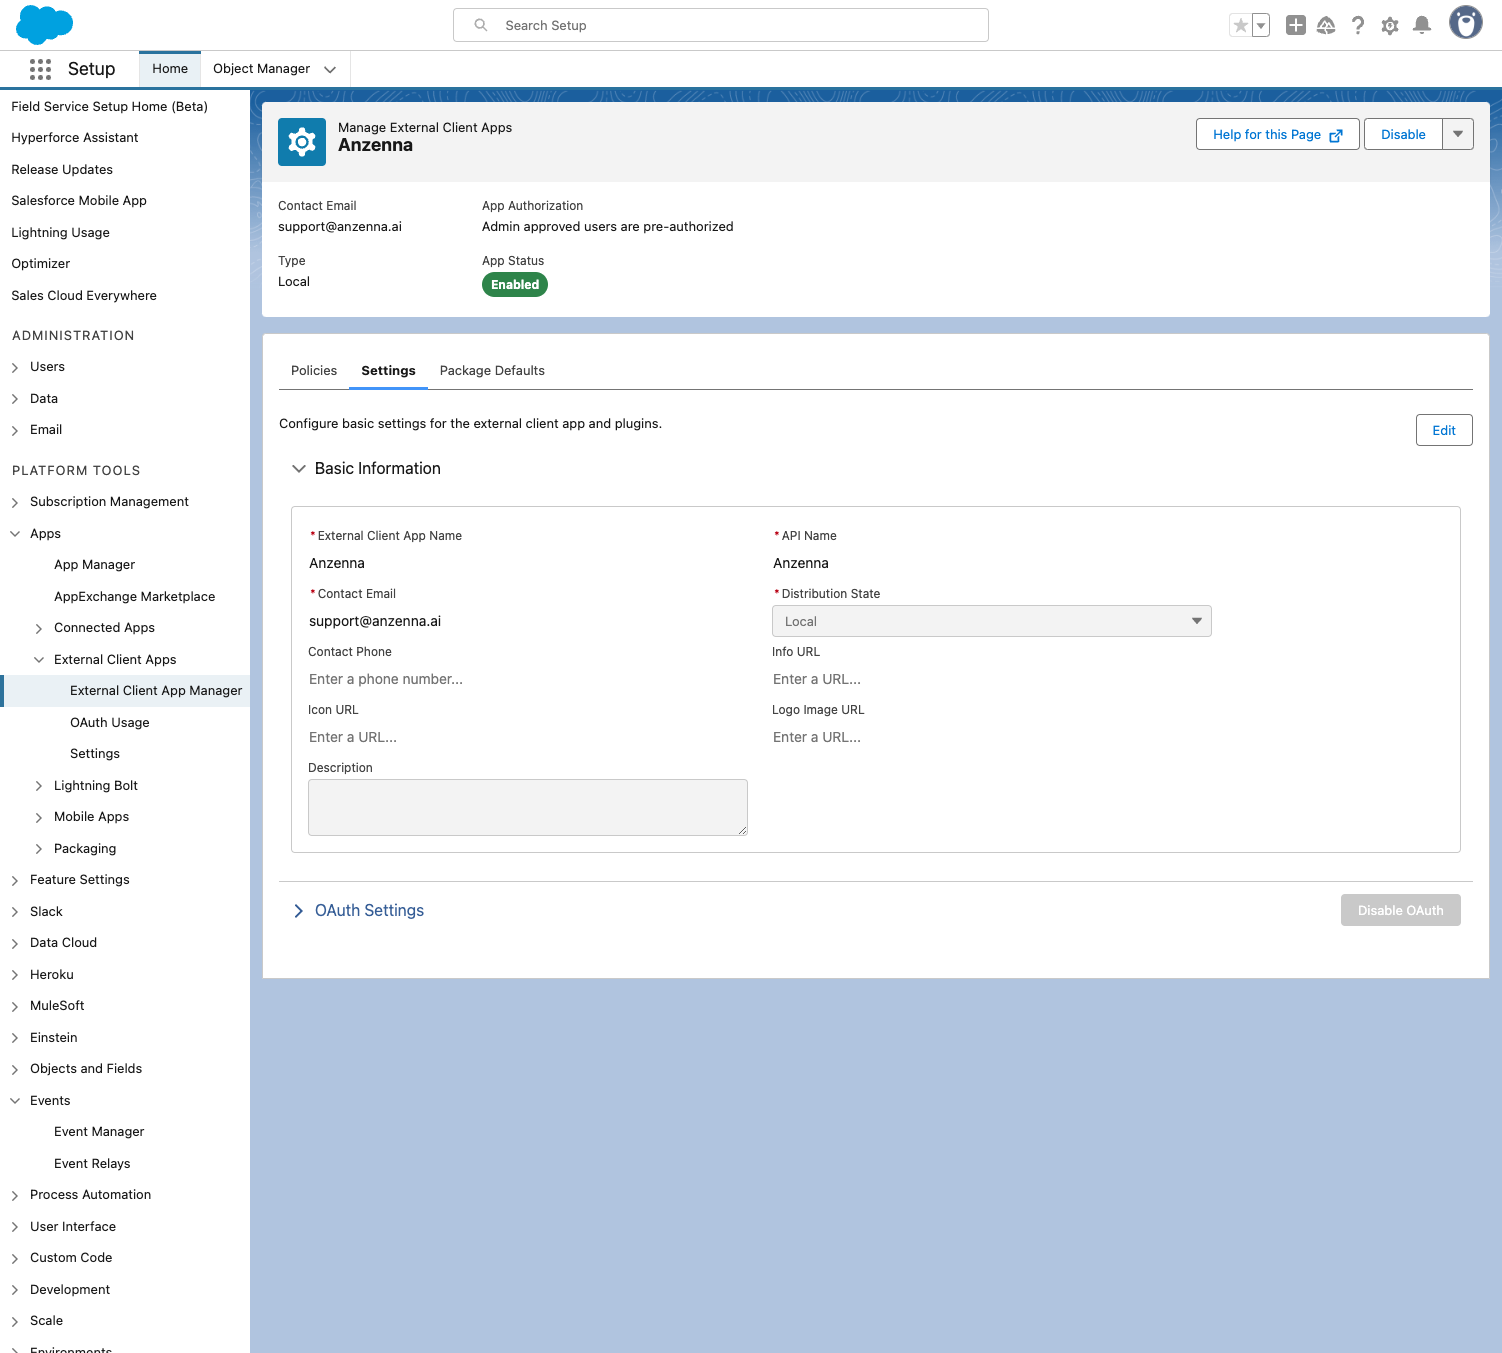
Part 3: Create an External Client App (OAuth)
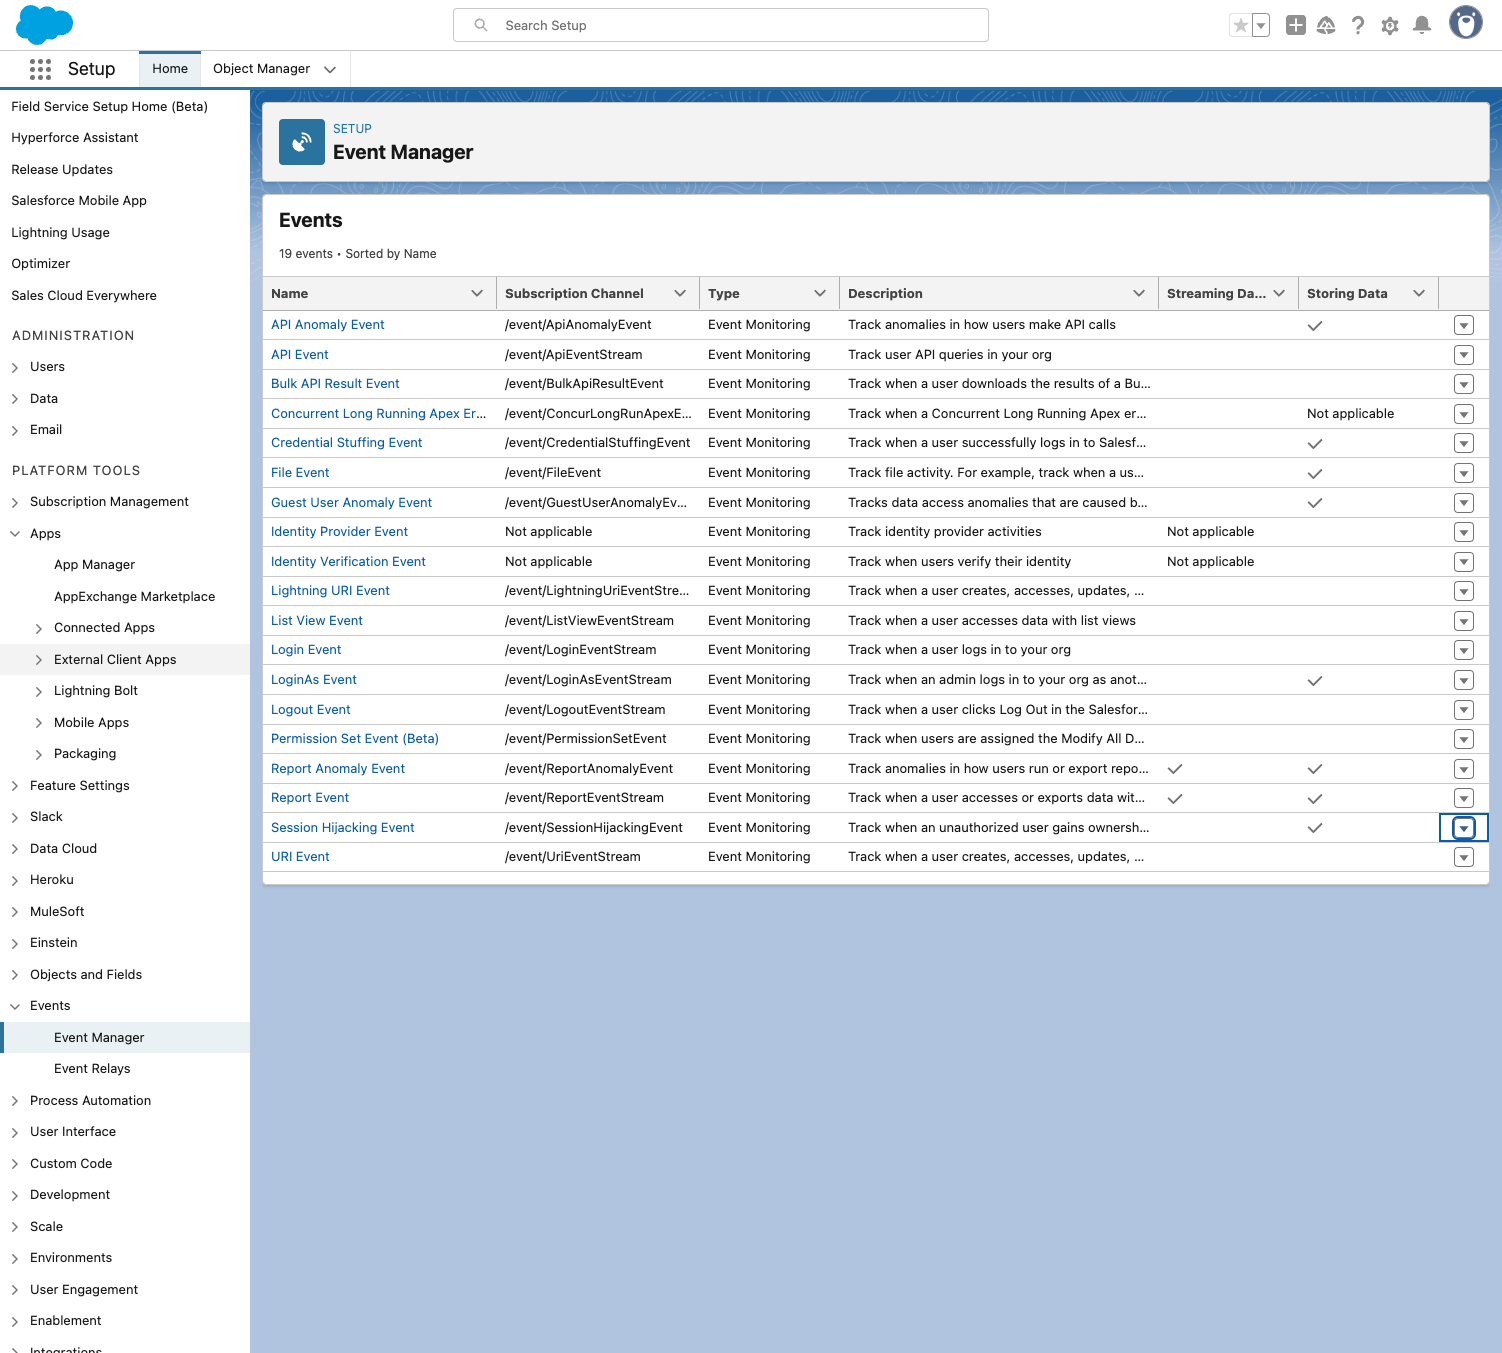
Click on Apps in the left menu.
Click on External Client Apps.
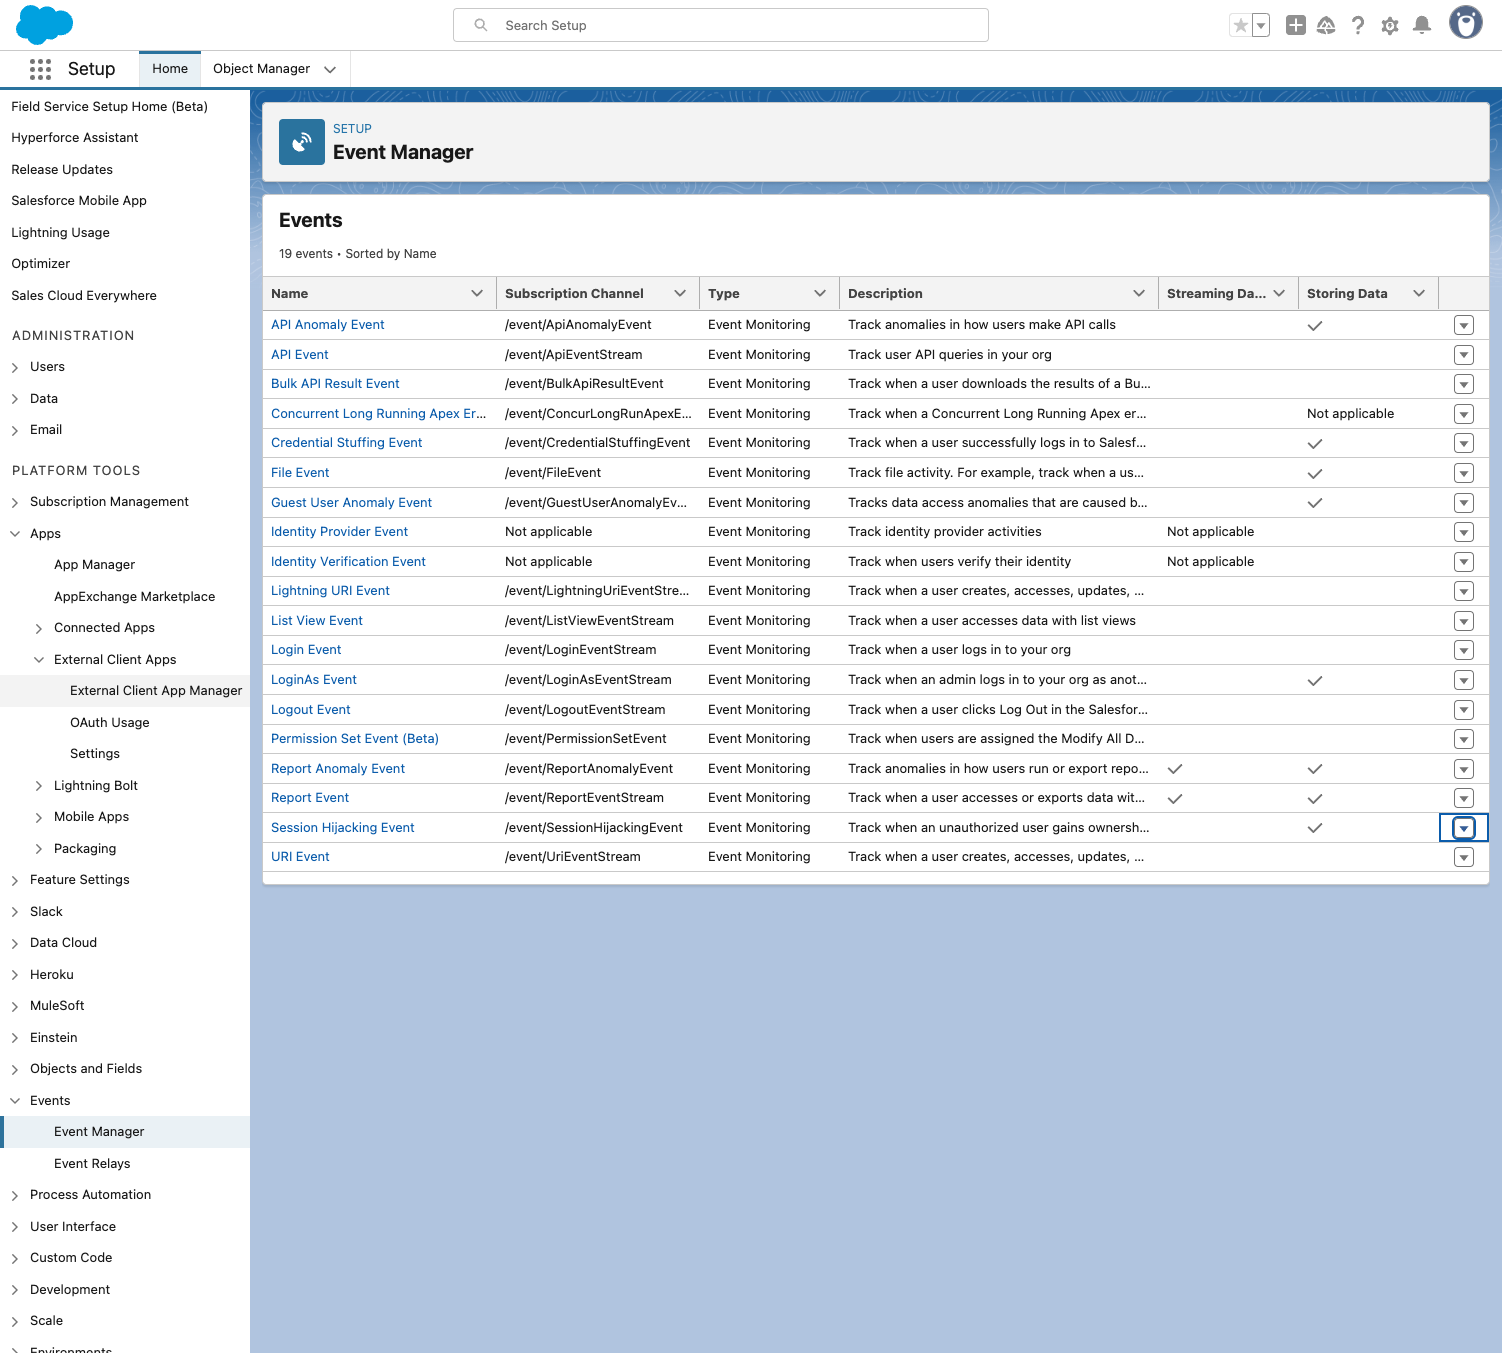
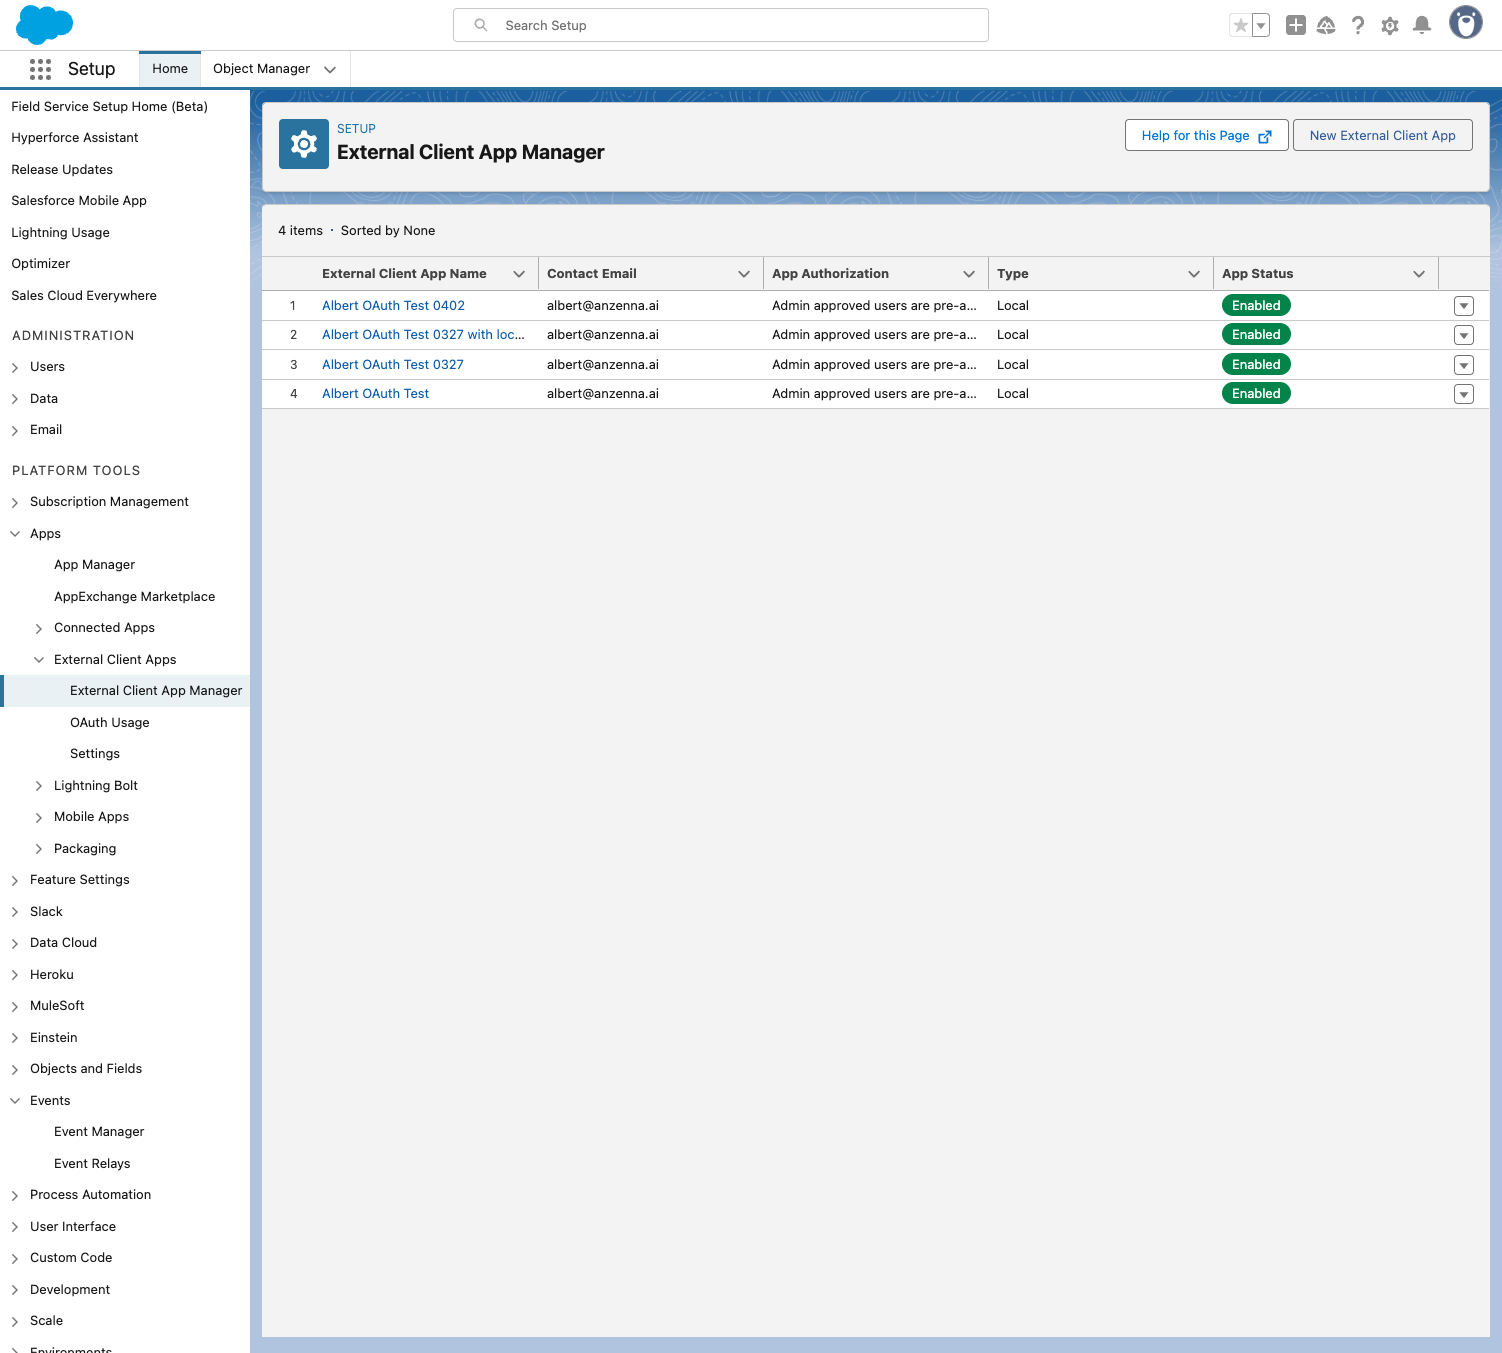
Click on External Client App Manager.
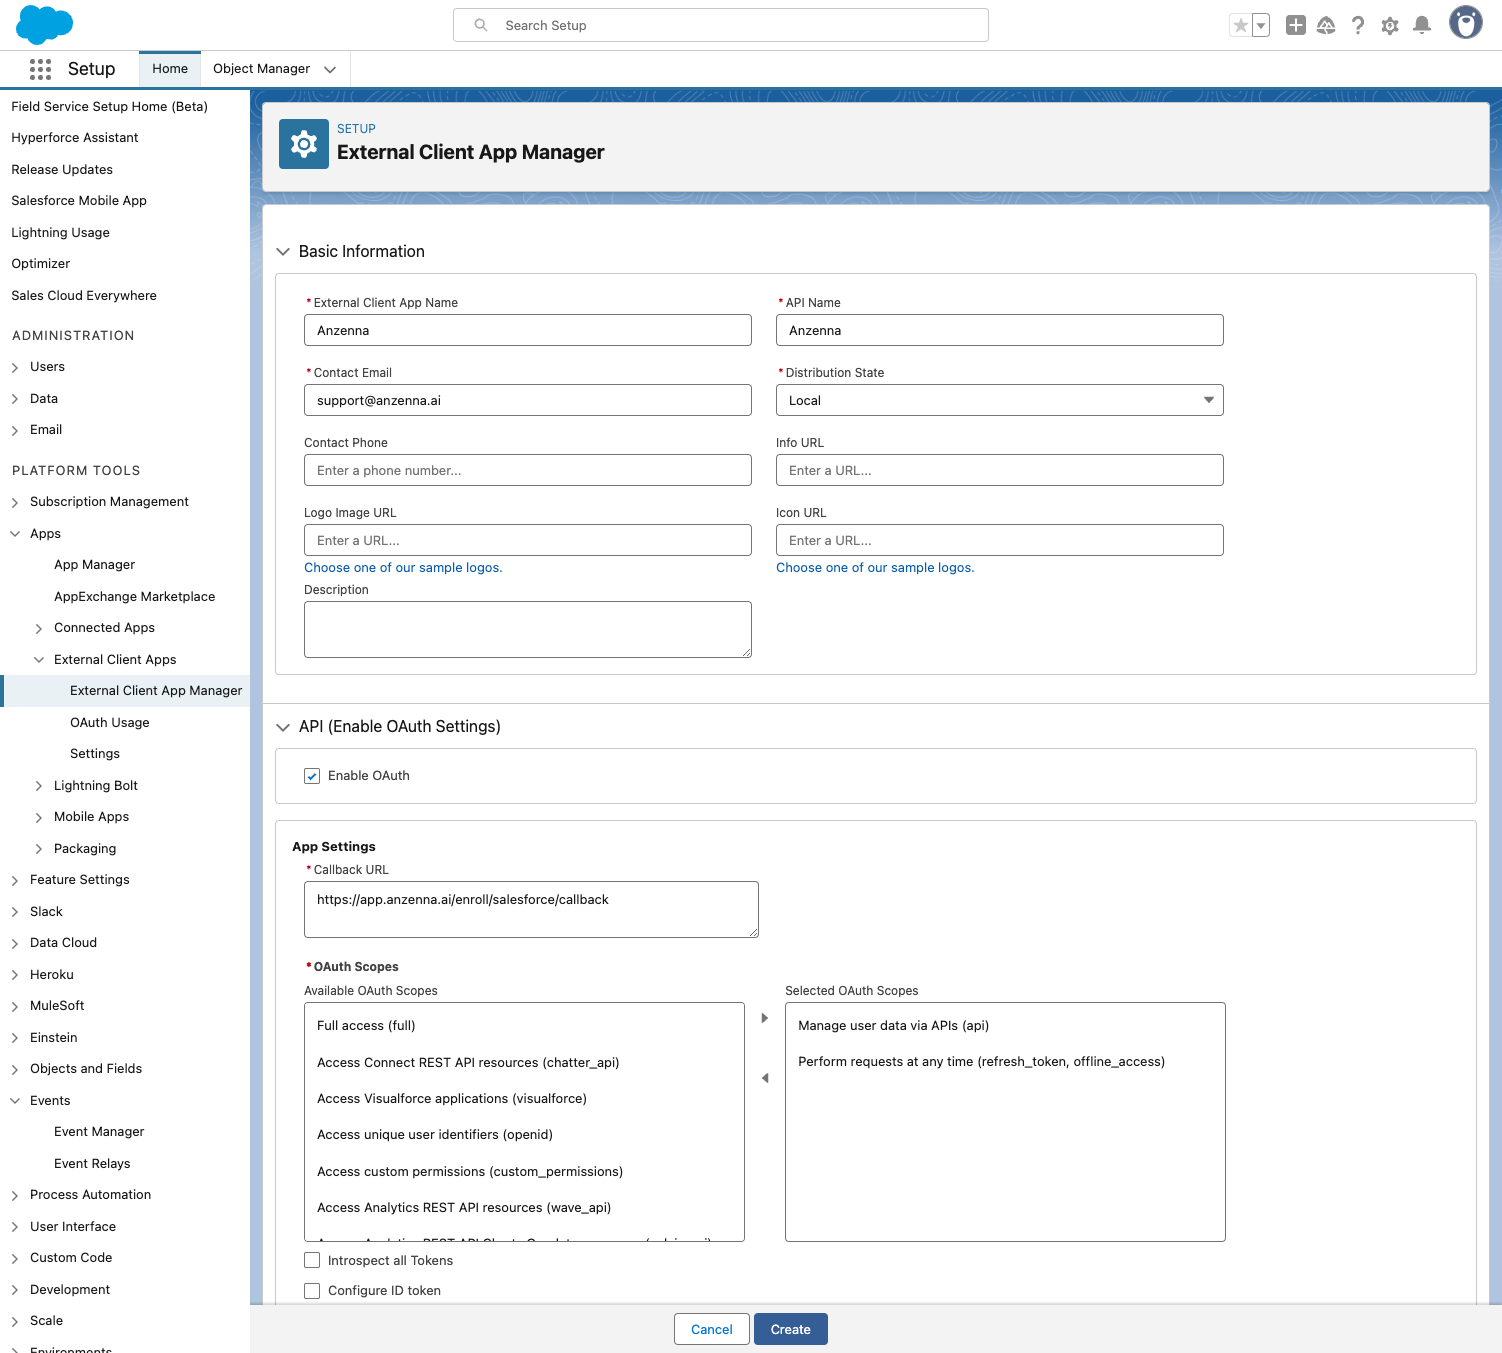
Click on New External Client App.
Type Anzenna as the app name.
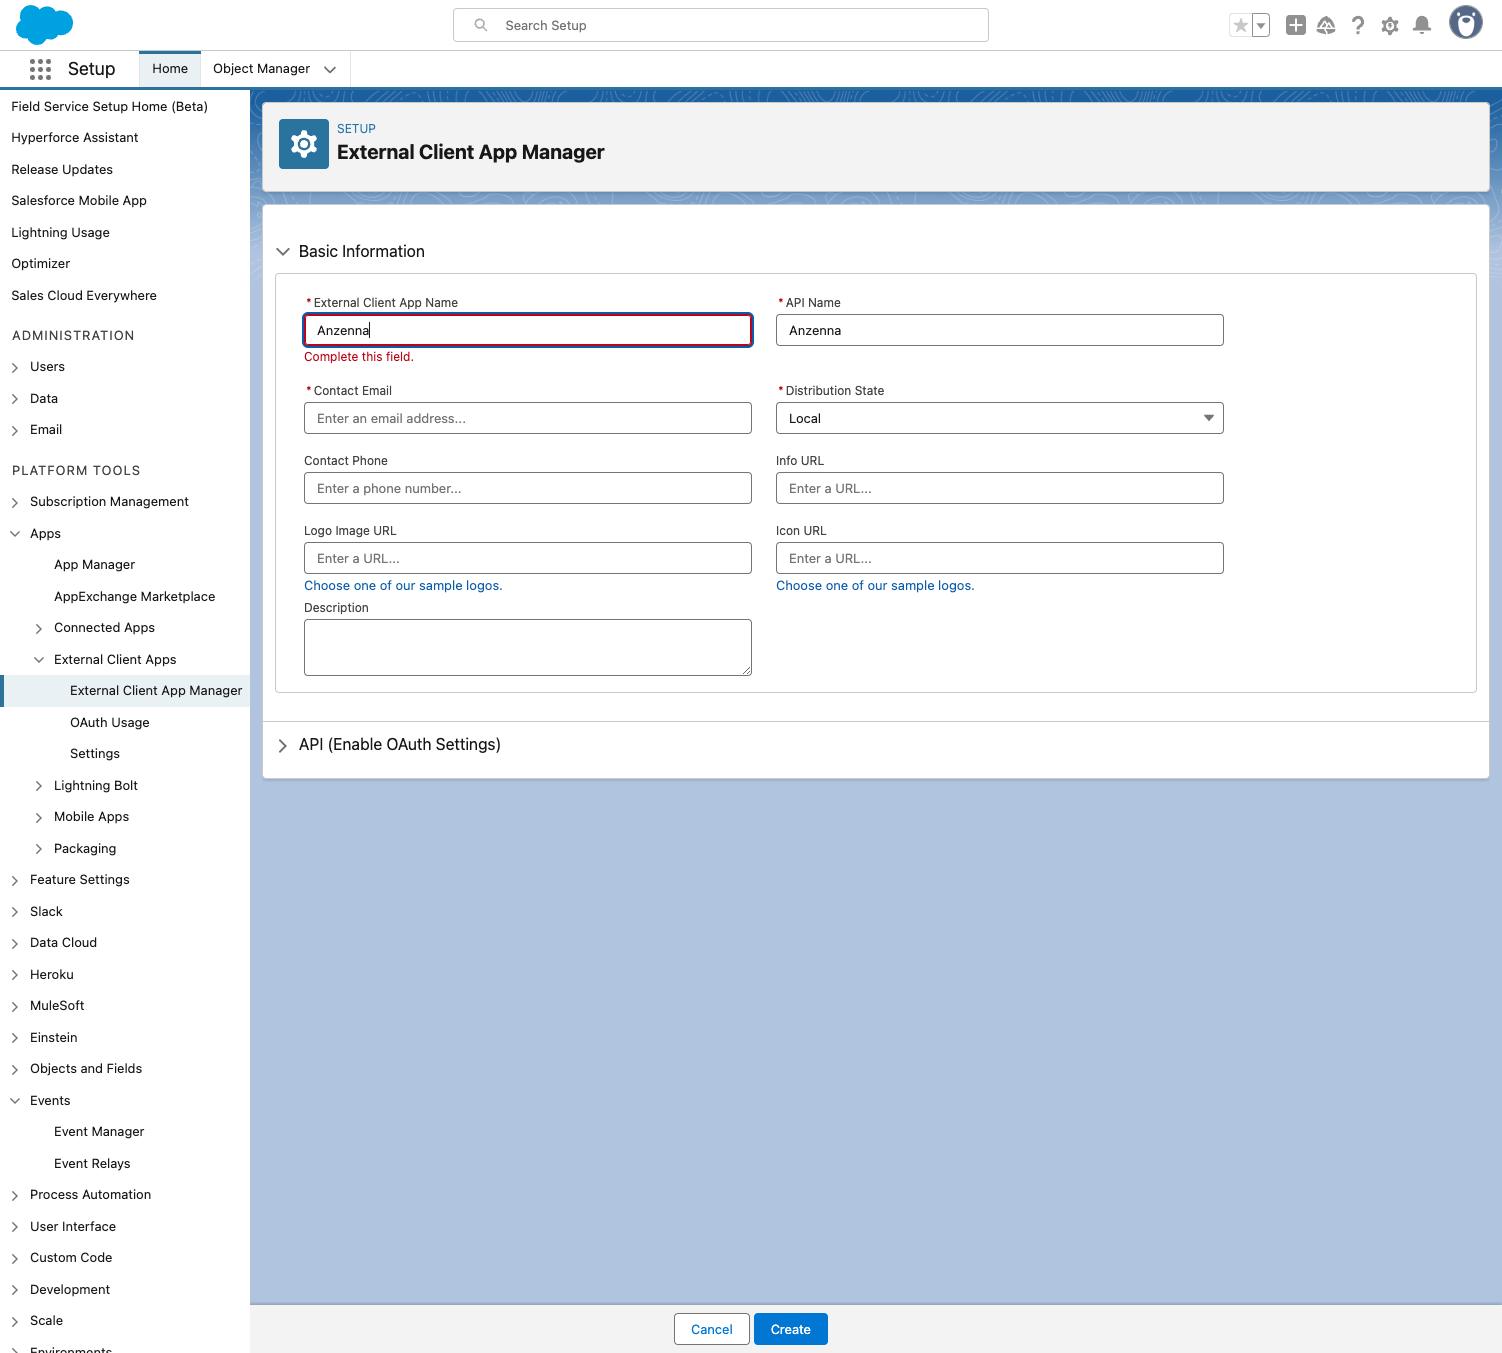
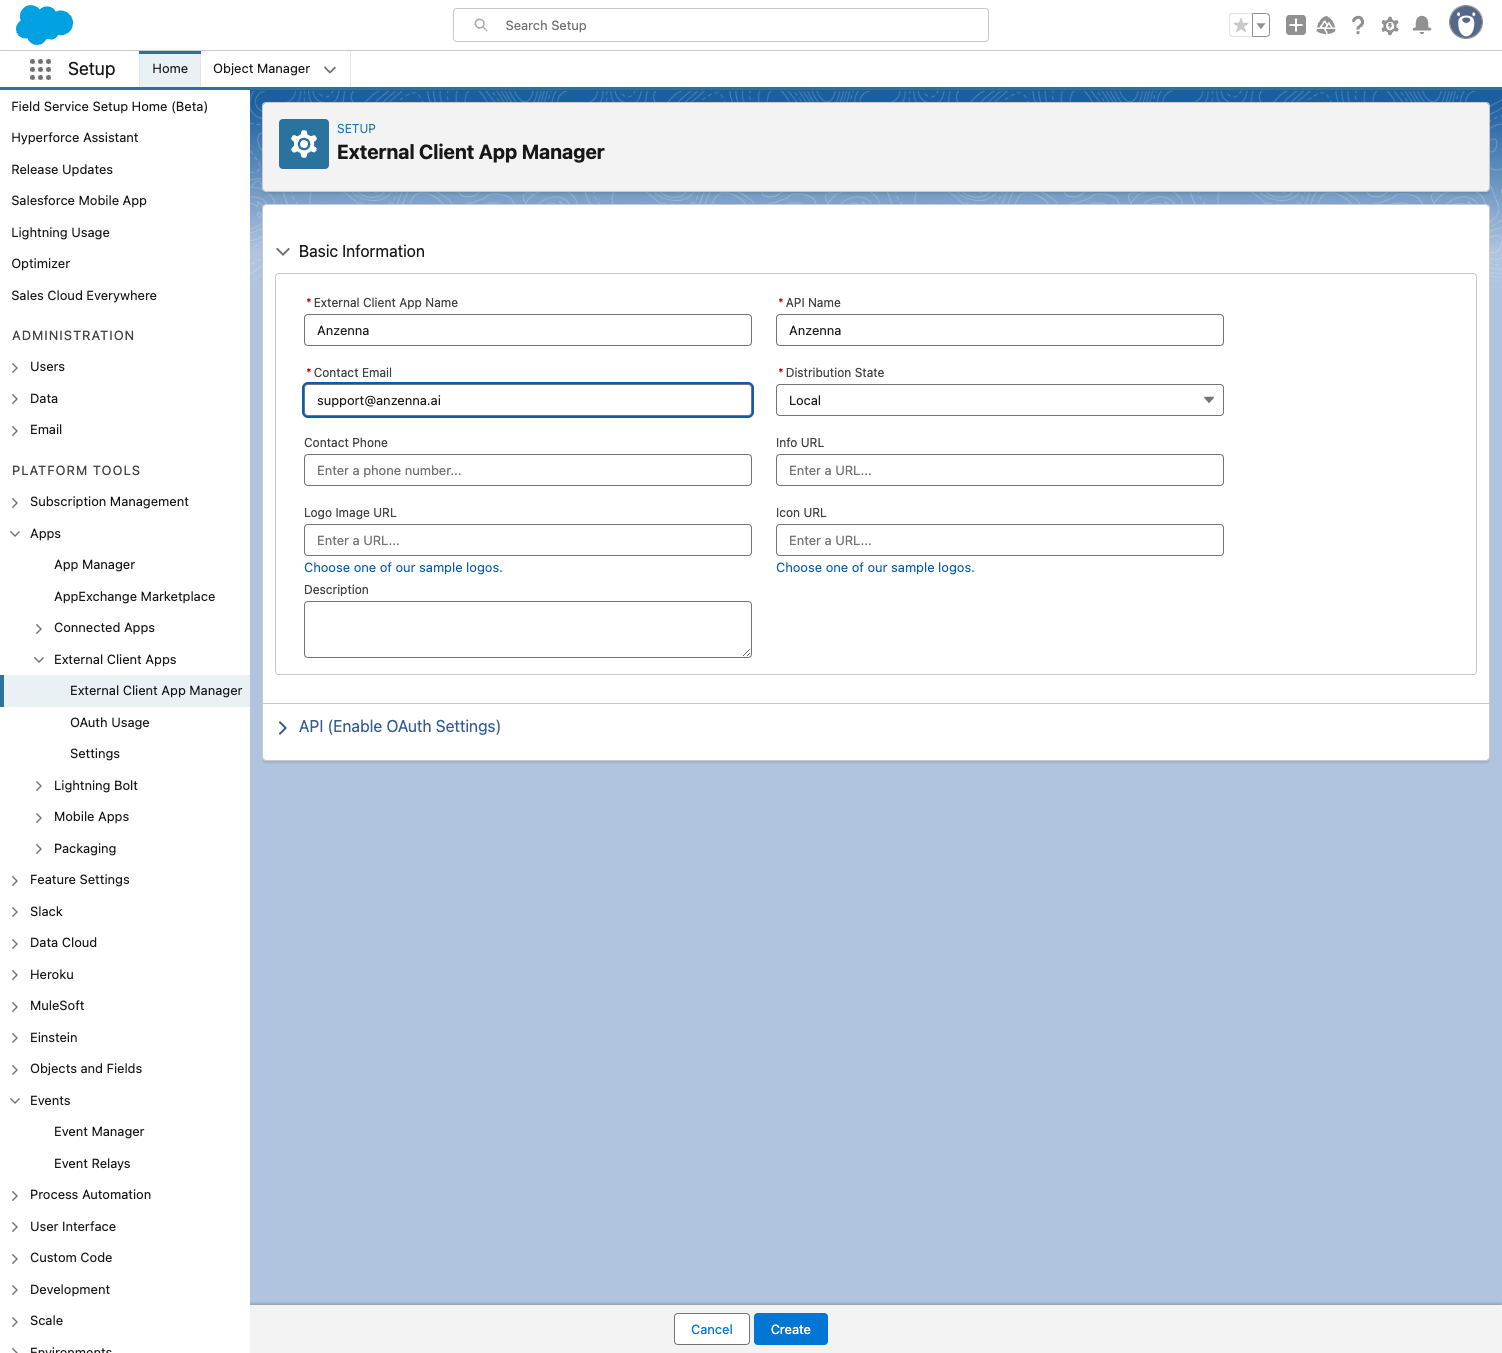
Type support@anzenna.ai as the contact email.

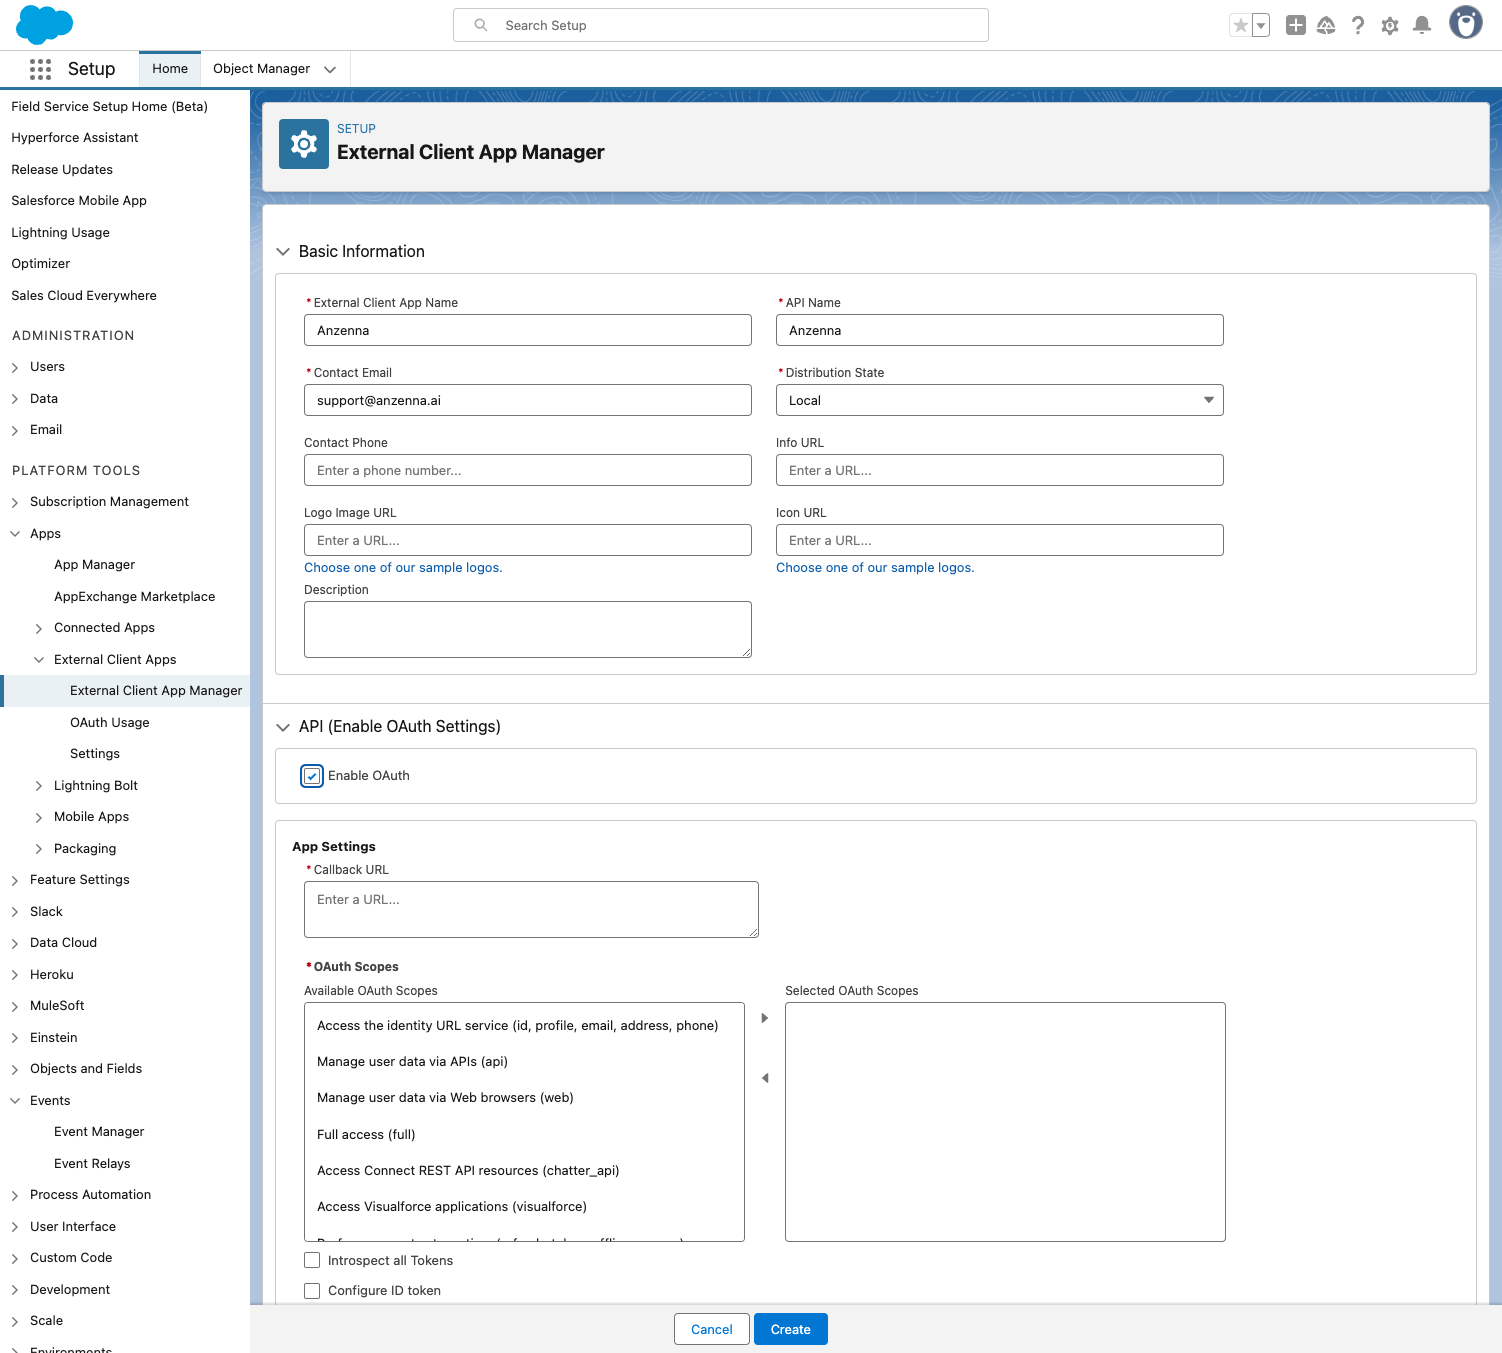
Click on API (Enable OAuth Settings).
Check Enable OAuth.
Paste the callback URL:
https://app.anzenna.ai/enroll/salesforce/callbackinto the text area.
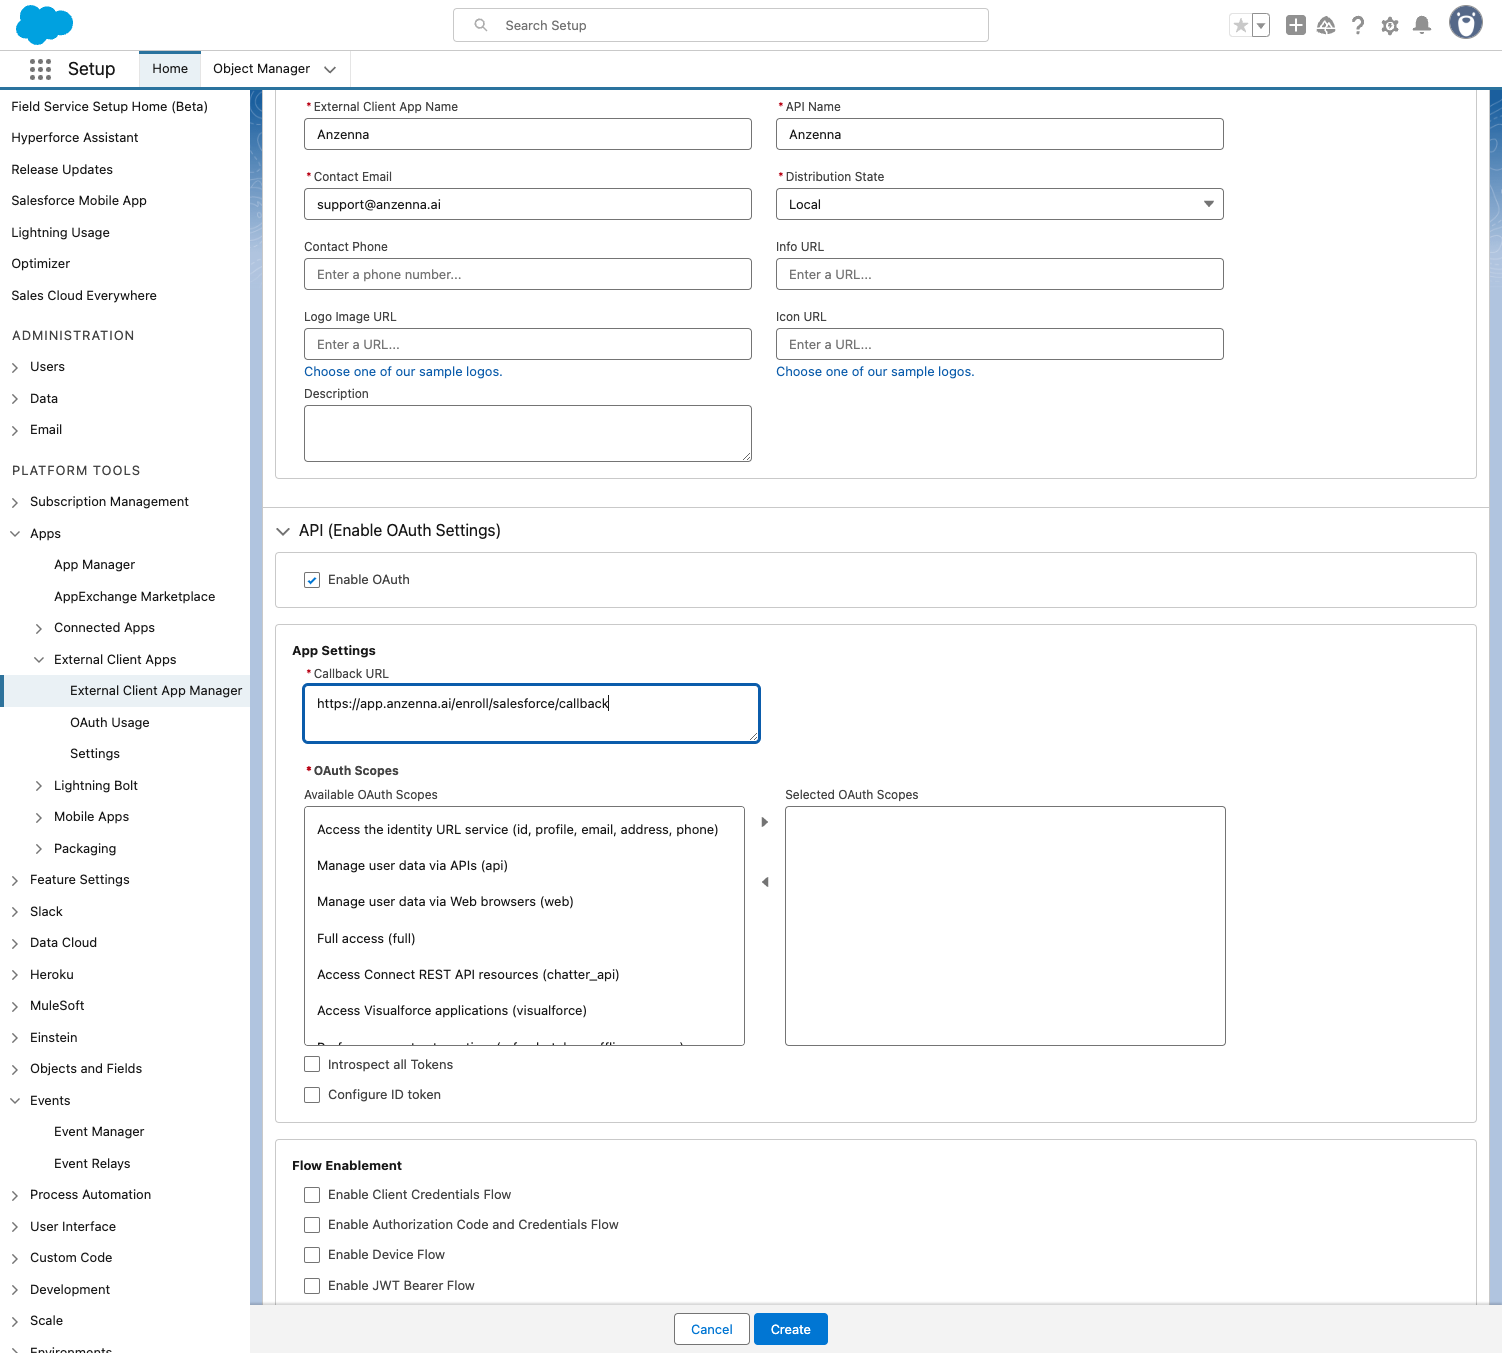
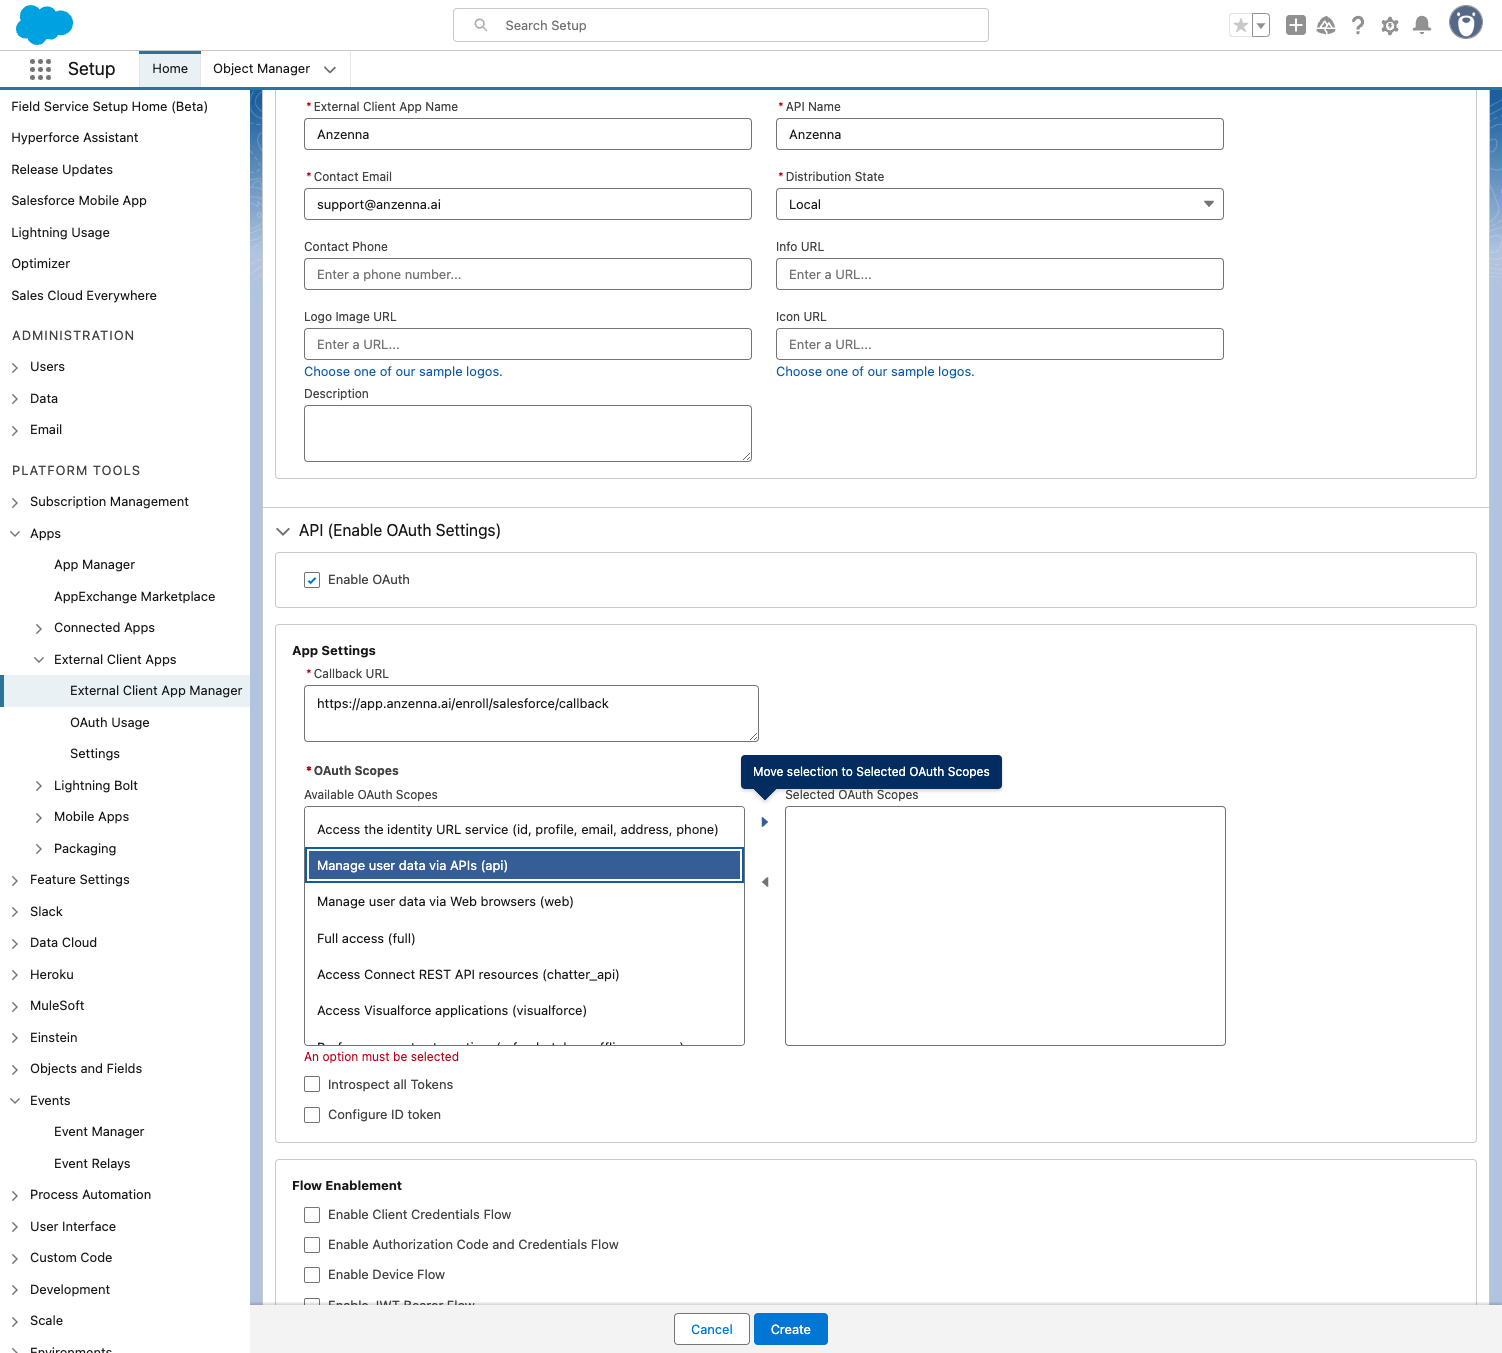
Click on Manage user data via APIs (api) to add it to selected OAuth scopes.
Click Move to Selected OAuth Scopes to add it.
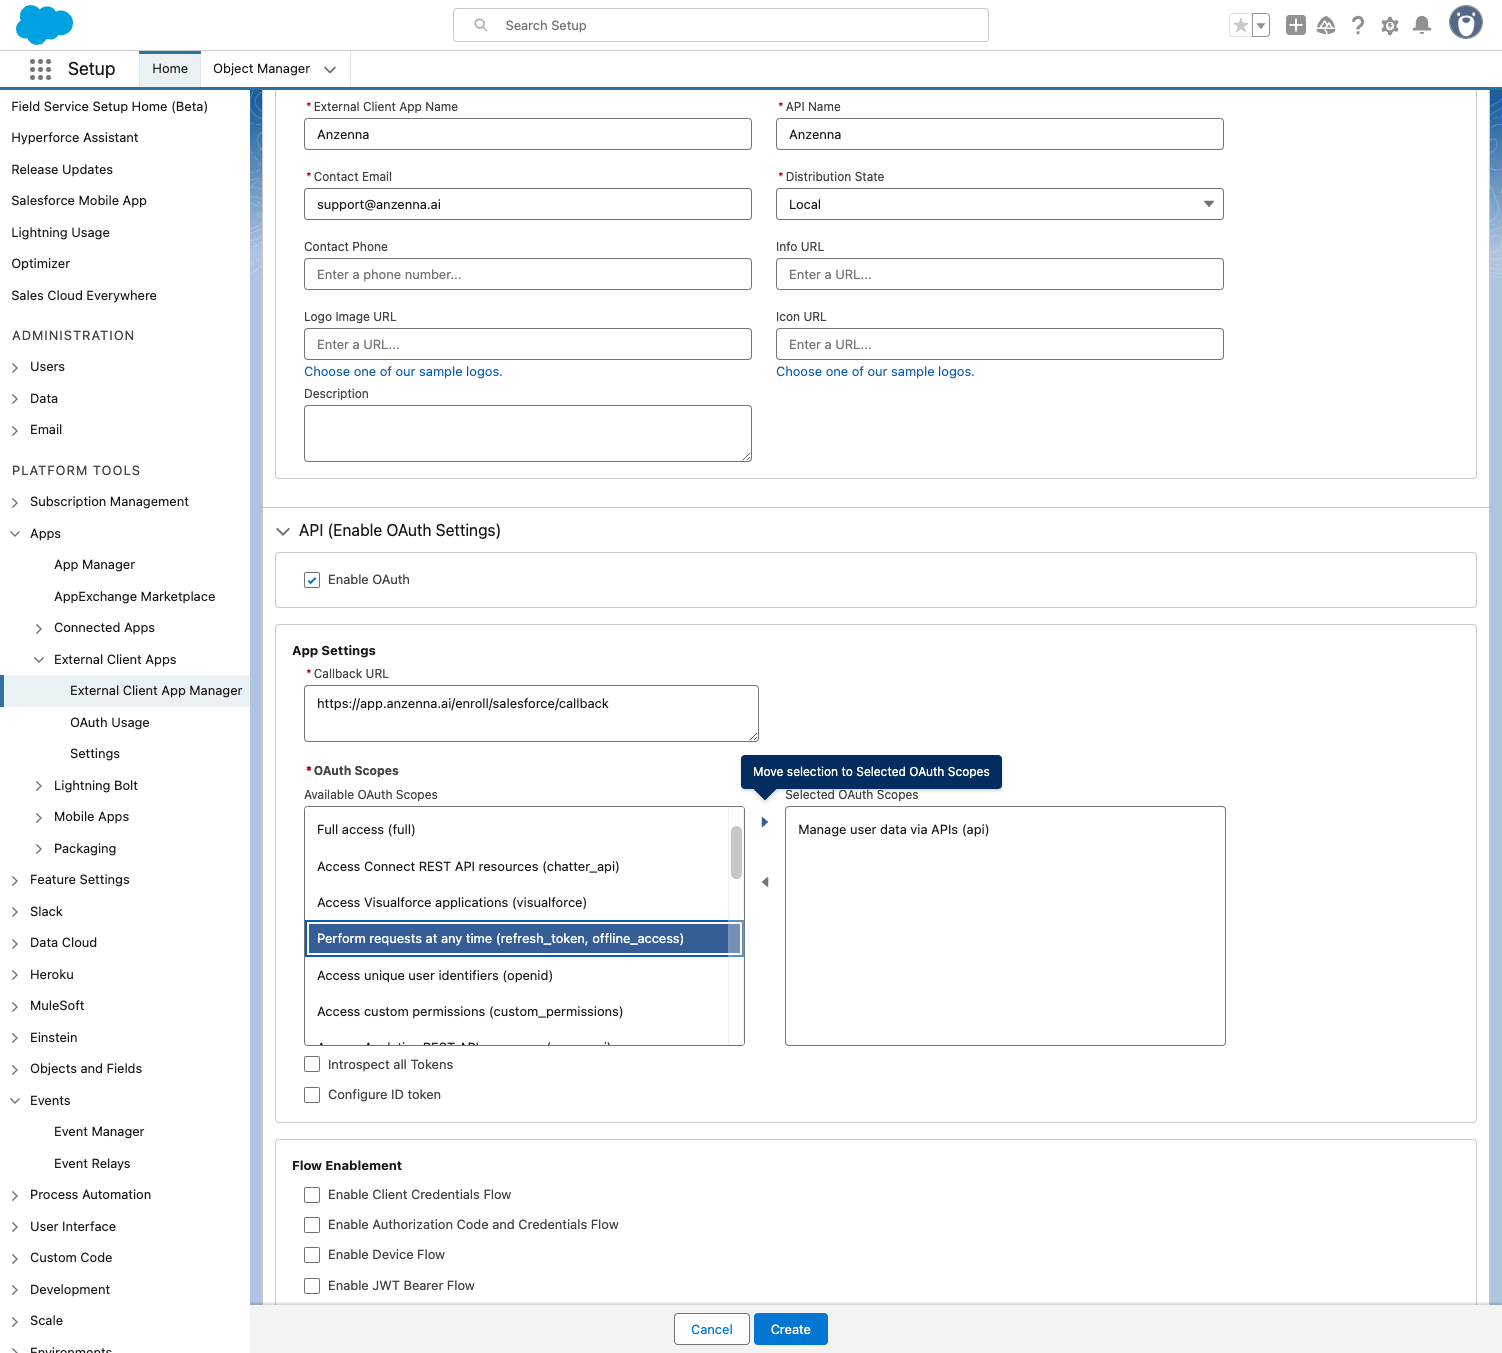
Click on
Perform requests at any time (refresh_token, offline_access)
.
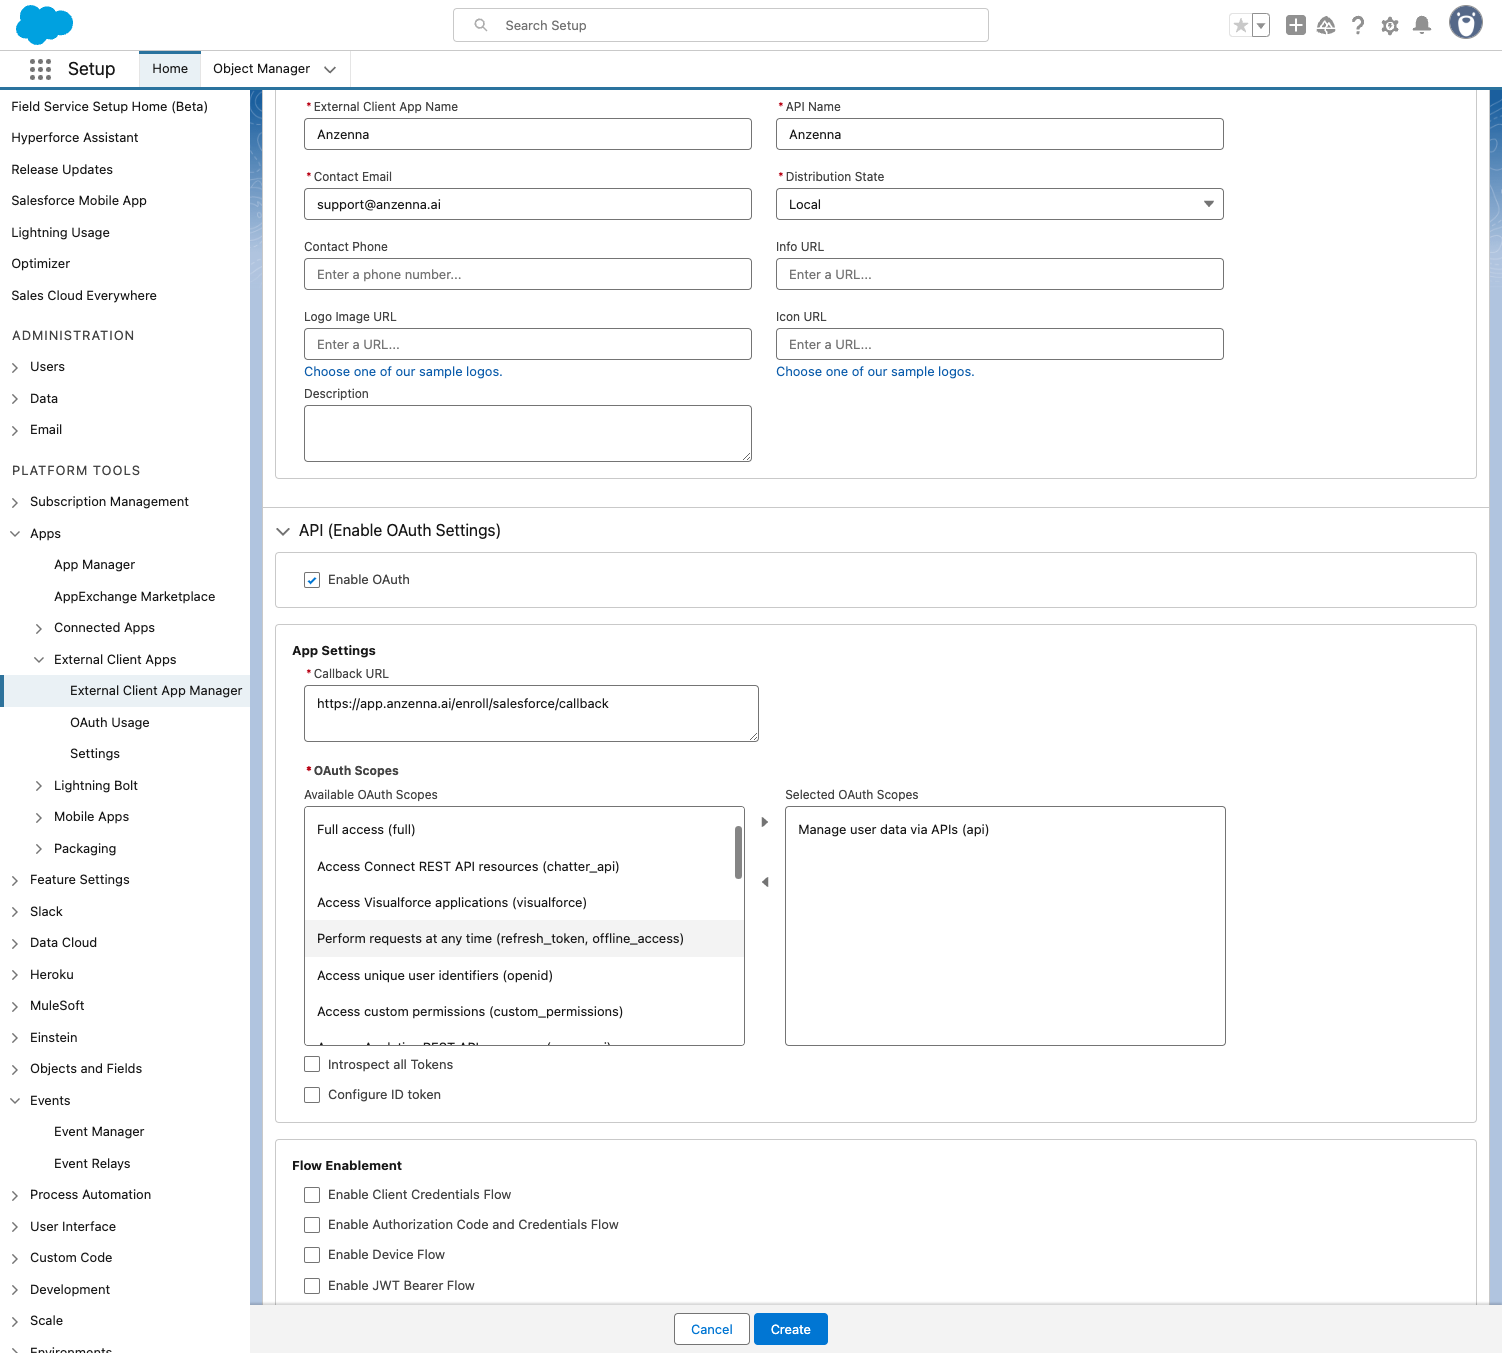
Click Move to Selected OAuth Scopes again.
Check Enable JWT Bearer Flow.
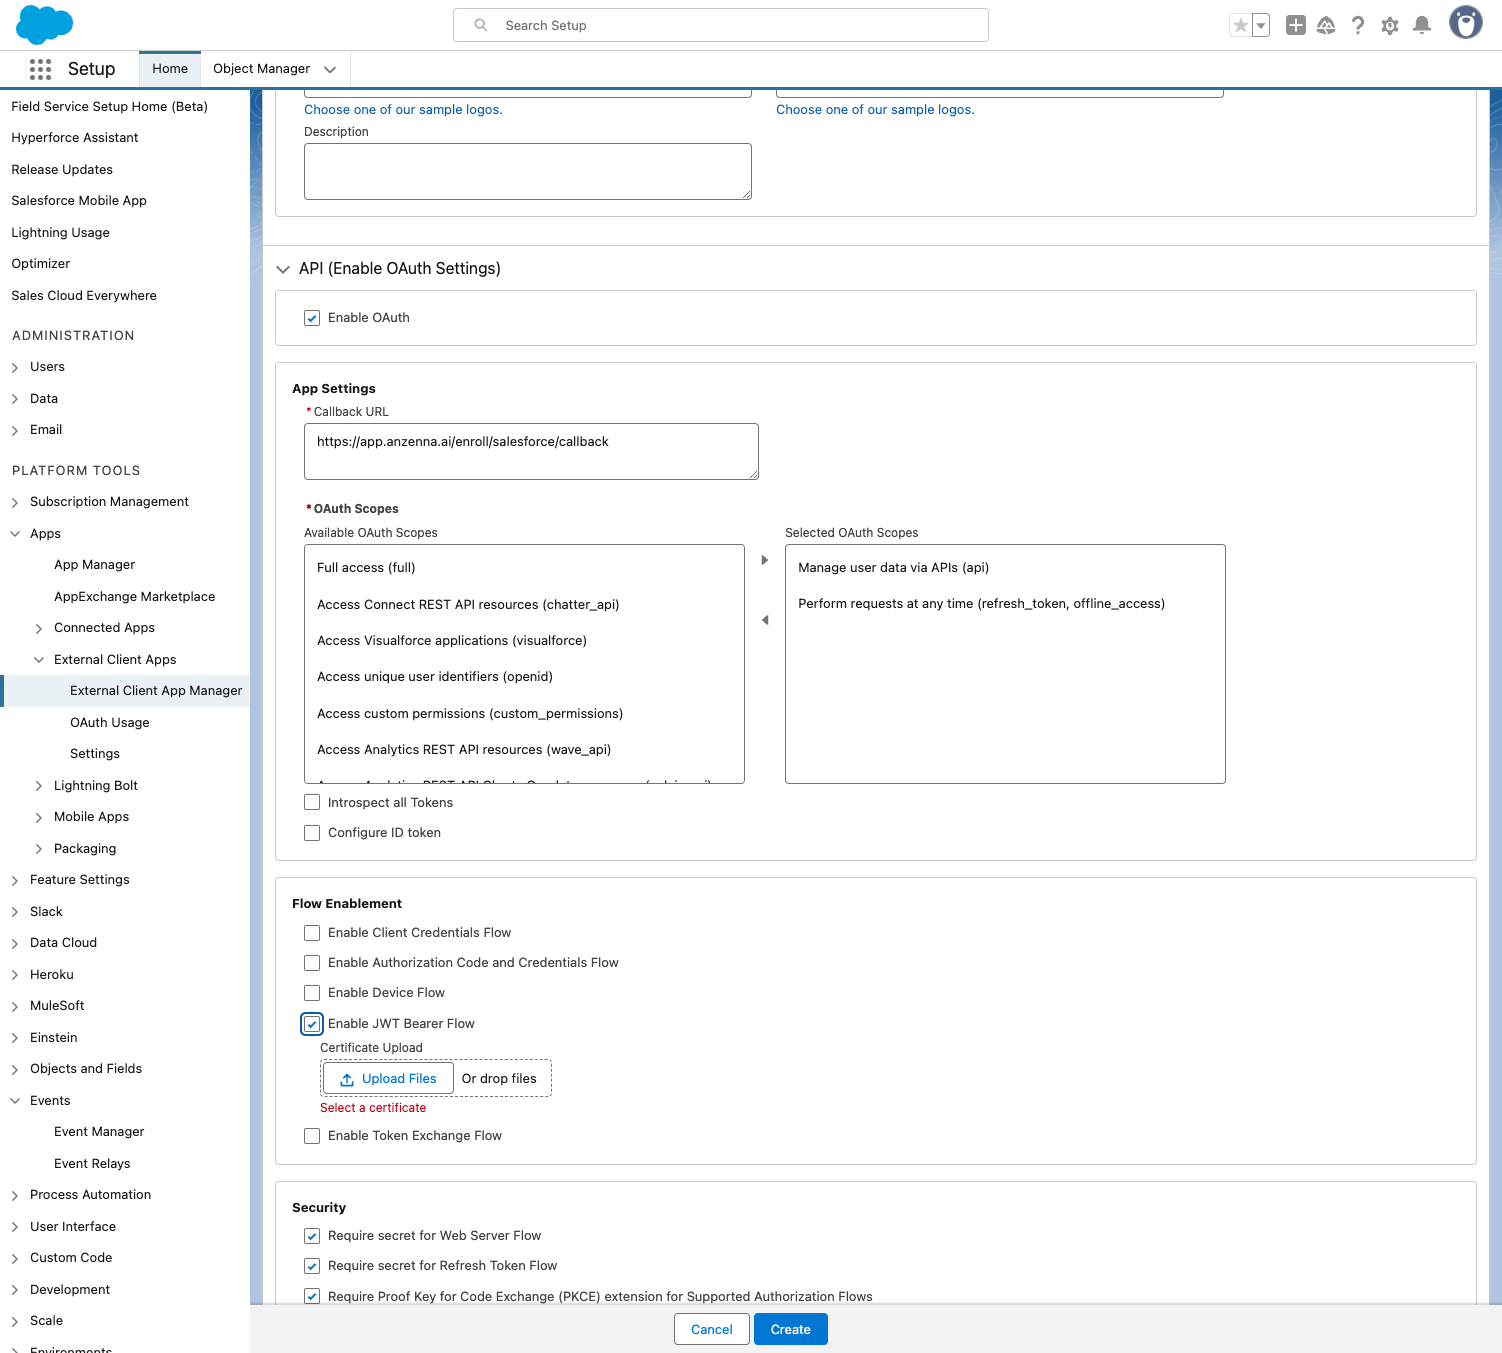
Select cert.pem from the file upload menu (the certificate you downloaded in Part 1).

Click Create.
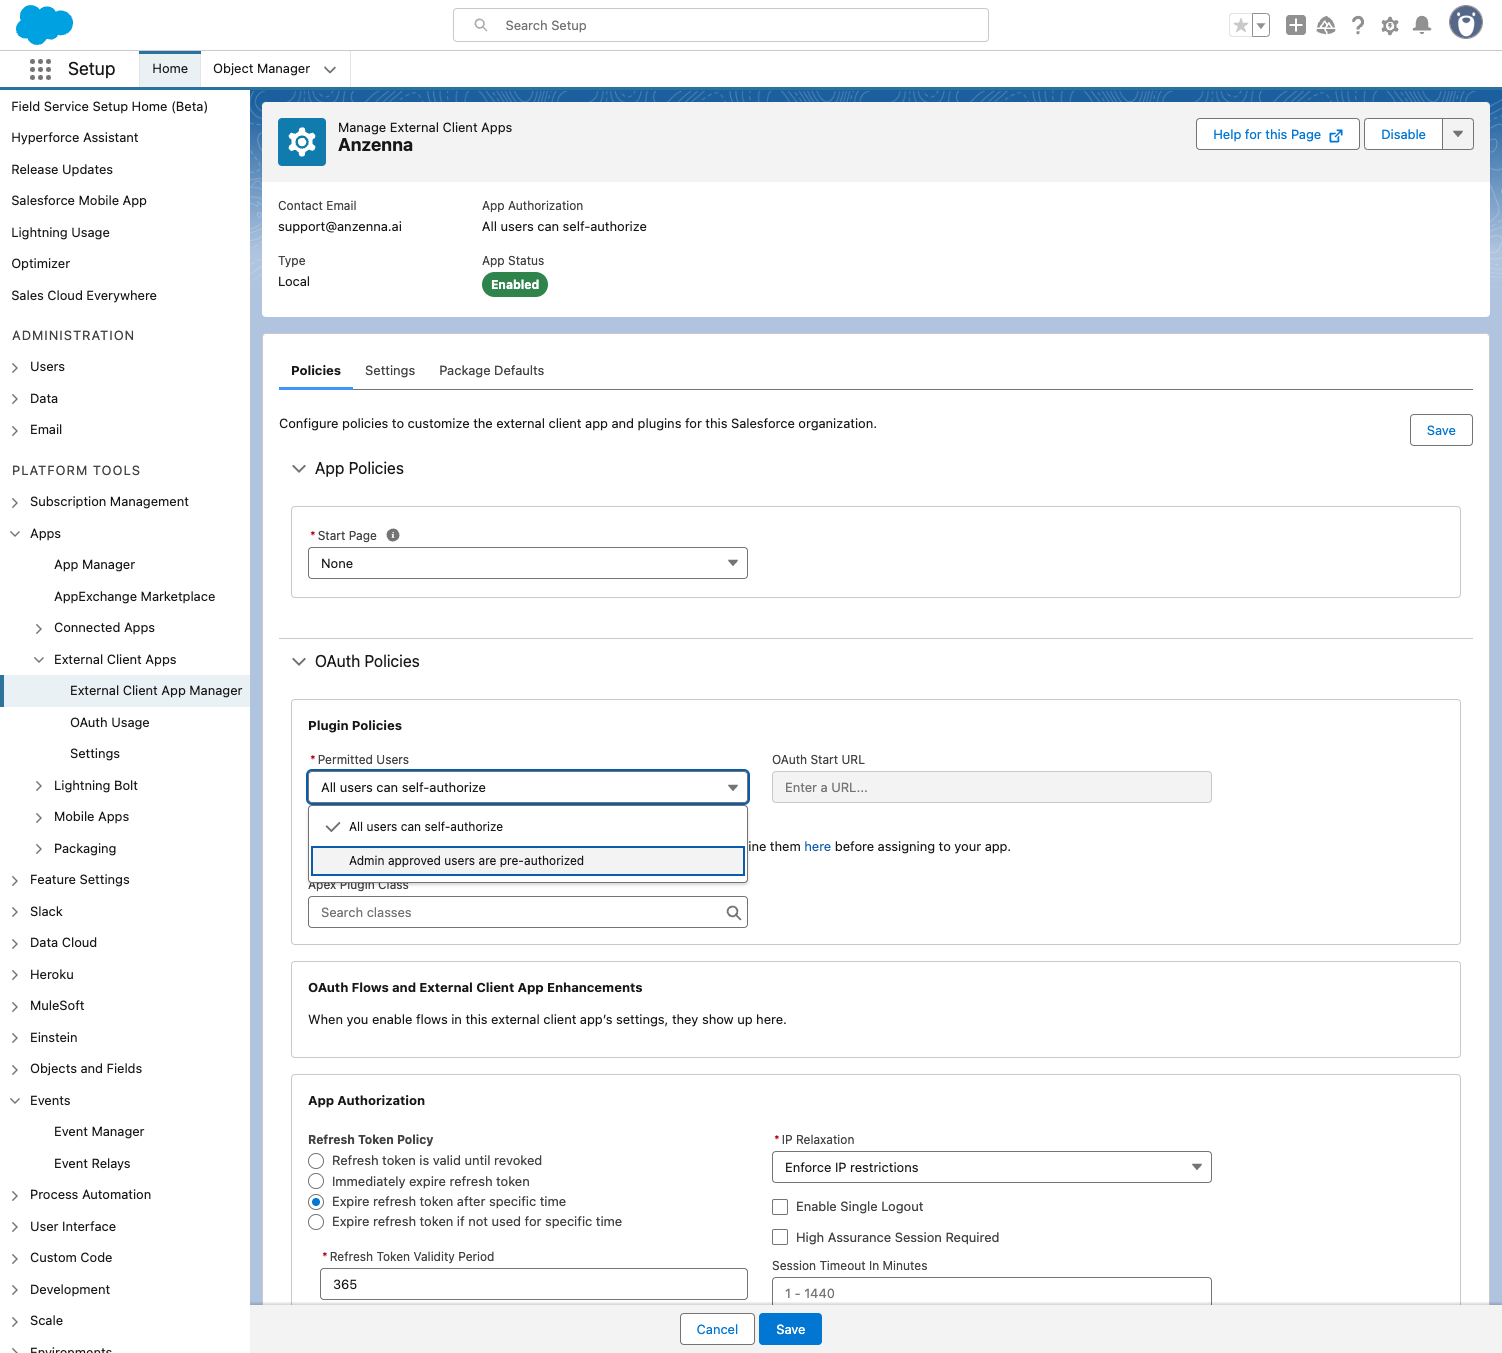
Part 4: Configure OAuth Policies
Click on OAuth Policies.
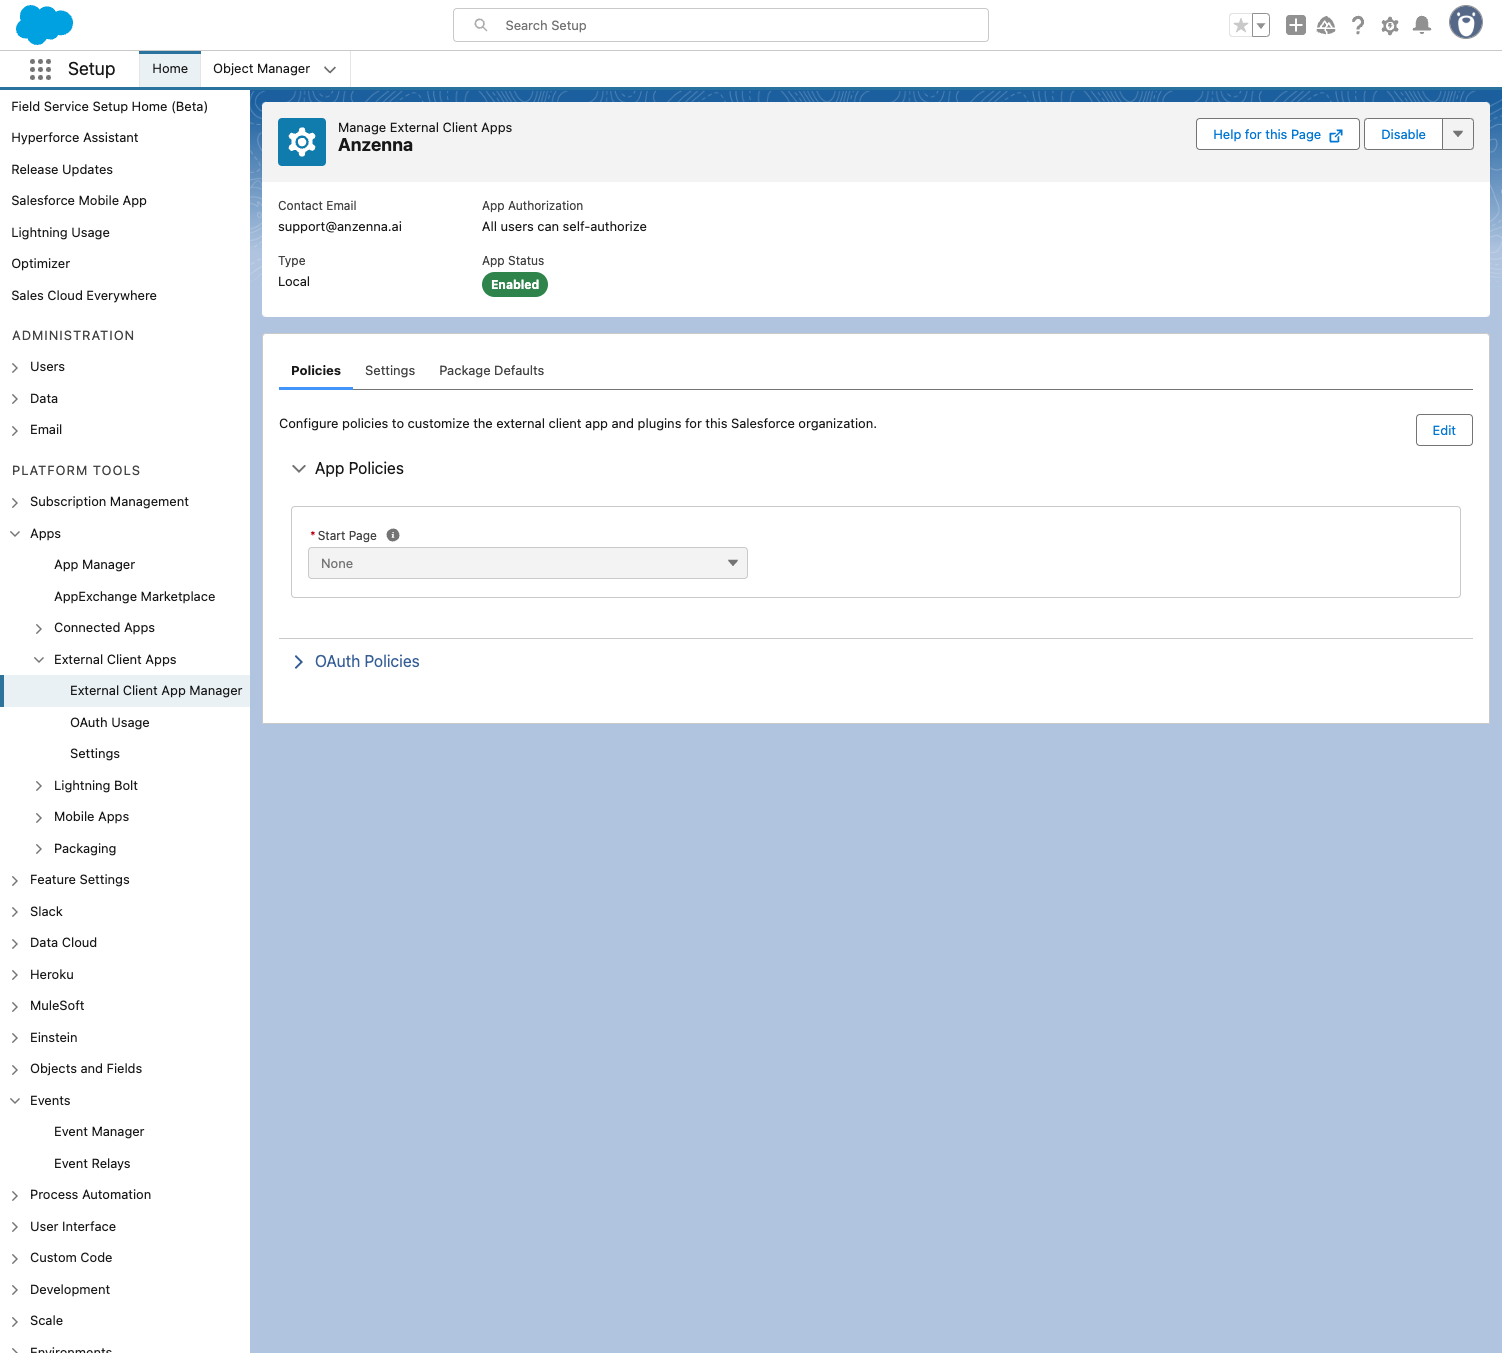
Click Edit.
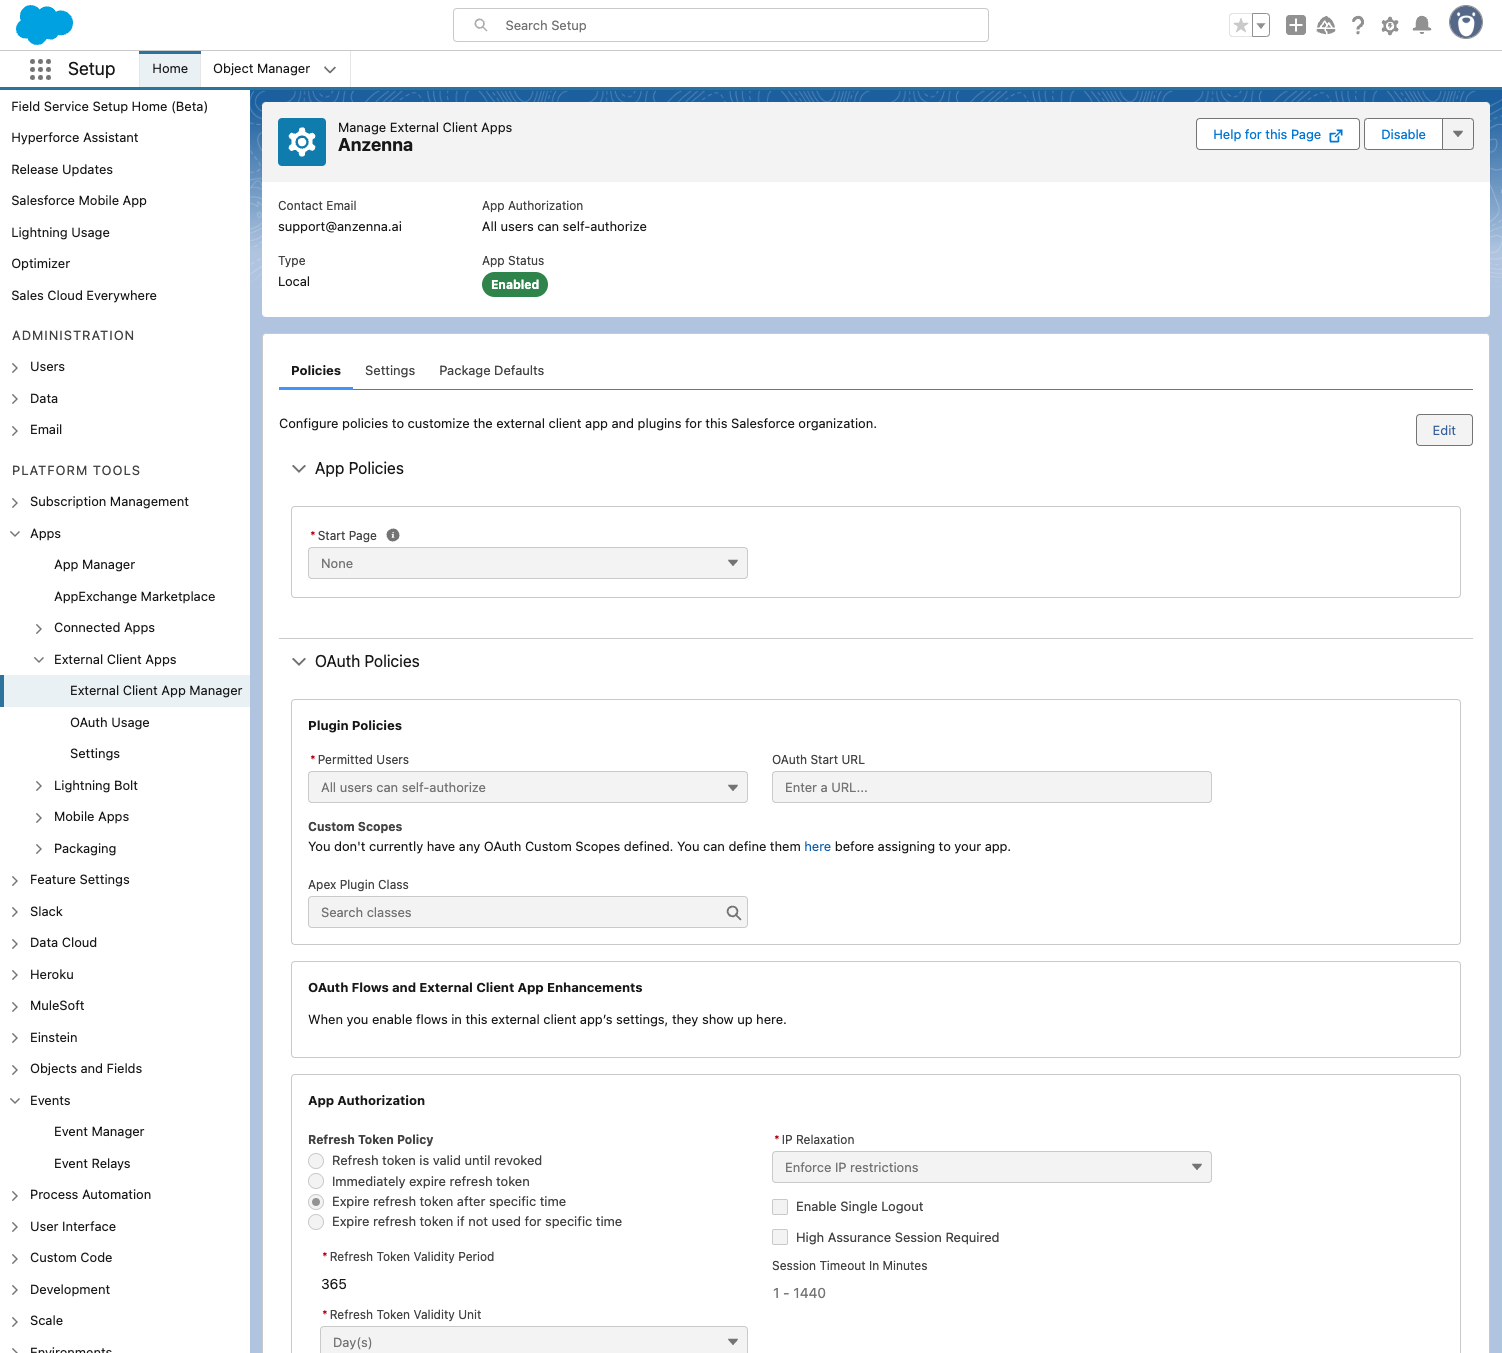
Click on Permitted Users.
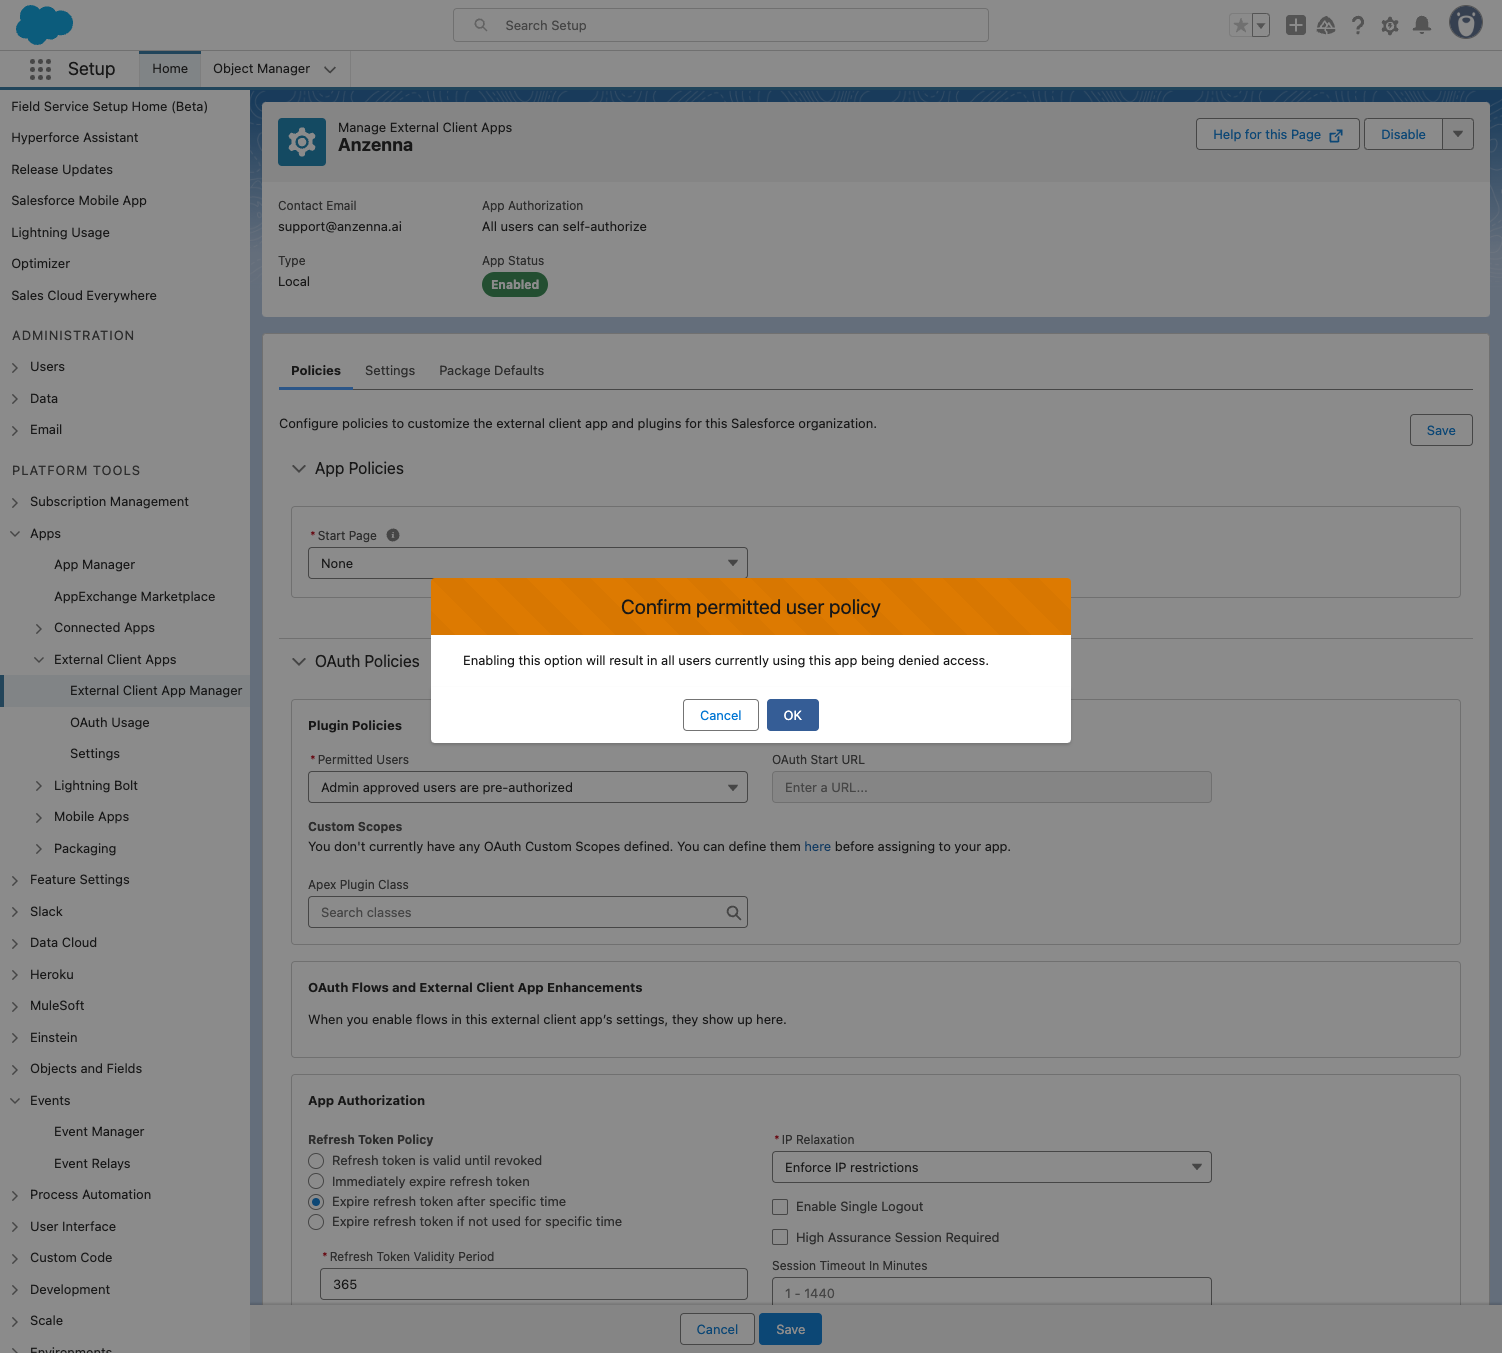
Click on Admin approved users are pre-authorized to allow server-to-server communication.
Click OK on the confirmation dialog.
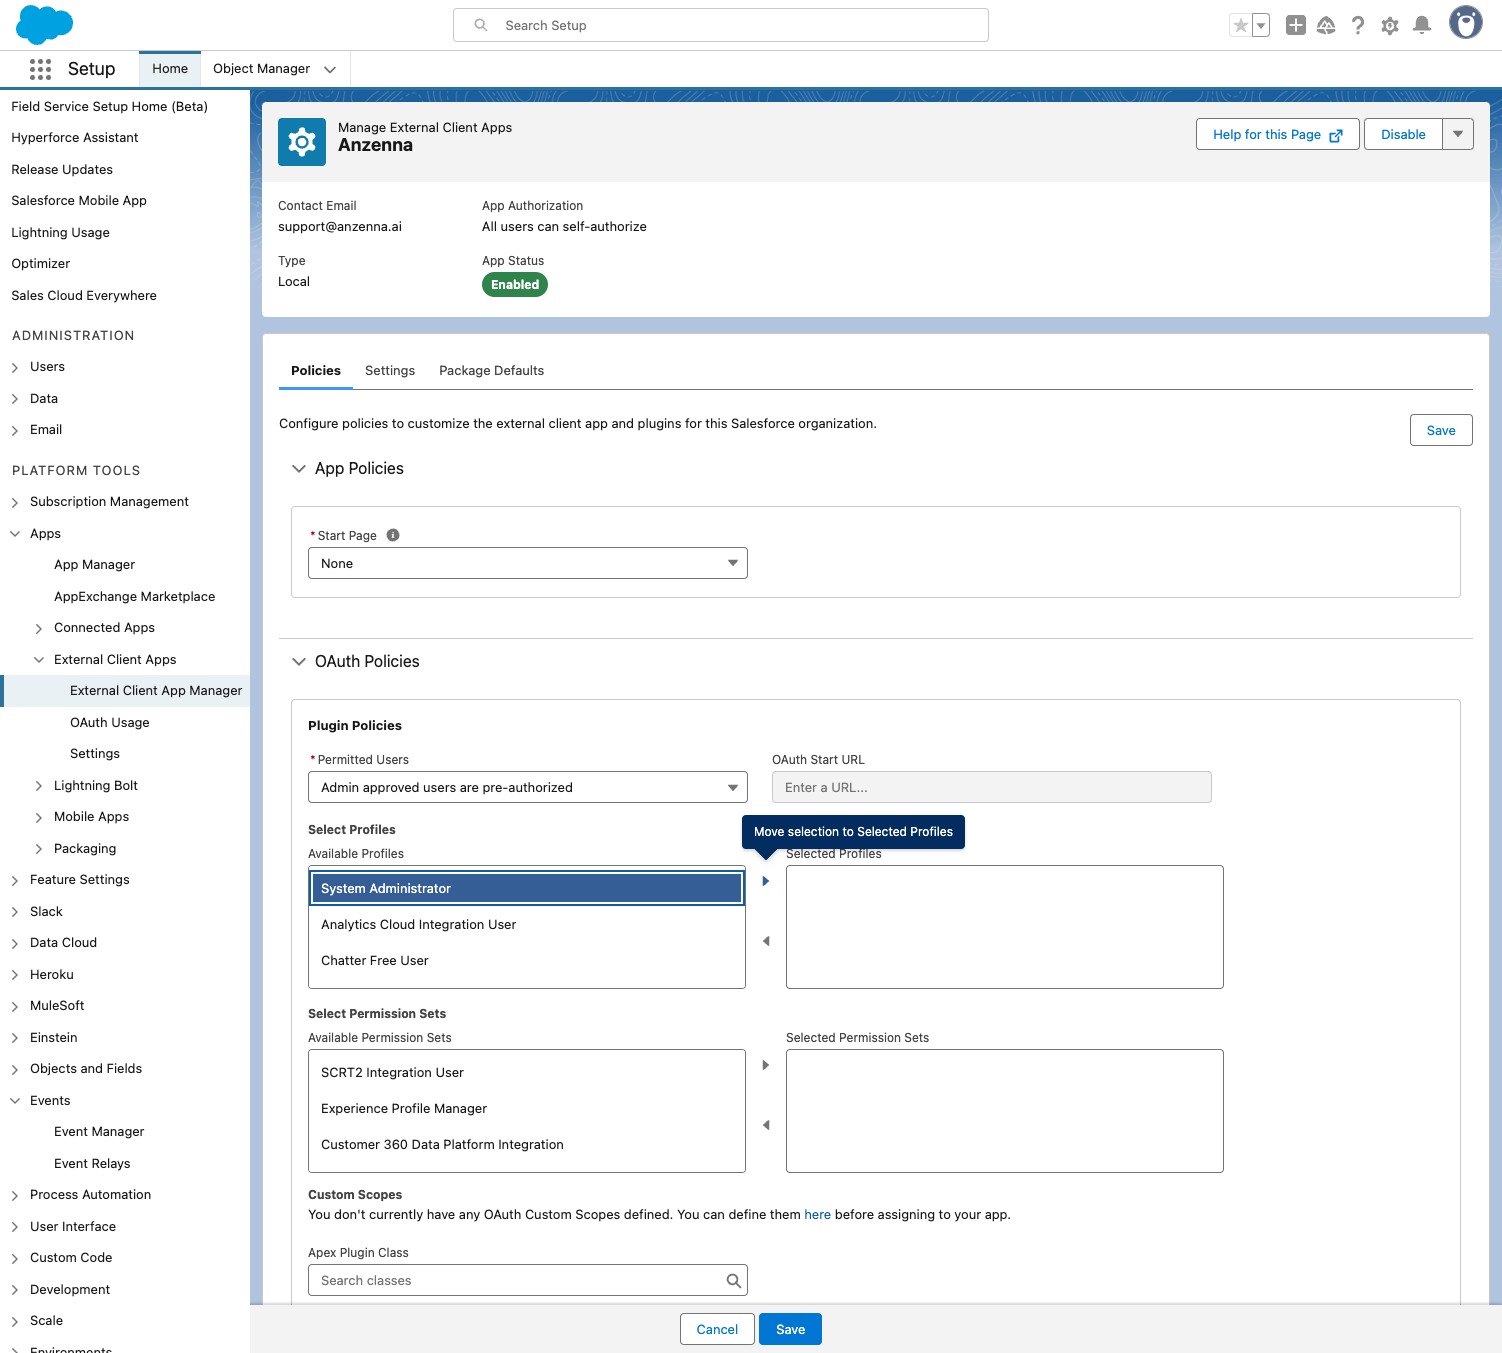
Click on System Administrator.
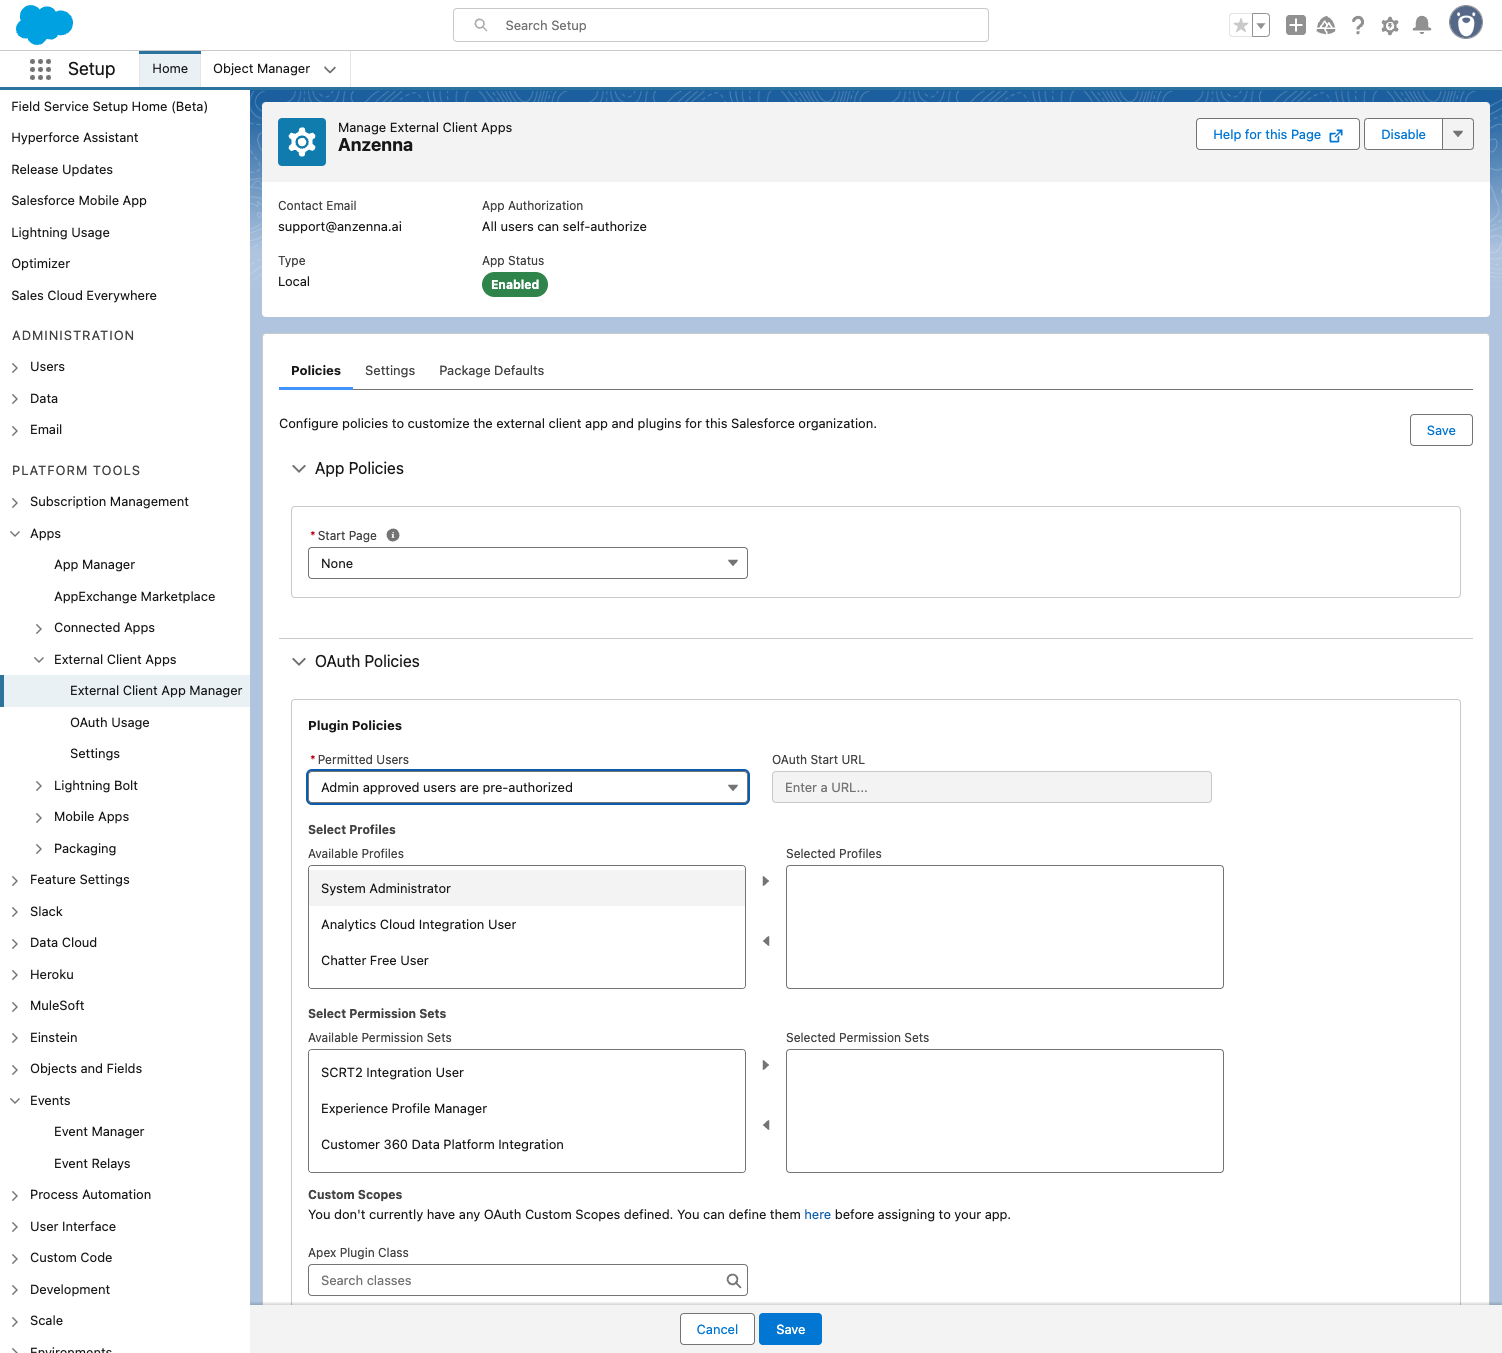
Click Move to Selected Profiles.
Select Refresh token is valid until revoked.
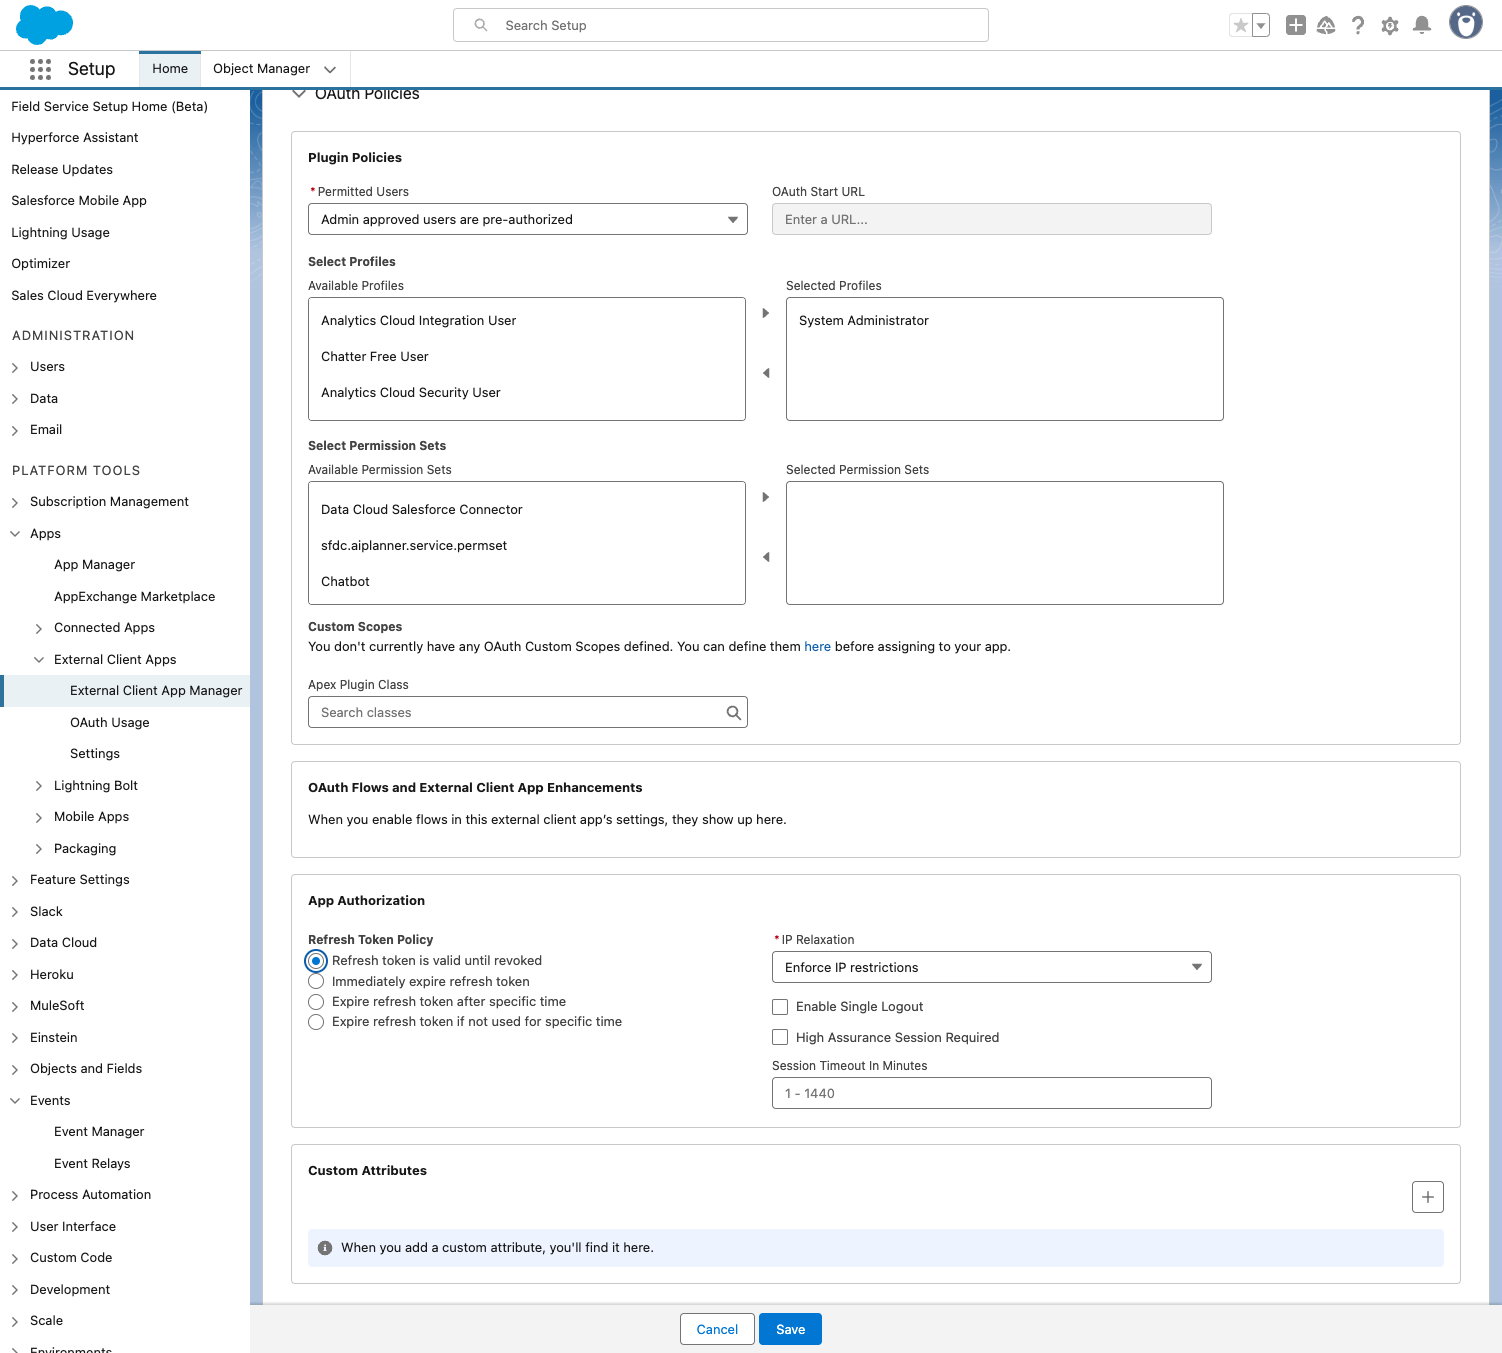
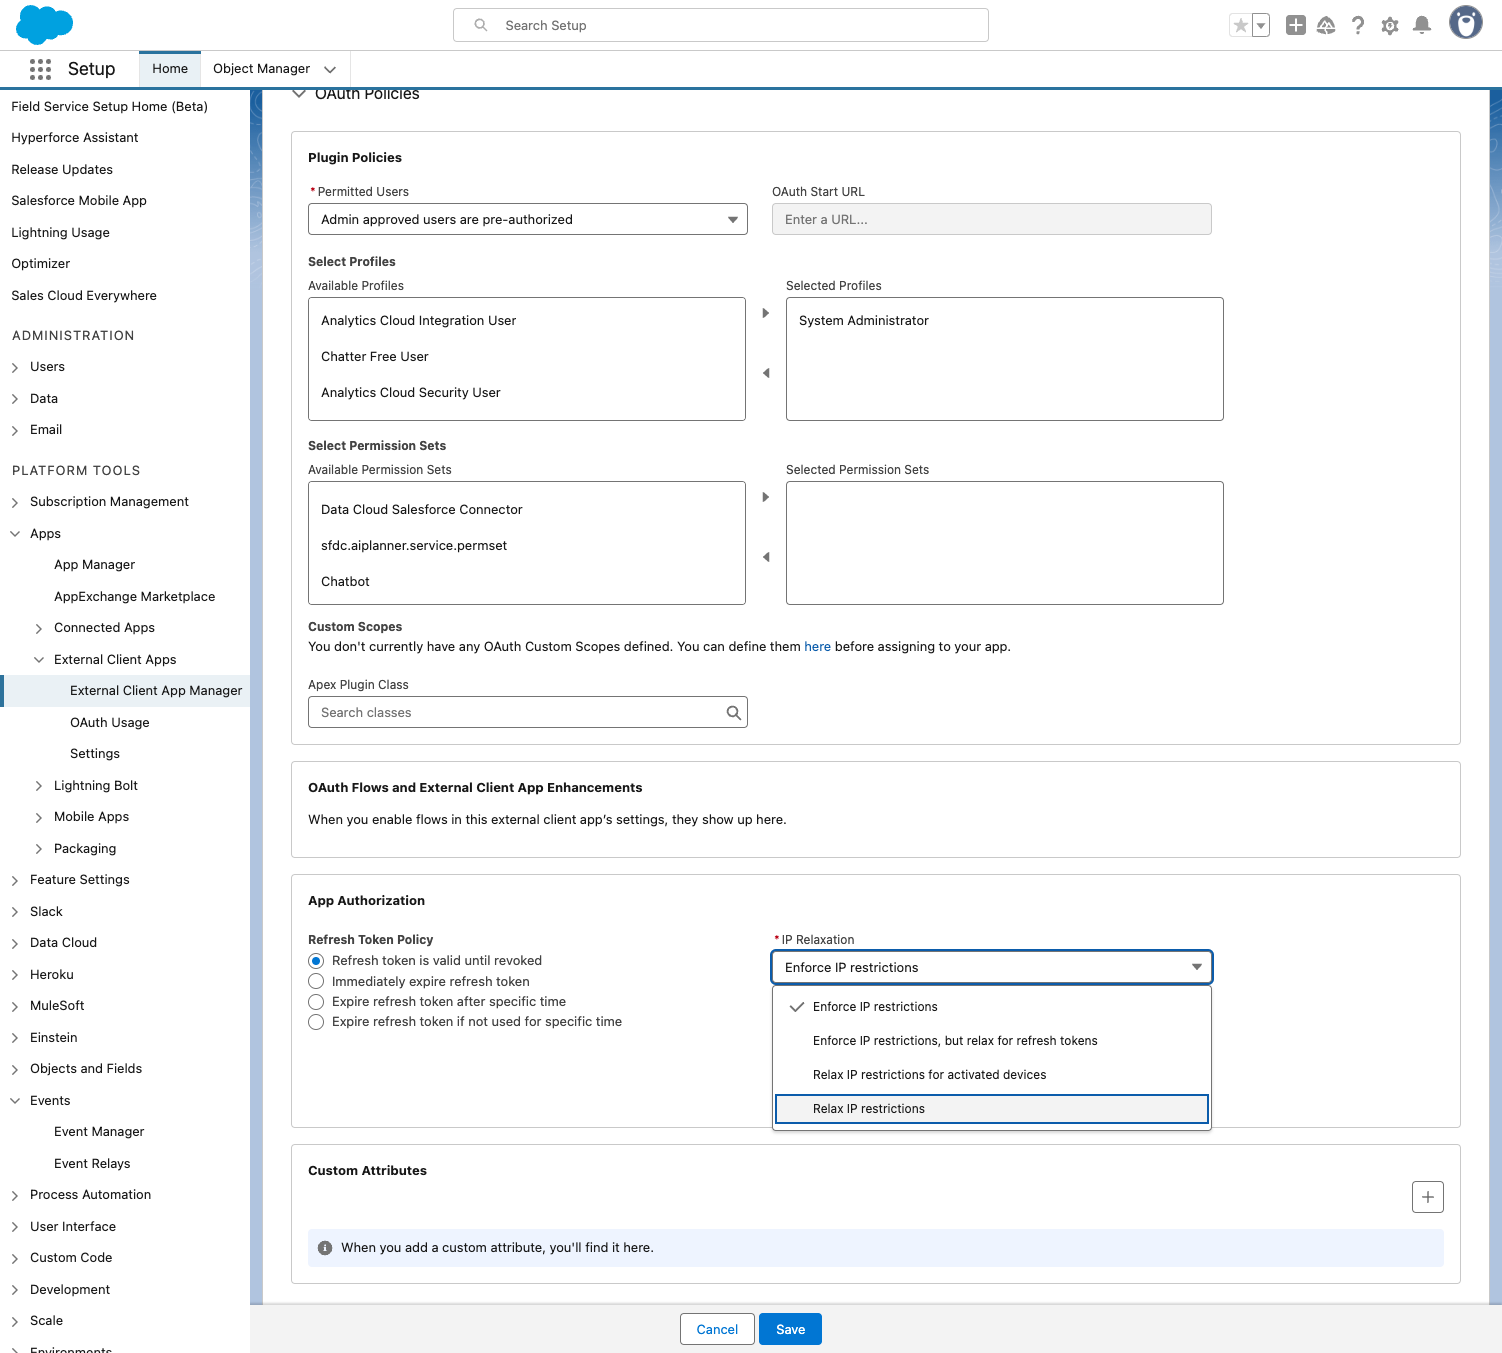
Click on IP Relaxation.

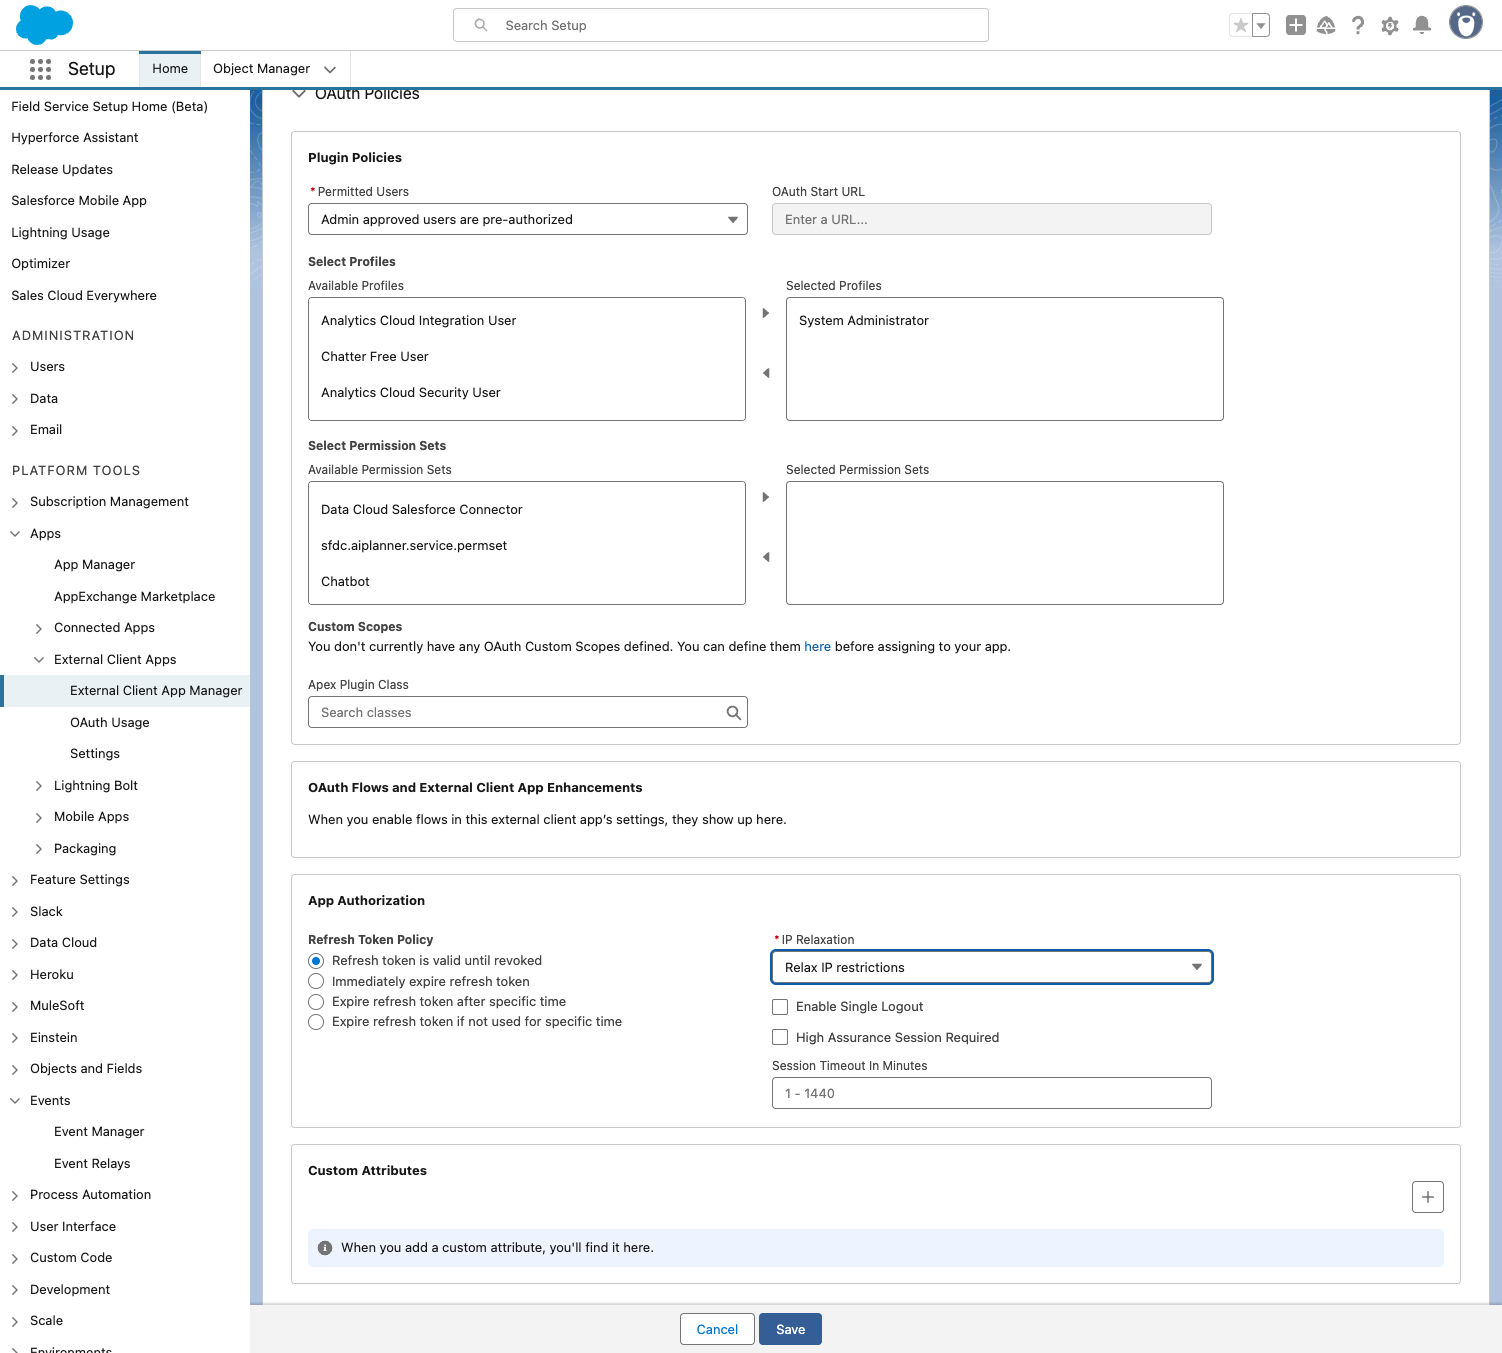
Click on Relax IP restrictions.
Click Save.
Part 5: Retrieve the Consumer Key
Click on Settings.
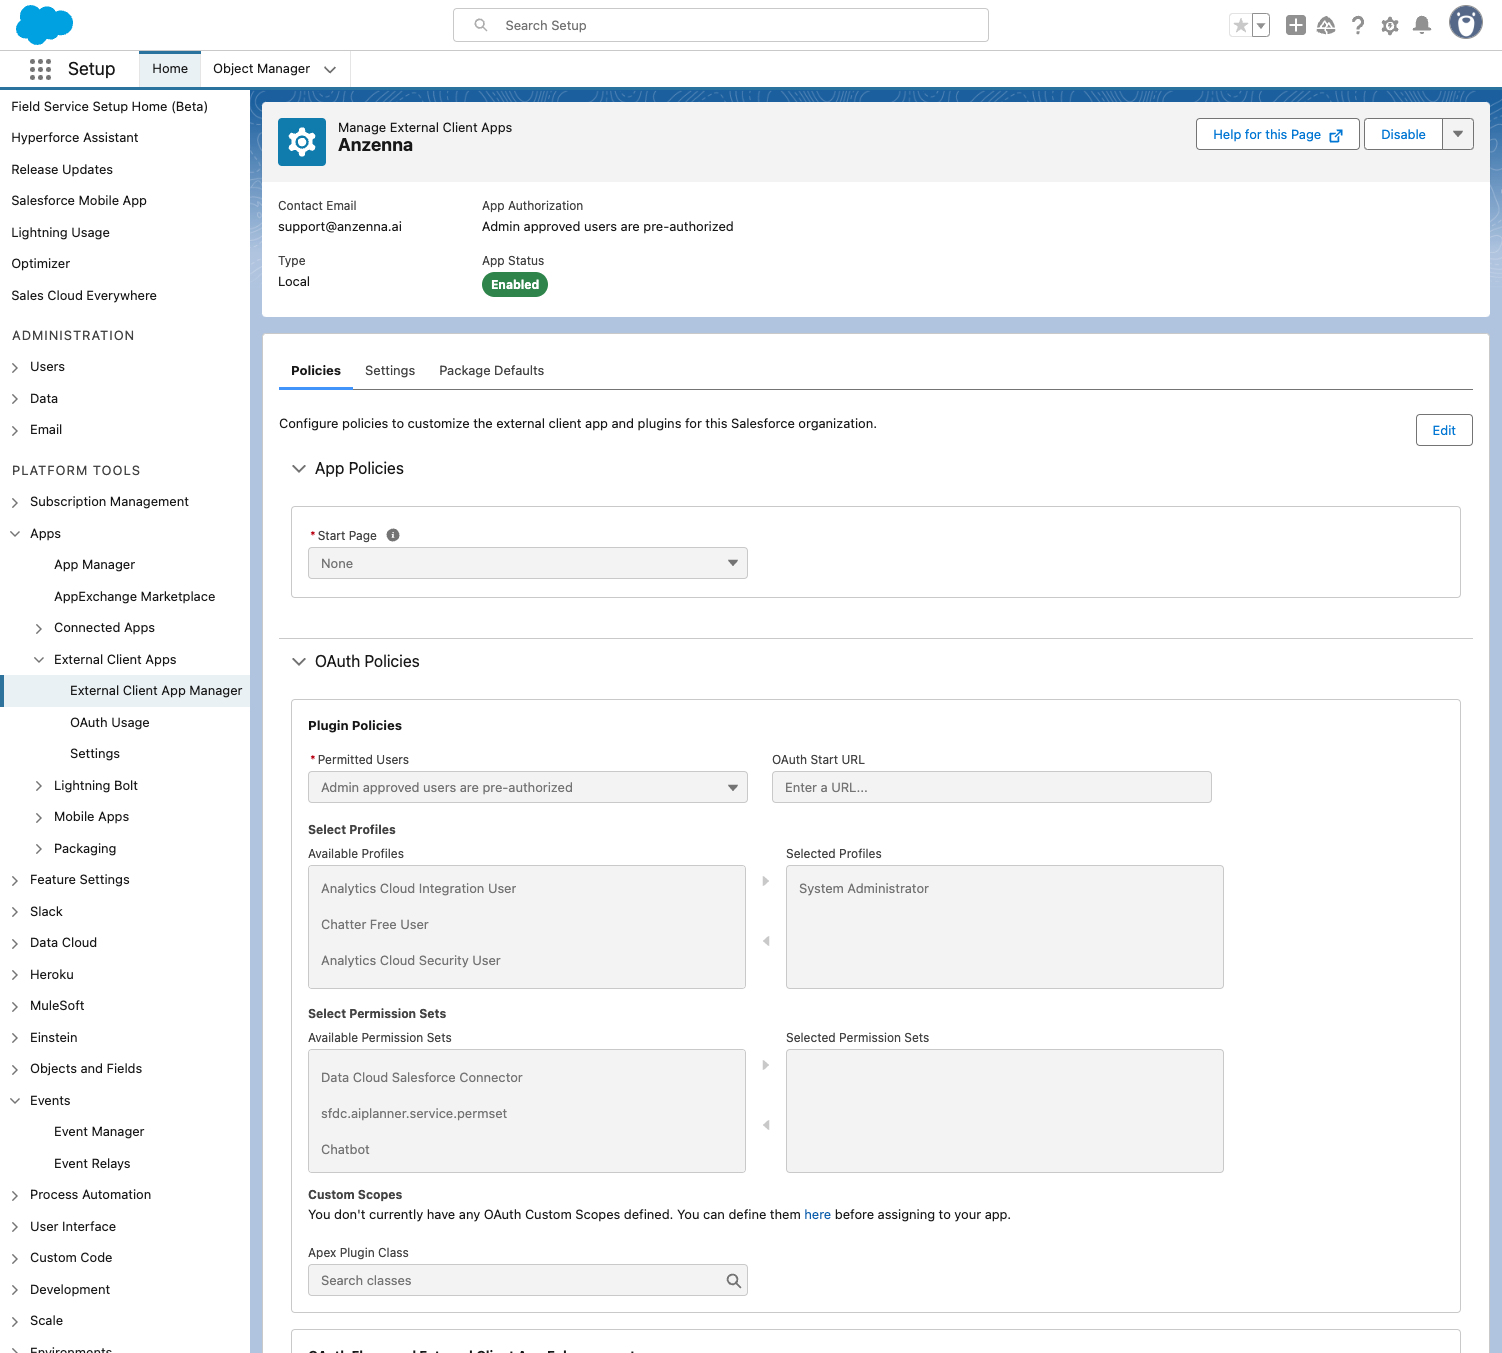
Click on OAuth Settings.
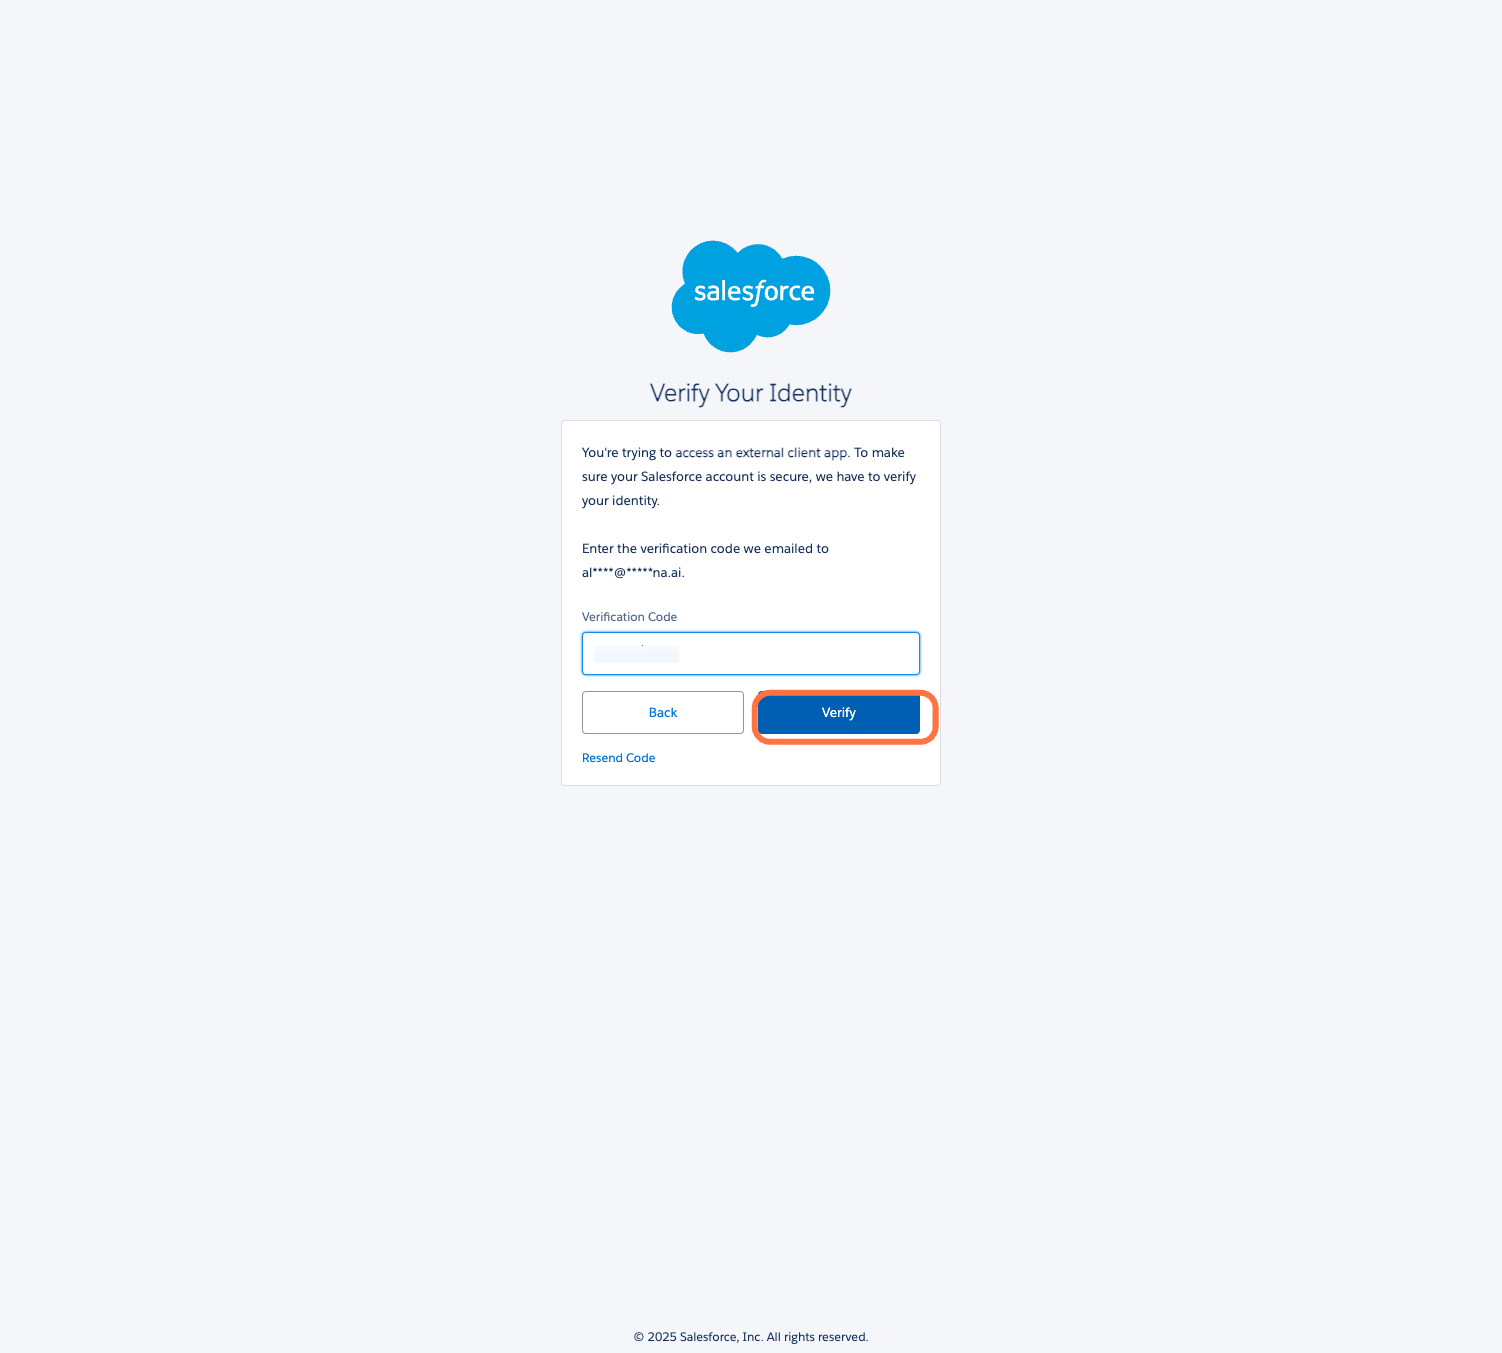
Click on Consumer Key and Secret. Salesforce will send you an email to verify your identity.
Get the verification code from the email, paste it in the dialog, and click Verify.
Click Copy on the consumer key.
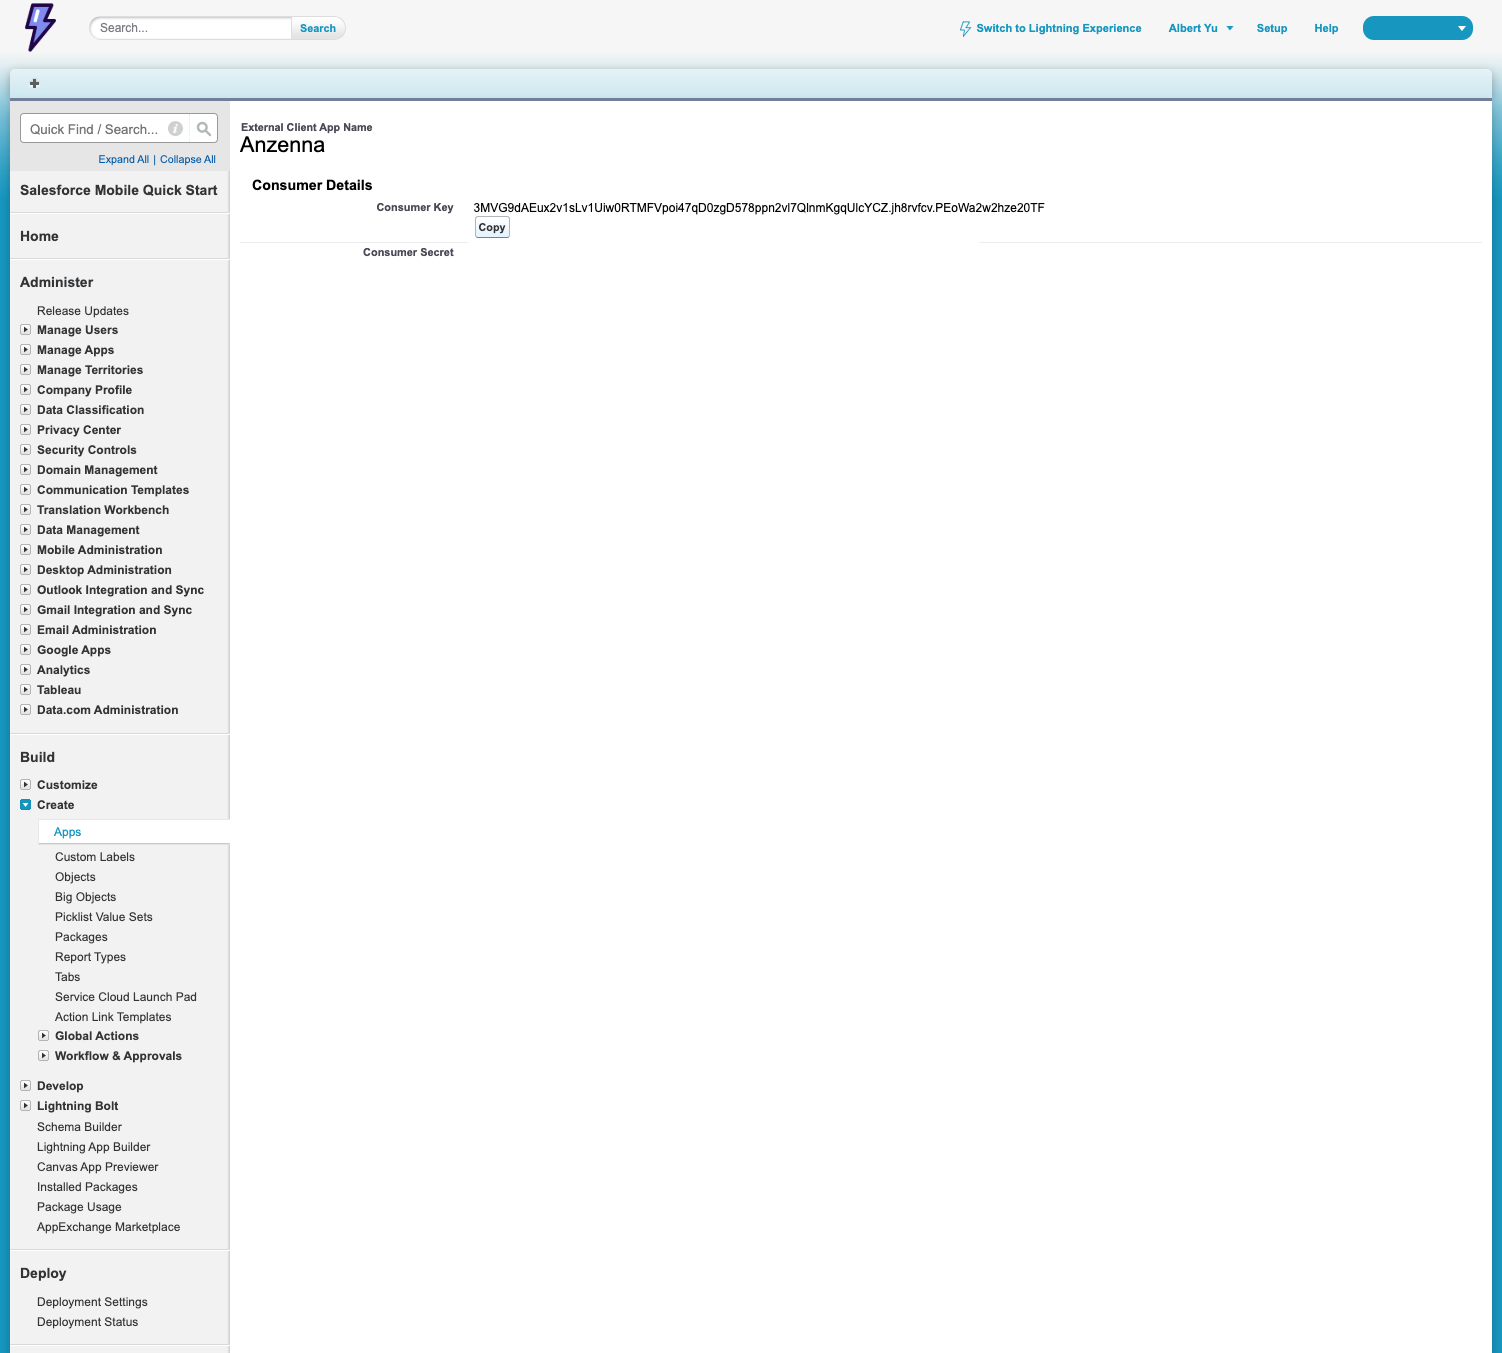
The consumer key is an ID, not a secret. It is safe to copy and use as your integration identifier.
Part 6: Complete the Connection in Anzenna
Paste the copied consumer key into Anzenna.
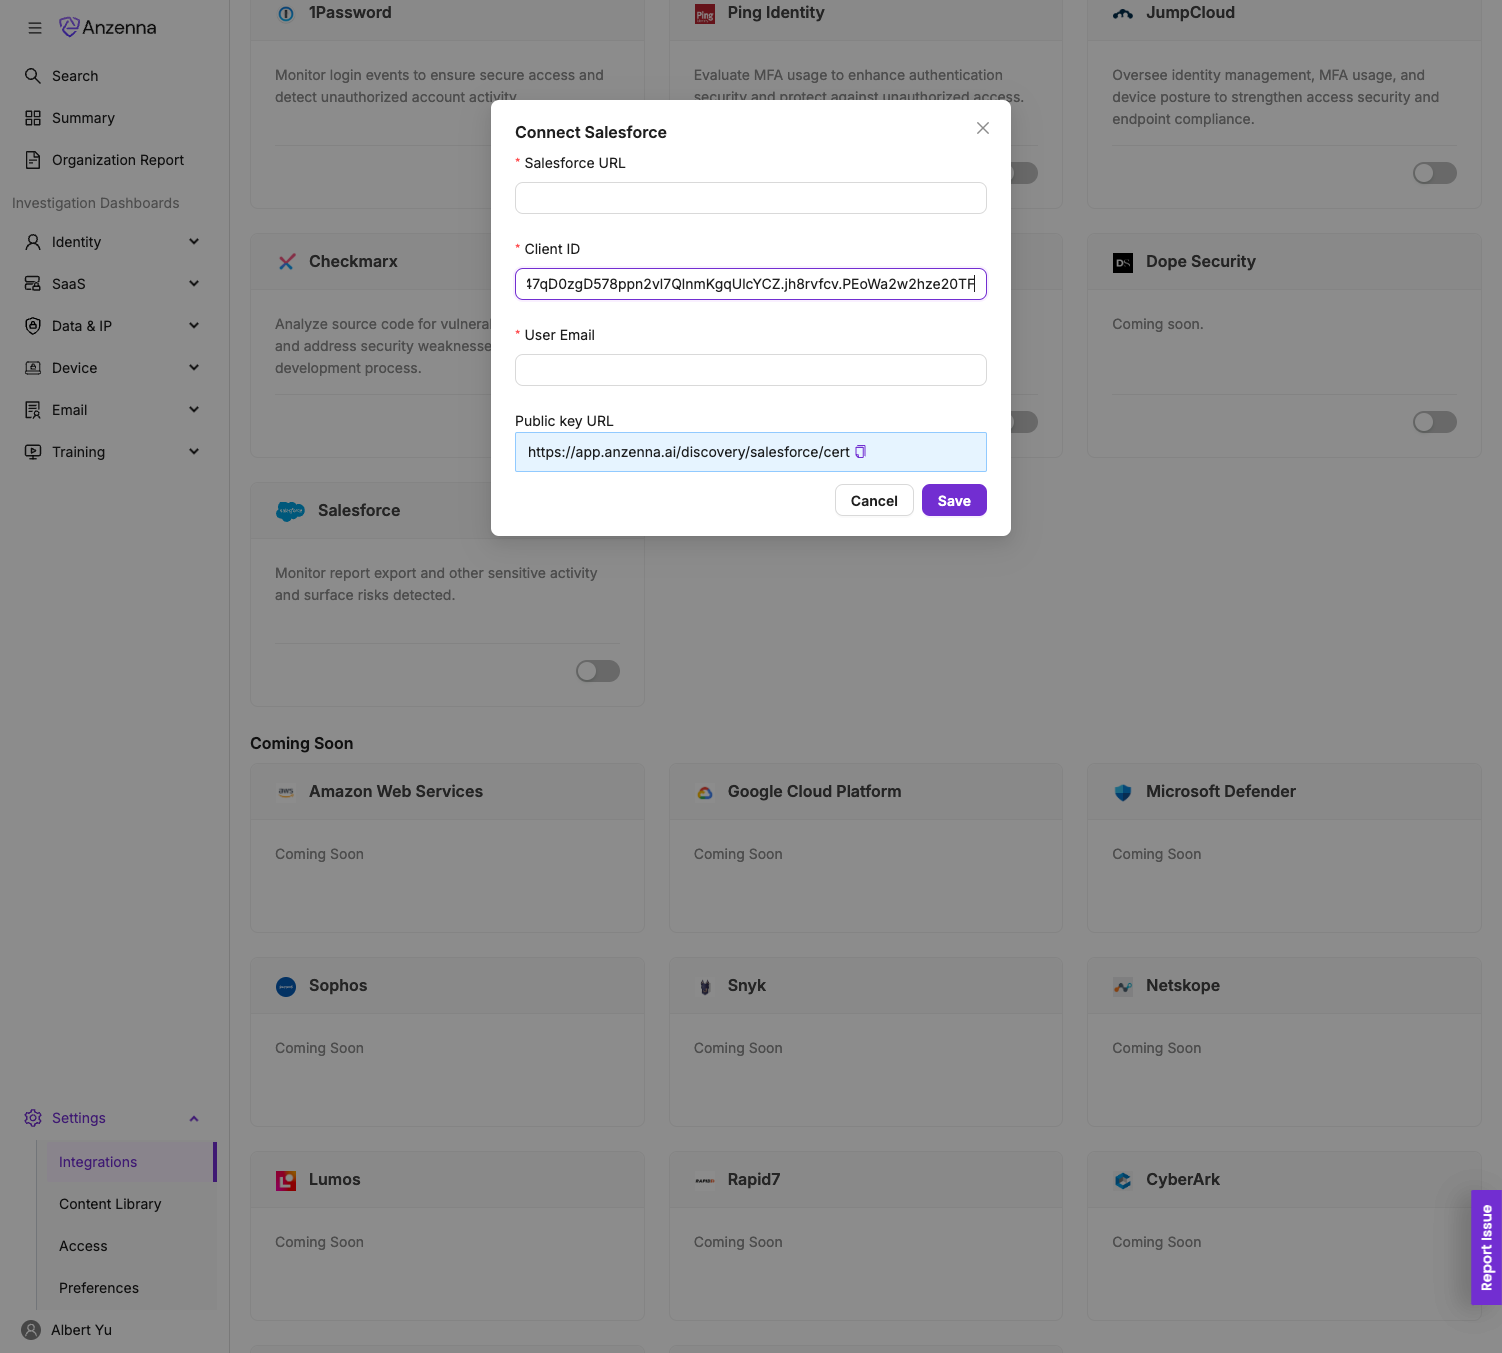
Paste your Salesforce instance URL (i.e. the website URL) in the input box.

Enter your Salesforce email address in the input box.
Click Save.
Wait a few seconds, then refresh the page. You should see your Salesforce instance listed as connected.
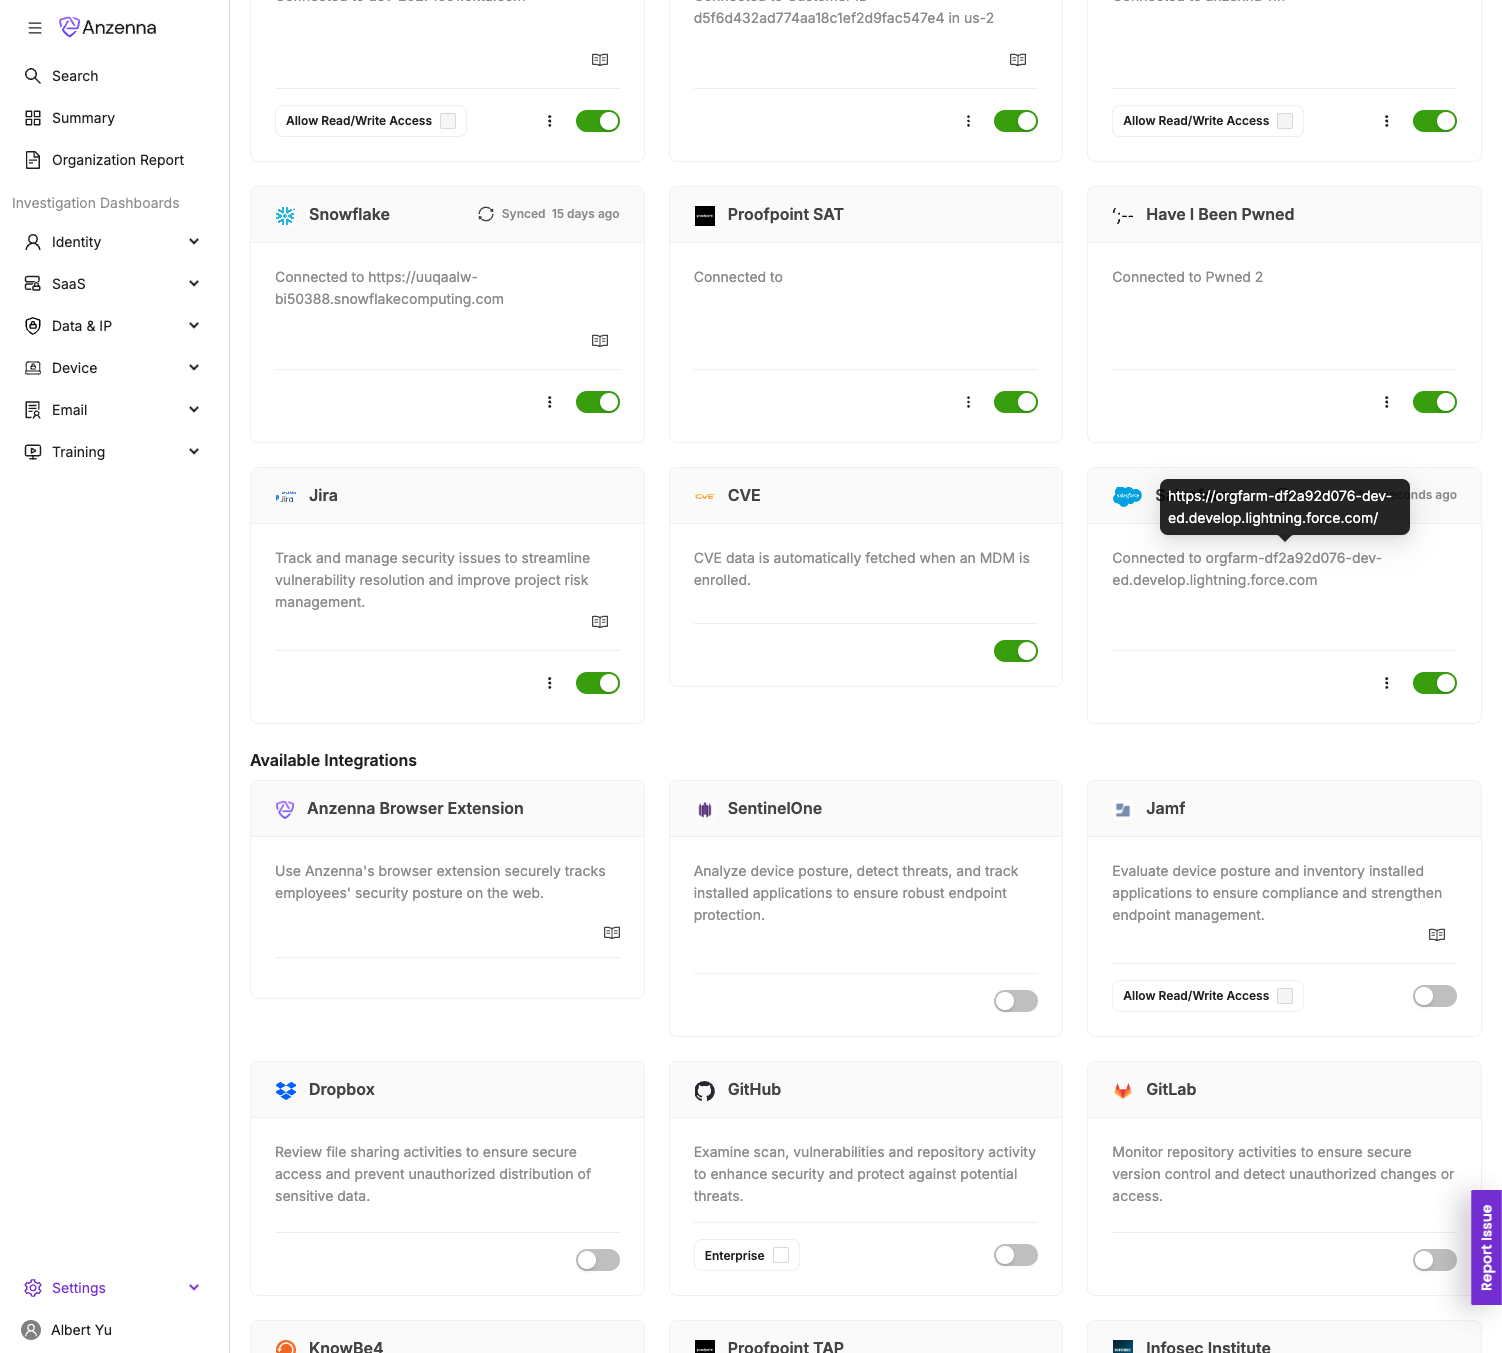
Your Salesforce integration is now active. Anzenna will begin collecting event logs for security monitoring.